
Puff heat transfer vinyl is the hot material to try this year…I’ve used puff HTV for quite a few projects, and I’ll try to answer your questions about what this material is, how it’s cut and how it’s applied.
So what is puff vinyl anyway?
Puff vinyl is a special heat transfer vinyl that appears flat in its pre-press condition. It looks and cuts just like regular HTV. But once you apply heat, it inflates and shows off its 3D texture.
Puff vinyl texture can vary a lot depending on the brand you’re using, the material you’re pressing it on, and the temperature, time and pressure you use. You can get a smooth marshmallow finish, an orange peel finish, or even a brainy texture.

Tutorials: Puff vinyl projects you can make right now

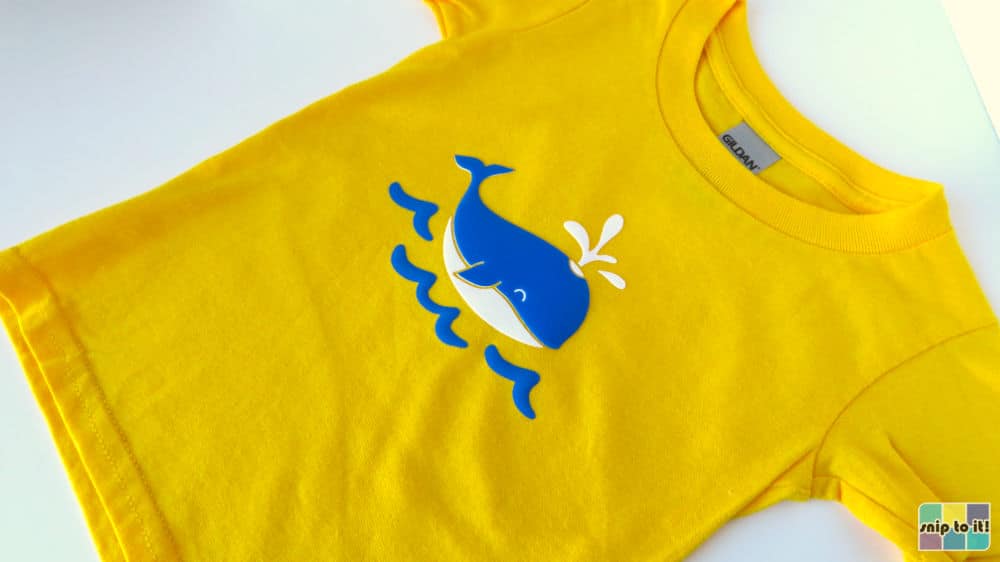
Project 1: Dive right into making eye-catching apparel with our tutorial for making puff vinyl t-shirts with a Cricut EasyPress. This tutorial shows you how to use multiple colors of puff in a single shirt, but also how to layer puff with StripFlock Pro to get super smooth and puffy results!

Project 2: If you are looking for a project with something extra, check out our tutorial for making t-shirts with WALAKut Glow in the Dark Puff vinyl. This tutorial shows you how to use this vibrant neon puff vinyl 3 different ways: on its own, in combination with glitter htv and layered on top of StripFlock Pro.

Project 3: This tutorial will guide you step by step in using puff HTV on a cotton tote bag. This tutorial was for making a customized trick or treat bag using both neon puff and reflective HTV, but you can use these steps to make a tote bag for any occasion. Links to free SVG files are included in this project!
What is puff vinyl made of?
Most puff iron on material is made of polyurethane, the same material used to make other popular HTV products like Siser EasyWeed and Cricut Everyday iron-on.
What can you apply puff vinyl to?
All the brands of puff vinyl I have seen can be applied to cotton, polyester and blends. Stretchy fabrics like lycra, spandex or elastane are not good choices for puff HTV because it doesn’t have much stretch. Nylon is also a no-no.
Puff doesn’t have much stretch, but it’s not particularly heavy or plasticky either, so it’s great for T-shirts. You can apply it to all kinds of other blanks, but be aware that it will show the texture of the fabric you apply it to, so heavily textured/coarse weave fabrics will result in puff that isn’t very smooth.
If you want to apply puff to heavy/coarse weave blanks (e.g. hats, bags, canvas, denim, etc.), I would recommend using a StripFlock Pro base layer to smooth the puff out.

Puff iron-on does not apply well to non-fabric bases like cardstock, wood or glass either. This isn’t to say you shouldn’t experiment, but don’t expect great results without a lot of testing.
Is puff vinyl the same as flocked iron on?
Puff and flock are fundamentally different iron-on products. Flock is a thicker HTV (e.g. Siser flock is 410 microns thick) that doesn’t change during application, and puff is a thinner film (~125-170 microns thick for most brands) that starts flat and inflates when heat is applied.


- Puff vinyl can have a highly variable texture, whereas flock always has the same texture
- Puff tends to show the texture of the fabric it’s pressed on, flock doesn’t
- Puff HTV will inflate and round off edges and fine details, but flocked looks exactly like how it was cut
- Puff vinyl is top layer only, and should be the last HTV you press. Some brands of Flock HTV (Siser StripFlock Pro) can be bottom-layer HTV
- You have to be careful about re-pressing puff vinyl. Most manufacturers recommend pressing only once (sometimes twice for specific types of puff). Flock HTV can be re-pressed multiple times without damaging the finish
Popular Puff vinyl brands
While puff heat transfer has gotten very popular in the past year or so, there are 3 main brands that I recommend: Siser, WALAKut and Specialty Materials. There are lots of other puff vinyl brands out there on small e-commerce sites and on Amazon. Some of those smaller companies are white-labelling big brand vinyl, some of it is independently sourced.
I don’t have experience with puff vinyl outside the “Big 3” that I describe below, so I can’t comment on the quality. (If you see something you’re interested in and want to try it, test, test test!)
‣ Siser EasyPuff

Siser released its line of puff vinyl in 2022, and it’s currently available at big box stores like Michaels and Joann. You can also get it at online retailers like Happy Crafters, Heat Transfer Warehouse and Amazon. Crafters in Canada can get EasyPuff vinyl from HappyCrafters.ca.
Important features:
- EasyPuff is CPSIA certified, polyurethane-based material, and it has a soft, plush feel after pressing
- Cannot be used as a base layer in a design (top layer only)
- One press recommended
- Compatible with Cricut and Silhouette cutters (available in 12″ sheets and rolls)
- Available in 21 colors
Like all Siser products, I have found EasyPuff to be very easy to use by itself and in conjunction with StripFlock Pro.

Updated (Jan 2024) – Siser has just released a new line of Metallic Puff HTV in silver and gold. It’s not exactly like the original Easypuff – it requires 2 presses to inflate – but after it’s pressed it looks amazing! It’s currently available at Heat Transfer Warehouse and Happy Crafters.
‣ Specialty Materials FashionFlex Puff
FashionFlex Puff is a dimensional HTV produced by Specialty materials. You may not have seen it in brick and mortar stores, but it is available at online retailers.
It may be harder to find than Siser, but like other Specialty Materials films, I have found this material to be top quality.
Important Features:
- FashionFlex Puff is CPSIA certified, polyurethane-based material, and is compatible with vinyl cutter or laser cutter
- Top layer only
- Single press required
- Available in 28 colors (including neon and metallic) in 19.5″ rolls (retailers like Specialty Graphics sell sheets)
- Must be peeled immediately after pressing
(FashionFlex Puff Metallic requires 2 presses for maximum puffiness.)
Although it doesn’t note it on their website, David W. of Specialty Materials sent me the CPSIA certification document directly. They are a very responsive company if you have product inquiries!
‣ WALAKut Puff and Puff Plus
WALAKut is the house brand puff vinyl from Heat Transfer Warehouse. Even though it has a lower price than Siser or Specialty Materials, the quality is at the same level.
This was the first kind of puff vinyl I used and it really got me hooked. In fact, Heat Transfer Warehouse was the only readily-accessible source for puff HTV for quite some time! I particularly love the WALAKut Puff Neon colors.
Important Features:
- WALAKut Puff is CPSIA certified, polyurethane-based material
- Cannot be used as a base layer in a design (top layer only)
- Compatible with Cricut and Silhouette cutters (available in 10″ sheets and rolls)
- Available in 22 colors (including 6 neon colors)
- New product launched: WALAKut Glow in the Dark Puff available in 7 colors
- Puff Plus available in black or white only

Update Jan 2024: Heat Transfer Warehouse has released their own line of Metallic Puff HTV in 4 bright shiny colors: gold, silver, red and blue! This special puff requires 2 presses to inflate, and the results are super puffy and shiny! Available in sheets and rolls.
WALAKut Puff Plus requires 2 presses for maximum puffiness.
Does Cricut make Puff iron on vinyl?
No! As of this writing, Cricut does not make its own variety of puff iron-on. But, all of the the brands listed above are compatible with Cricut machines and the Cricut EasyPress.
Can you sublimate on puff vinyl?
The puff vinyl discussed in this article is all polyurethane based, not polyester, so the basic answer is NO. PU-based puff HTV does not have the chemical characteristics required to bond with sublimation ink. Another consideration: most puff will flatten when re-pressed, or pressed at the high temperatures required for sublimation.
This doesn’t stop people from experimenting with pressing sublimation ink onto all kinds of HTV.
This video by Josephine Godfrey of the Best Uni shows the only in-depth sublimation on puff results I could find. She uses white FashionFlex Puff peeled off the carrier, layered with the sublimation print, and pressed for almost 30 seconds. (She doesn’t say what her temperature is in the video).
Her immediate results are OK, but there isn’t much in the way of follow up documenting how it washes.
My opinion is that you are free to experiment all you want, but don’t expect fantastic results sublimating onto PU based puff vinyl.
Cut settings for puff vinyl (Cricut and Silhouette)
There is not a universal cut setting for puff vinyl, you should always consult the instructions included with the manufacturer. I suggest going a step further and doing a test cut before you cut a design. Puff HTV is not a super thick material, but machines and blade sharpness vary so you may need to adjust your settings.
Vinyl Name | Cricut Smart Set | Design Space Custom Setting | Silhouette Studio Setting |
Siser EasyPuff | Vinyl+ / Iron-On Fine-point blade | heat transfer Fine-point blade | material: heat transfer, smooth |
WALAKut Puff | iron-on Fine-point blade | heat transfer Fine-point blade | material: heat transfer, smooth |
WALAKut Puff Plus | iron-on Fine-point blade | heat transfer Fine-point blade | material: heat transfer, smooth |
FashionFlex Puff | iron-on Fine-point blade Deep-point blade | heat transfer Fine-point blade | material: heat transfer, flocked |
Doing a test cut is simple and can save you a lot of headaches. Put a triangle inside a square, attach both shapes and resize to 0.5″. Cut this out of the top corner of the vinyl. If the square weeds away cleanly from the triangle, the setting is good and you can proceed with the rest of your cut. If it’s not weeding cleanly, change your settings and re-cut.


Do I mirror puff vinyl?
Yes! All puff htv is mirrored before cutting. If you are cutting from Design Space, make sure you toggle the mirror setting on the Preview Screen before cutting.
In Silhouette Studio: in the Design tab, select your design and open the Object menu–>select Mirror–>select Flip Horizontally, then it’s ready to send to your cutter.
Which side goes down when cutting Puff HTV?
The general rule for cutting HTV with a vinyl is cutter is “put the shiny side down” on the mat. But for most varieties of puff vinyl, that rule doesn’t apply because it has a matte carrier that isn’t shiny.
- Siser EasyPuff: clear, sticky carrier sheet with a matte finish
- WALAKut Puff: semi-opaque, sticky carrier with a matte finish
- WALAKut Puff Plus: semi-opaque, non-sticky (static) carrier with a matte finish
- FashionFlex Puff: semi-opaque, sticky carrier with a matte finish
The best thing to do if you’re not sure is separate the vinyl/carrier on a corner of your roll or sheet. Use a weeding tool to peel the vinyl off the carrier sheet to see for sure what side is the carrier and what side is the vinyl.
Place the carrier side down on you mat and start cutting!

Heat settings for puff vinyl
Right off the top, I’m going to say what a lot of other bloggers seem to want to gloss over: Puff vinyl is going to be the most inconsistent material you work with.
Heat settings for puff vinyl vary between brands, and some brands even recommend different heat settings for different colors of puff. It’s important to know the recommended temperature is for the puff HTV you’re pressing, because pressing too hot can deflate or deform the puff. Not pressing hot enough can mean your adhesive layer doesn’t bond to the base material or the puff may not inflate as much.
Here are the recommended heat settings for Siser, WALAKut and FashionFlex puff vinyl
Vinyl Name | Temp (ºF) | Time (sec) | Pressure | Peel Temp | Layerable? |
Siser EasyPuff (with heat press) | 280ºF | 8 – 10s | medium/firm | hot | NO |
Siser EasyPuff (with EasyPress) | 310ºF | 8 – 10s | medium/firm | hot | NO |
WALAKut Puff (with heat press or EasyPress) | 305ºF | 10s | medium | hot | NO |
WALAKut Puff (Neon) (with heat press or EasyPress) | 275ºF | 10s | medium | hot | NO |
WALAKut Puff Plus (with heat press or EasyPress) | 285ºF | 10 – 12s | medium/firm | warm/cold | NO |
FashionFlex Puff (with heat press or EasyPress) | 255 – 275ºF | 12 – 14s | medium | hot (immediate) | NO |
FashionFlex Puff (metallic) (with heat press or EasyPress) | 275ºF | 10s | medium | hot + 4 sec repress for max inflation | NO |
Cricut EasyPress puff vinyl settings
Can you use an EasyPress with puff vinyl? Yes, but you need to be aware of a few factors that can affect your puff.
It’s important to plan your pressing so that the platen covers your design completely. You don’t want to press puff vinyl in sections. This is true using an EasyPress or a conventional heat press.
Even Pressure vs Tons of Pressure
Other blogs recommend using lots of pressure, but that’s always a tricky proposition. Is this the advice of a tiny person pushing down with all of their body weight, or a really big dude (like me) advising of “moderate” pressure?
What I’ve learned is that the best way to get great results with puff vinyl and an EasyPress is to press on a hard surface, not a pressing mat. I press on a wooden table top. Even pressure is more important that tons of pressure. If you are a smaller person, you should give it more “oomph” than you might normally use to press HTV, but you don’t have to be the Incredible Hulk to get a good result.
Even with an EasyPress, it is possible to over-press some puff HTV (this depends on brand and color!). The picture below shows EasyPuff in 2 different colors pressed with the same amount of extreme pressure, where I (a 300 lb, 6′ 4″ man) put most of my body weight into the press. Too much pressure caused the neon yellow puff to collapse.

Watch for seams and zippers
After I figured out that I got better results pressing on a hard surface, the challenge becomes avoiding pressing over seams with your EasyPress. Overlapping on a seam or zipper makes your pressure uneven and can make your puff result bumpy or uneven.
In this case, you might want to use a thick (3/4″ or 1″) wooden cutting board inside your garment in place of a pressing pad. That will lift your pressing surface above the seams so they don’t interfere. (Note: I avoid using bamboo cutting boards because they have warped and cracked on me)
Pressing puff vinyl (or any HTV really) with an EasyPress should come down to allowing yourself time to test press before you press your final design. (Keep reading the pressing tips section for more on this.)
Can you press puff vinyl with a home iron?
Most manufacturers specifically say to avoid using a home iron to press puff vinyl.
- It’s hard to get consistent pressure with an iron
- pressing a design section by section will deliver inconsistent finish to the puff (different texture, different degrees of inflation)
- the holes in a steam iron will mean inconsistent heat application as well.
Can you layer on top of puff vinyl?
As a rule, puff vinyl should be top layer only. This means puff vinyl can be included in multi-layer projects as the top layer.
Most manufacturers recommend against multiple presses, so puff vinyl should be the last HTV you press when layering.
More tips for pressing Puff heat transfer vinyl
I have tried experimenting with the following factors in an effort to improve my results with puff iron-on. Any of these variables could be the key to improving your results, and my recommendation is to test your HTV and fabric in combination with these factors to get the texture you want.
[Brand and specific color of puff HTV matters, I *always* recommend doing a test press when working with any HTV for the first time.]
Pressure
Some bloggers will recommend using an insane amount of pressure, which may be true for some brands of puff HTV, but not the ones I have worked with. I’ve found that concentrating on firm but most importantly, even, pressure is key, especially if you are using an EasyPress. You shouldn’t have to use Hulk strength to get the desired results. To help you get even, firm pressure with an EasyPress, press on a hard flat surface like a table top or wooden cutting board.
If you are using a conventional clamshell or other heat press, you will still have to experiment to find the right amount of pressure for your particular puff HTV. Most manufacturers recommend “medium/firm” pressure for puff.

Cover sheet
I have found that I get puffier, more smooth results when I press without a cover sheet. Teflon can shield your puff vinyl from getting the right heat, and your results can be an inconsistent finish.

Base fabric matters!
Puff vinyl will show the texture of the base fabric after it’s pressed. Even if you’re pressing on a basic cotton T-shirt, you’ll get the fabric texture showing on the puff after it’s pressed. If you want a smoother look, choose a fabric that has less texture, or press on Siser StripFlock Pro, which provides a smooth base.

Temperature
Always start with the manufacturer’s recommended temperature. In my experience, temperature doesn’t have as large an effect on puff compared to pressure and base material. If you feel like temperature might be your problem and you start at a lower press temp (e.g. 275oF), try raising your temperature 10 degrees.
If you use an EasyPress with Siser EasyPuff, I recommend adding 30ºF to your press temperature. EasyPuff is normally pressed at 280ºF, but I have seen better results at the higher temperature (310ºF) with an EasyPress.

When I pressed FashionFlex or WALAKut Puff, I used the recommended temperature (275ºF) and got satisfactory results across all of my testing and for my final projects.
Final Thoughts
Puff vinyl is tricky but rewarding to work with. Even sub-par results can look cool, but if you’ve got the patience to run a few tests, you can see really eye-popping results that will earn you all kinds of compliments and rave reviews.
It’s tempting to want to dive in to puff projects, but start slow and don’t waste your materials. Nothing will discourage you faster than wasting sheets of puff vinyl on bumpy, brainy or flat results. Good luck and let us know how your puff projects turn out in the comments!
Amazingly helpful! Thank you!