This article is part of our Print Then Cut section of the Mastering Cricut Design Space learning hub.
After publishing our tutorials on how to do double-sided Print Then Cut, we’ve had a few people ask us: how do you make double-sided TEXT that stays readable on both sides?
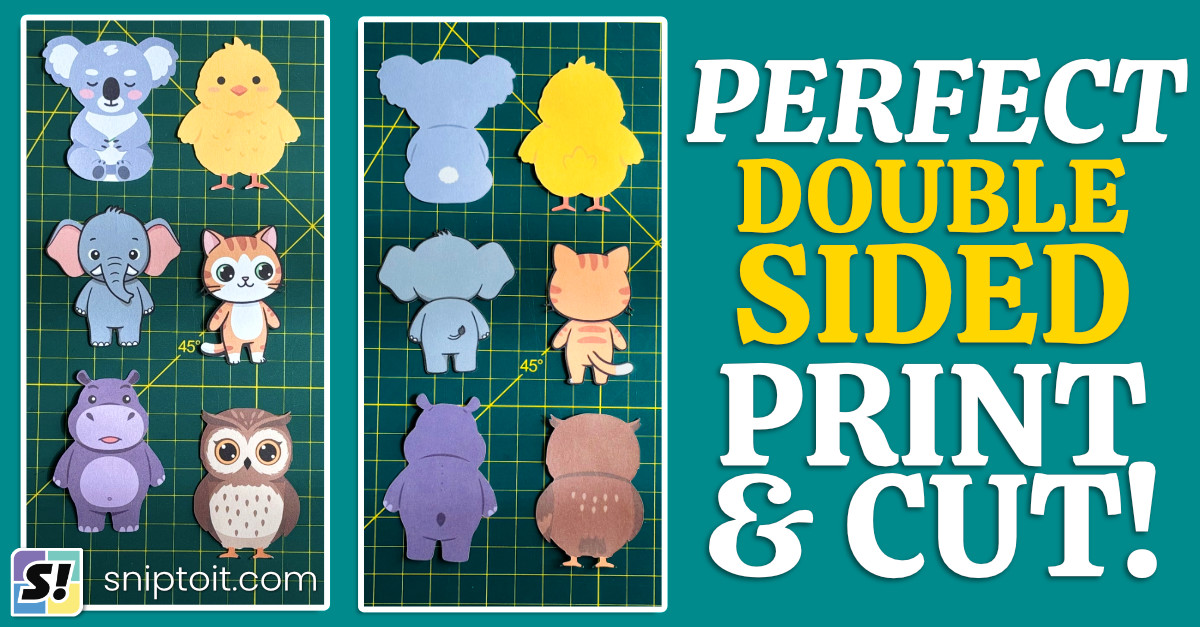
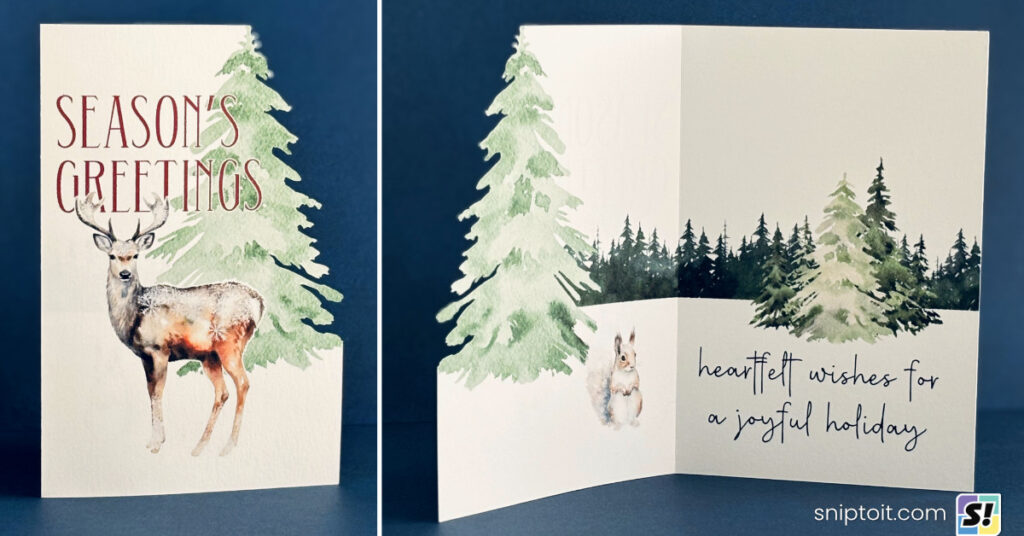
I’m going to show you 2 easy design methods to incorporate double-sided text into your Print & Cut project. You can use this for cards, cake toppers, banners, gift tags, and more!
The problem with text
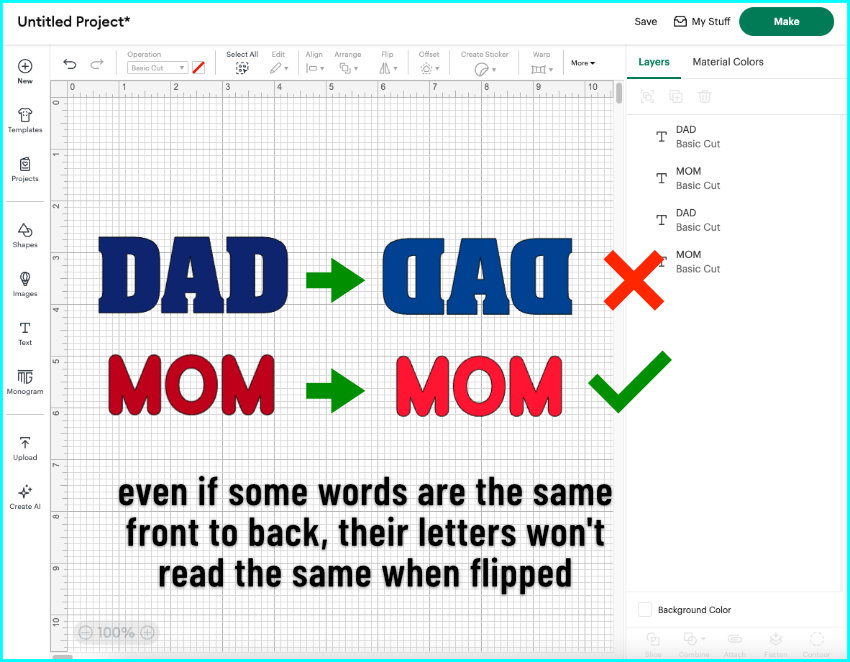
Let’s start with why double-sided text is tricky. Text is almost never symmetrical. Even a simple word like ‘DAD’ won’t work when you flip it horizontally, because those D’s only face one direction. Unless it’s a perfect palindrome like MOM, mirroring text doesn’t work.
But we can still make double-sided text as a Print Then Cut project! The key is that you don’t mirror the text itself, you mirror the position of the text on the mat.
The solution: flatten to a base shape
To make double sided text work, we have to flatten the text onto a base shape. That shape becomes the cut line, so anything inside (your text, colors, and styling) doesn’t need to match or mirror the opposite side.
The base shape can be an offset, or a shape like a circle, arch, or something asymmetrical.
I’ll show you how to do this 2 ways: with an offset, and with shapes.
Method 1: use an offset
If you want to use an offset, the general shape of your text has to match on both sides. Any mismatches can lead to cutting off text on one side or the other. A couple of things can help with that:
- use all caps to keep the line height of the text consistent
- use block fonts, which tend to have uniform character height and width to make the outlines of letters more likely to match
- make your offset larger so there is more margin for error when matching both sides
- make your offset plain white so small mismatches won’t be seen
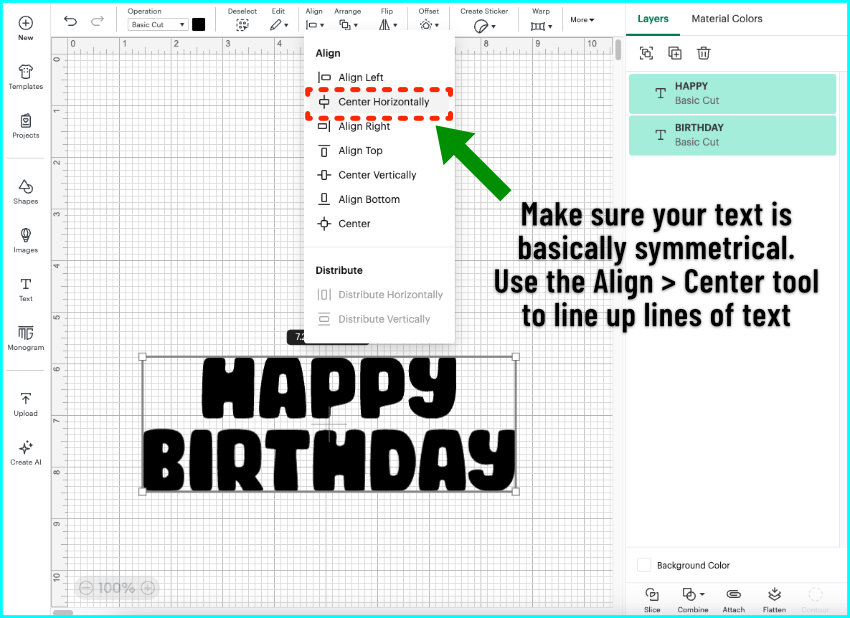
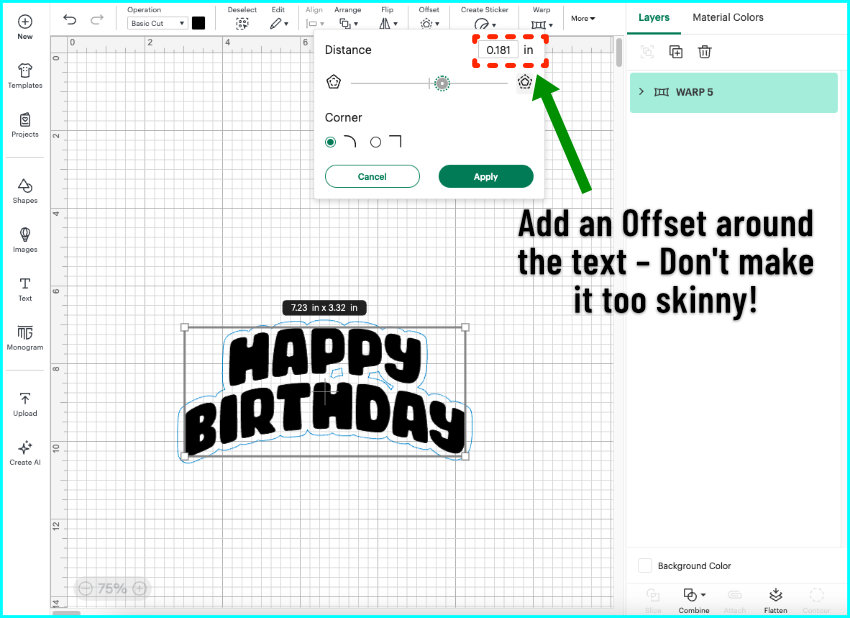
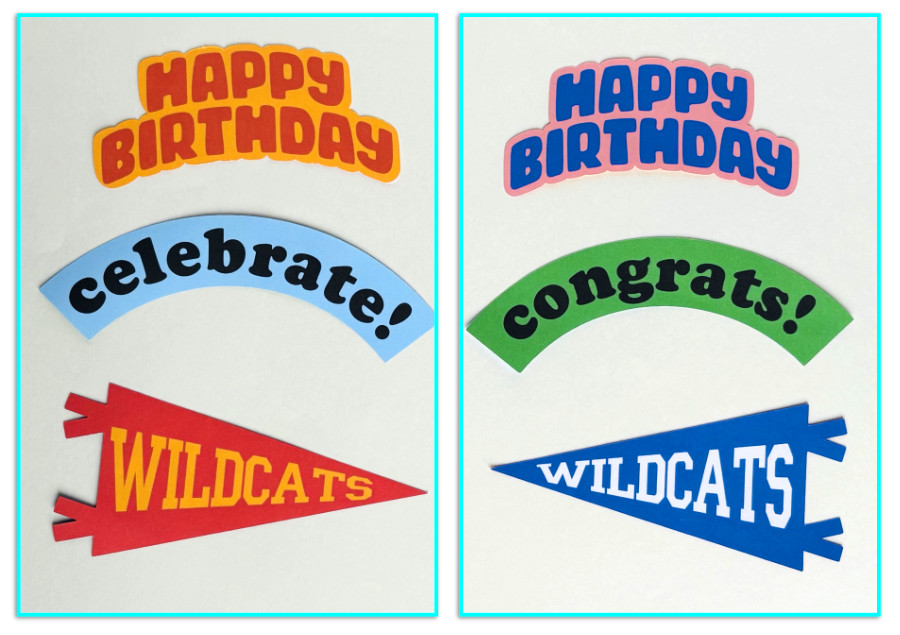
For my example, I have HAPPY BIRTHDAY in a block font (Chibold), in two separate text boxes. I’ve arranged the text in a stack, and now I’m going to center the words horizontally. The text isn’t exactly symmetrical, but the general shape is.
Before I add the offset I’m adding some styling. I’ll use the Warp tool for a small arch, and then then add the Offset.
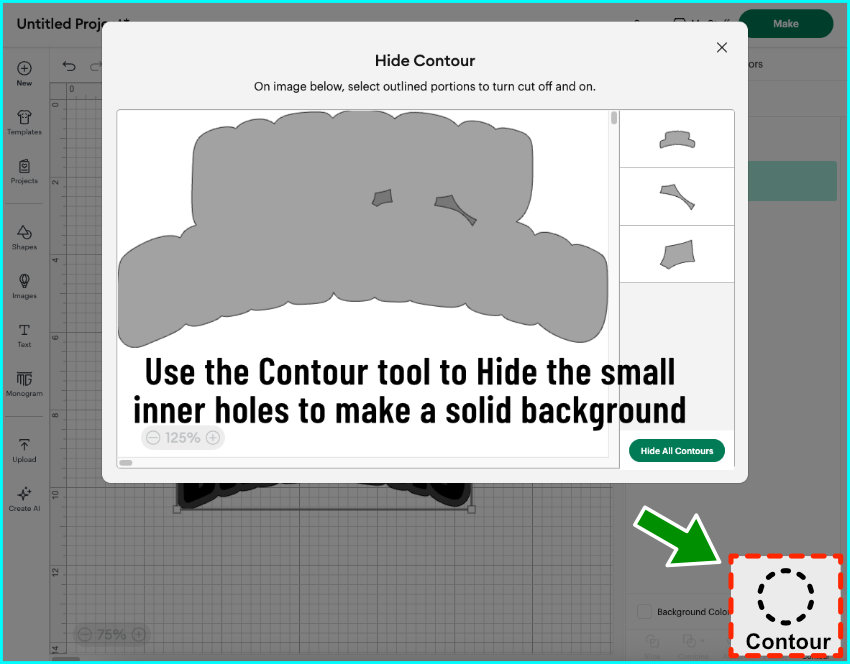
Select the offset, open the Contour tool, and hide all contours to get rid of any inner holes to create a solid base shape. Now select the text and offset together and duplicate them.
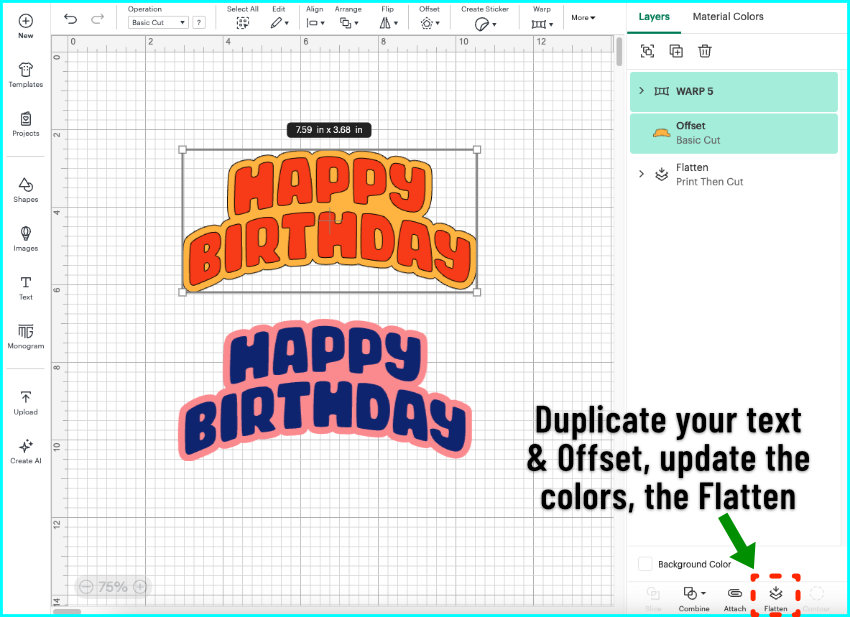
I’m going to make each copy of the text a different color to make each side easy to distinguish. I’m also going to give each offset a different color to demonstrate how there can be mismatches between the printed sides that show up after we cut. Now I’ll select each pair of text + offset and Flatten.
Method 2: use a shape
If you use a shape instead of an offset, you can use any font you like, no need to match the text on both sides!
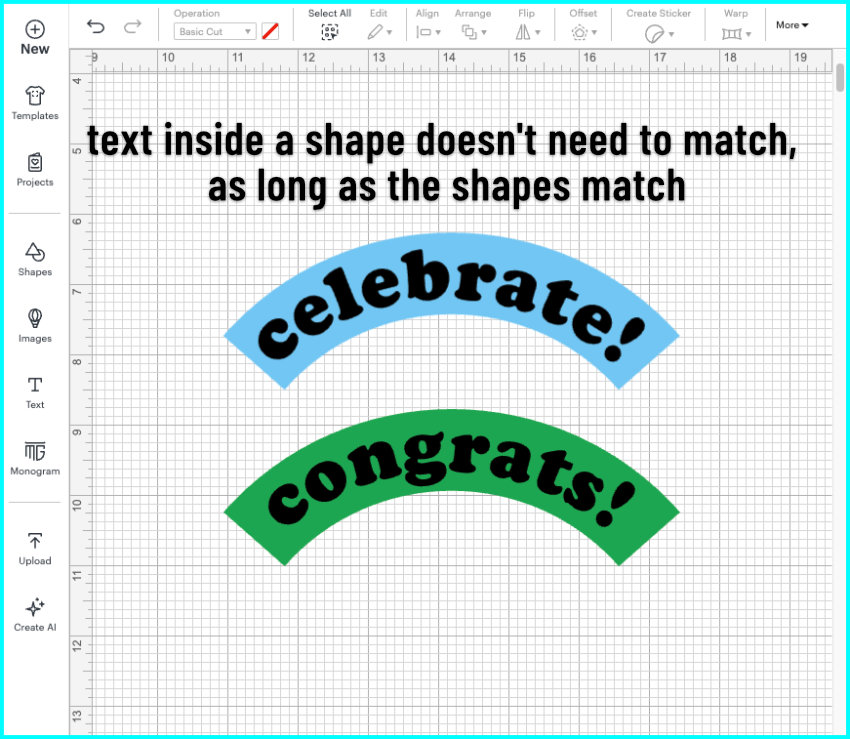
For a first example, I’ll use a symmetrical shape. I chose an arch from the Shapes menu, then I added a text block and used the Curve tool to fit the text inside the arch. I duplicated the arch and the text, and I’m going to change the wording and arch color for the other side. Finally, I Flattened each text block to its arch.
Because the outer cut line is the same, the two sides will align perfectly even if the text is different.
Now let’s take it further with an asymmetrical shape, using a pennant from the image library (#M505A9AC1). With an asymmetrical shape, the text will not be mirrored, but you must mirror the shapes.
Duplicate the shape, select the copy and Flip Horizontally. I’ll add a text block and warp it to match the first pennant, then add another text block and warp it the opposite way to fit the flipped pennant. Again, the text doesn’t need to match. After arranging the text and changing the colors, each text block gets Flattened with its pennant.
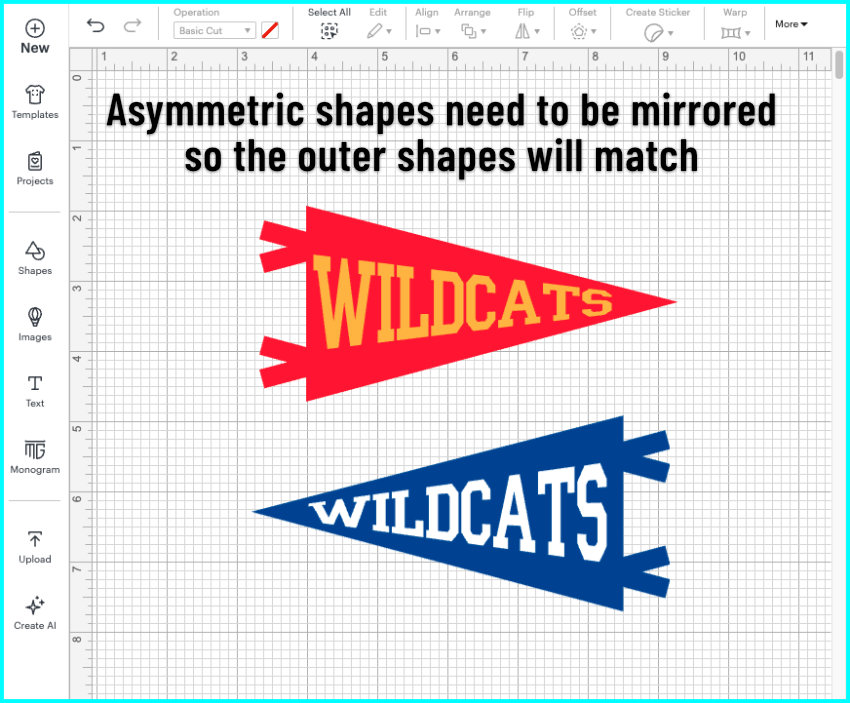
Both sides will cut identically because the outer shapes match, no matter what kind of text or font is on the inside.
Double-sided printing basics
Now that your front and back designs are ready, let’s talk about how to actually print them so the two sides line up.
To do double-sided printing, you run the same sheet through your printer twice.
The front prints first, then the back gets printed in the mirrored position so that when you flip the page side-to-side, the two images align perfectly.

The challenge is that Design Space automatically moves things around on the mat to save space, so we need a way to lock the position of both sides before printing.
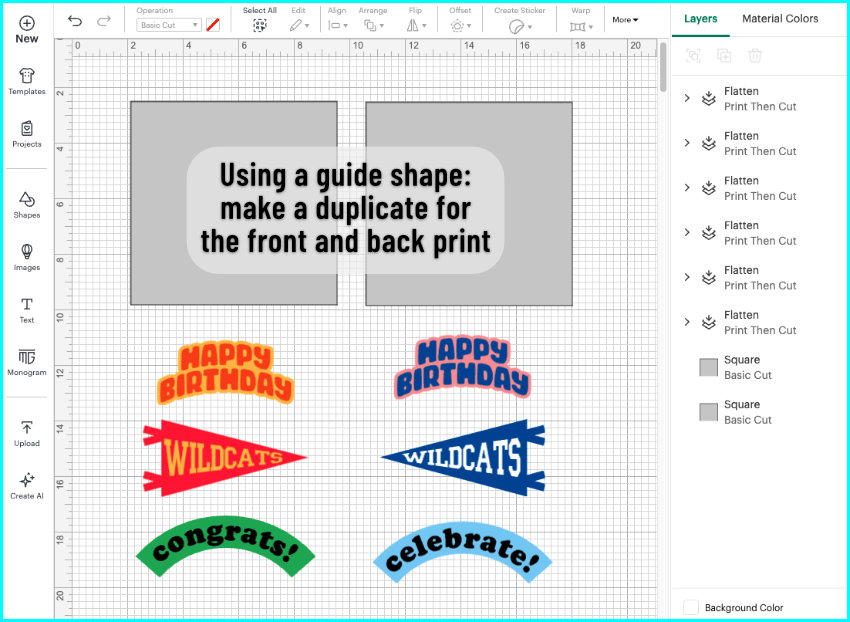
To solve the problem, we’re going to attach each design to a guide shape.
Setting up the print guides
Guide squares
If you want to keep it simple, you can use a square as your guide shape. Just add a square to the canvas, size it to 7.44″ wide and 7.325″ tall, which will take up almost the entire printable area. You’ll need to duplicate the square so you have one for the front and one for the back.
Attaching your text to the guide square will prevent Design Space from repositioning the text and it will keep each side on its own mat.
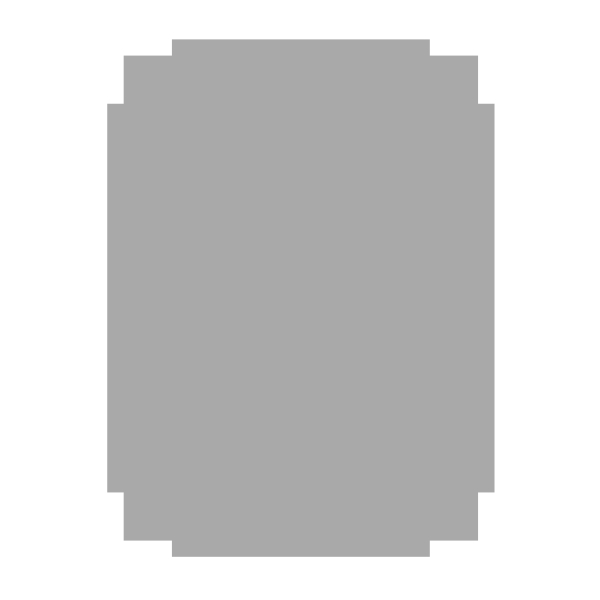
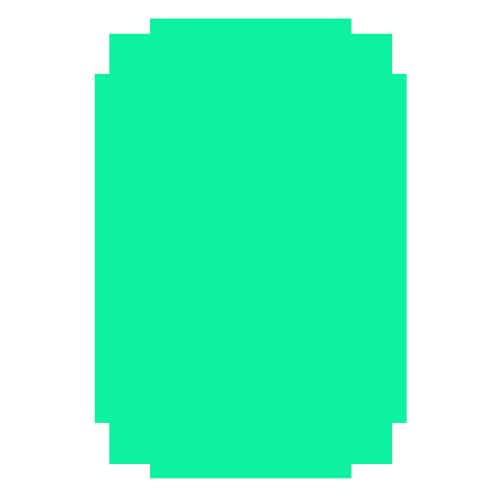
Maximum Print Then Cut area guide
My 3 examples are too big to use just a square guide. If you need a larger guide shape, you can download one of my maximum print then cut area guides SVG from our Resource Library. It fills the entire print & cut area and it’s good for printing multiple designs at the same time.
So now I’m going to position my designs on the guides for double-sided Print Then Cut. The key is to create two mats where the positions of the front and back text designs are mirrored. The text itself isn’t mirrored, just its position on the mat relative to its partner.
For my examples, I’m going to do a bit of rotating to make sure everything fits without overlapping. I’m going to use alignment to position my images.
For the first mat of images (this will be the front of my designs):
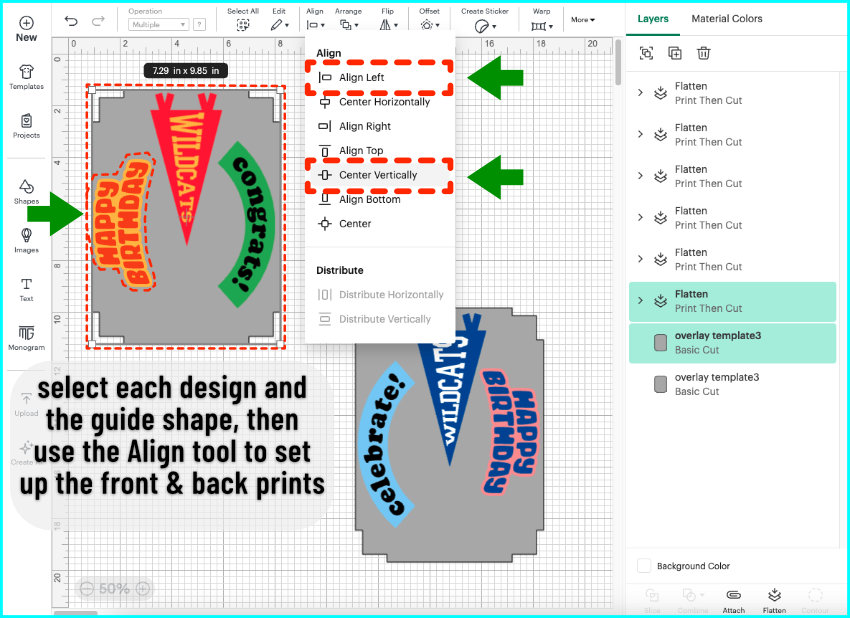
- Select the first HAPPY BIRTHDAY design and the guide shape, then go to Align > Left, then Align > Center Vertically.
- Select the first arch design and the guide shape, then go to Align > Right, then Align > Center Vertically.
- Select the first pennant design and the guide shape, then Align > Top, then Align > Center Horizontally.
For the second mat of images (back designs), mirror the placements of the front images:
- Select the second HAPPY BIRTHDAY design + guide shape, then Align > Right, Align > Center Vertically.
- Select the second arch design + guide shape, then Align > Left, Align > Center Vertically.
- Select the second pennant design + guide shape, then Align > Top, Align > Center Horizontally.
Once everything is placed, Attach each set of images to its own guide, then change each guide’s Operation to Draw so it won’t cut.
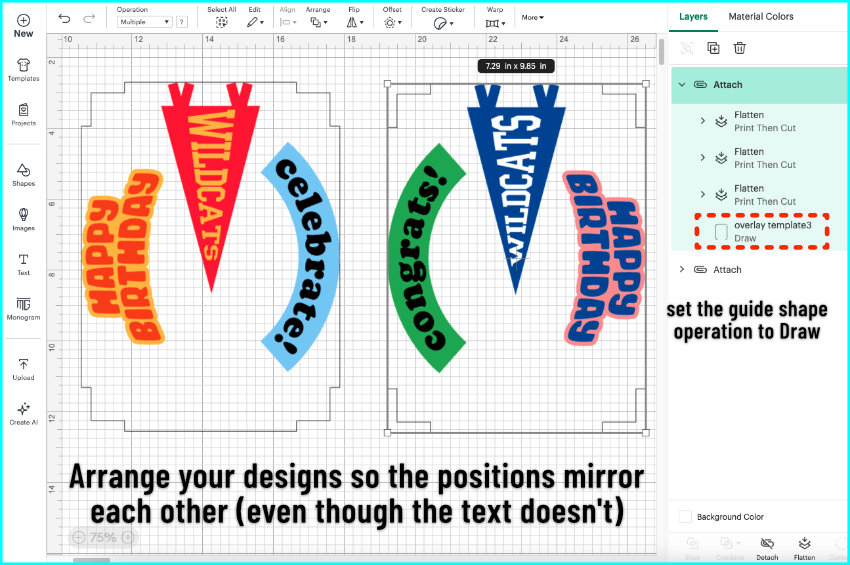
You’ll see now that each attached group is a mirror image of the other, even though the individual images are still readable.
Printing the front and back
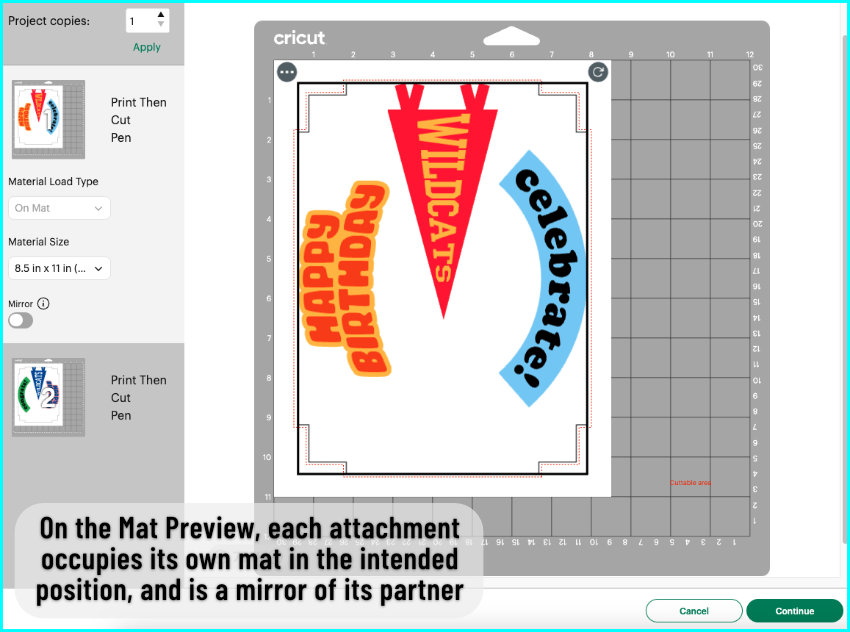
Now click the Make button, and you’ll see your two designs, each locked in position on its own mat.
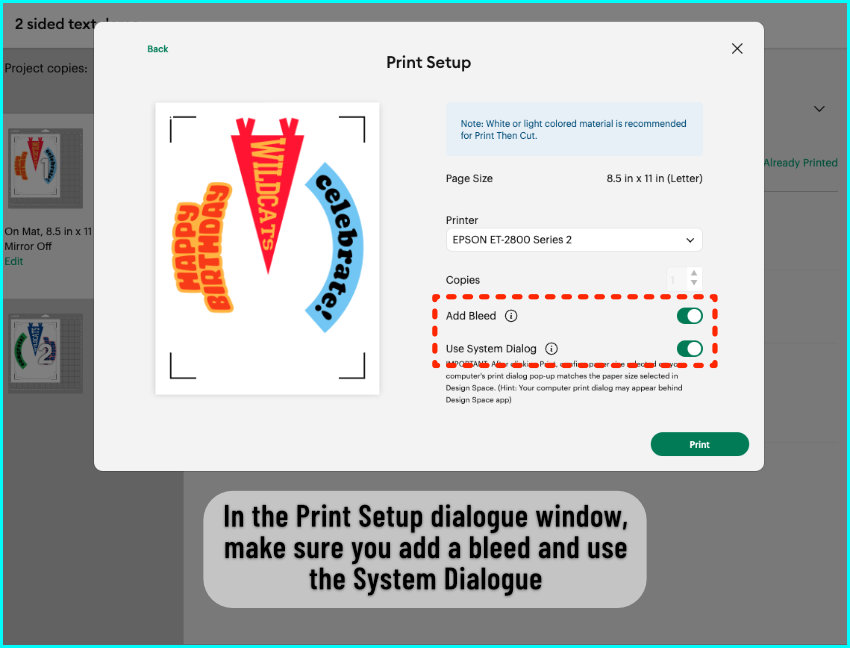
Select the front mat, click Continue, then Send to Printer. Turn Bleed on, and check Use System Dialog so you can pick your printer settings.
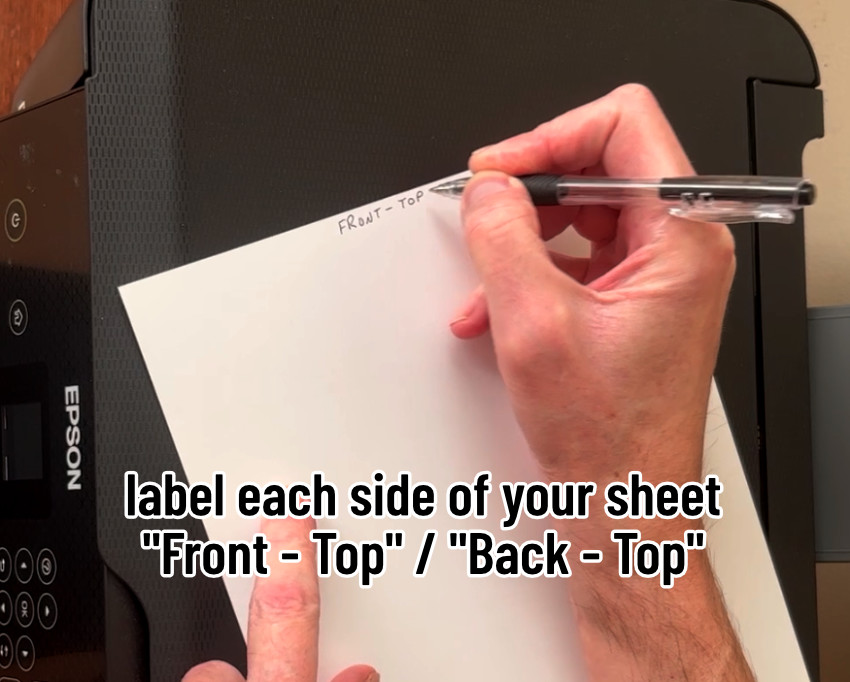
Before printing, label the page with ‘Front Top,’ and ‘Back Top’ so you know which way to load the paper into the printer.
Rear-feed printers
If your printer loads from the back, place the sheet with the top edge going in first (upside down) and the front side facing up. Print the front side.
To print the back, flip the sheet side-to-side only, not top-to-bottom, and feed it top edge leading into the printer again.

Front-load printers
If your printer loads from the front, the top of the sheet goes in pointing toward the printer, front side facing up. It prints, comes out face-down, and the top points toward you.
To print the back, don’t flip the page—just feed it in with the top pointing toward the printer again, back side facing up.
Labeling the sheet really helps while you get used to this.
Cut the double-sided print
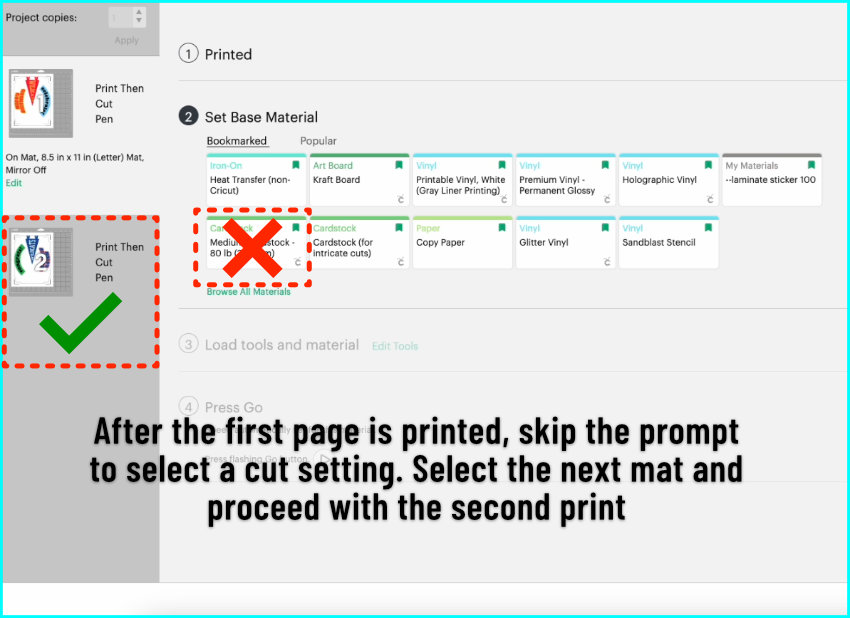
No matter if you have a rear feed or front feed printer, after the first page is done, ignore the prompt in Design Space to select a cut setting. Instead, choose the second mat and proceed with the second print.
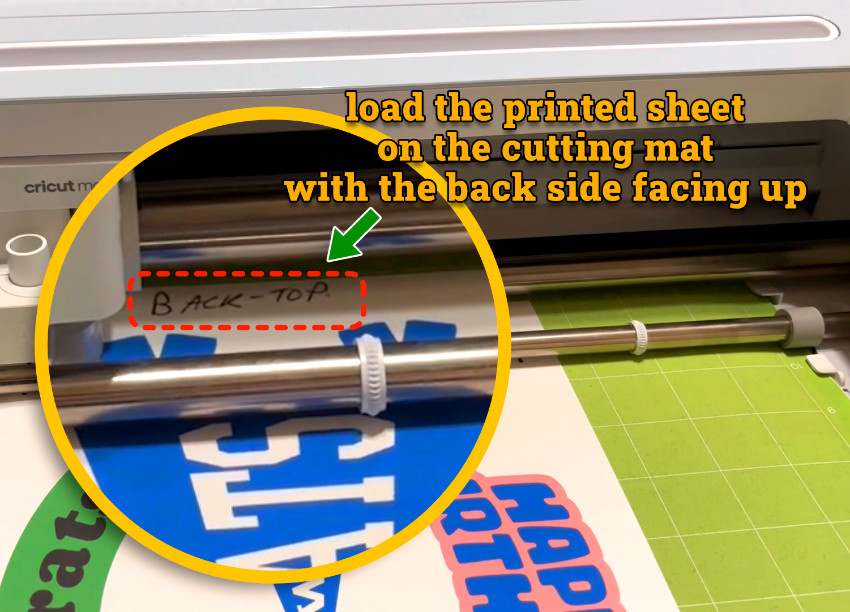
Once both sides are printed, place the sheet on your mat with the back side up. Follow the prompts in Design Space after the second page has finished printing. I’m using the Medium Cardstock setting, and it cuts perfectly.
When Design Space asks you to load a pen, just ignore it—that’s for the guide shape, and we’re not drawing that.
A note about using offsets
Now that we’re finished with the print and cut, I want to go back to the beginning and show you why you should be careful if you choose the offset option.
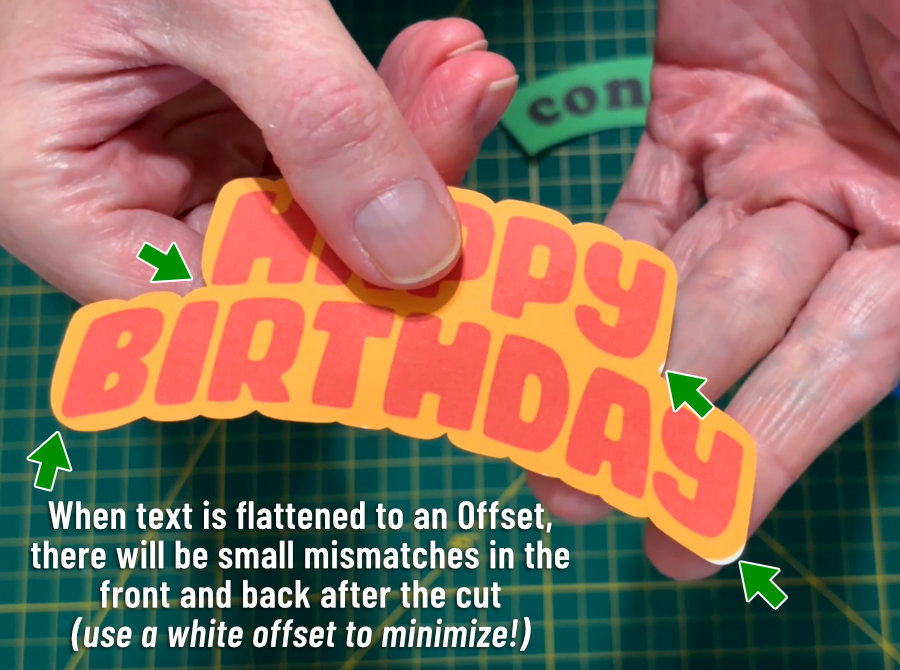
You can see here that the offset shapes around HAPPY BIRTHDAY are not a perfect match, and you have some spots near the edges where the cut from the back missed the offset on the front of the print. This is why I recommend leaving the offset white, so small mismatches like these are not noticeable.
Otherwise, you can always just go the easy route and flatten your text to a shape.
And that’s it! Two very simple ways to prepare your text designs so they can be printed double-sided with ease. What projects are you going to make as you master Print Then Cut? Let us know in the comments below!
Before you go…
You might want to check out our other double-sided Print & Cut tutorials: