
This tutorial is part of the advanced techniques section of the Mastering Cricut Design Space learning hub.
Fun retro designs are everywhere and I love it! This tutorial will show you a very easy way to make retro rainbow layered text right in Cricut Design Space, no other software required. I will be using this technique to make a birthday cake topper, but you could use the same method to add colorful dimension to cards, shirts, signs, or any other project.
Video: Make a Retro Rainbow Cake Topper with Cricut
Choose a font and Weld your text
To start, choose a chunky, retro-inspired script. I’m using a font I love called Bratsy that has the vibe I want. If you prefer to use a Design Space font, Candice Regular or Analog Script are good choices, and you can make them thicker by adding an offset if you like.

Once you adjust your spacing and the text looks how you want it, select all the words and click Weld to turn them into one shape. I’m going to change the color to white so it’s easier to see what’s happening with my layers as I go. Note: now, in the Layers panel the text will be called “Weld Result”.
Duplicate your text
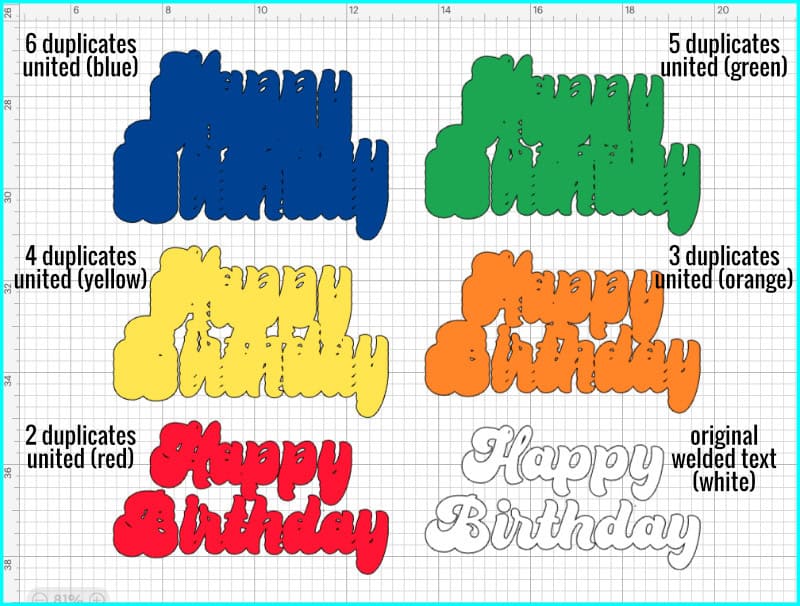
Now duplicate the text, creating one copy for each color in the rainbow stack. For this particular rainbow look, I’m duplicating it five times—for red, orange, yellow, green, and blue. The original (top) text will be white. In total, I now have 6 layers.
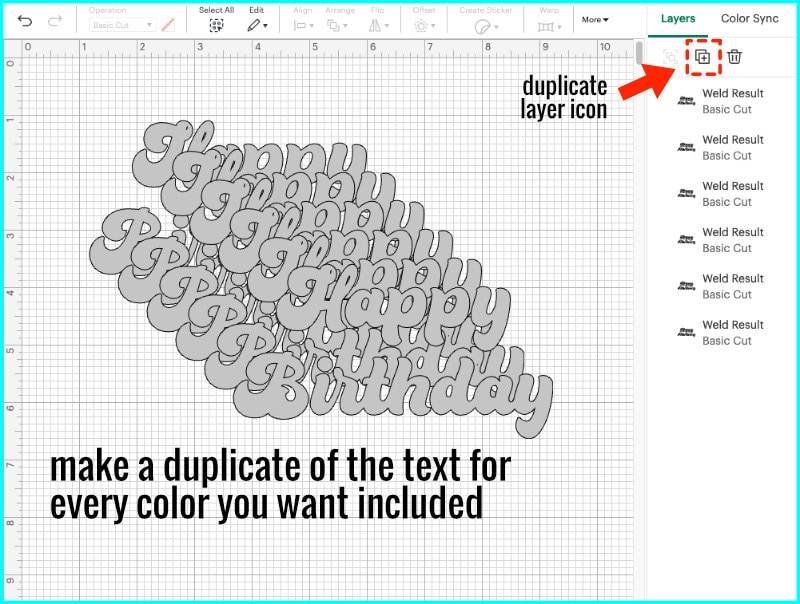
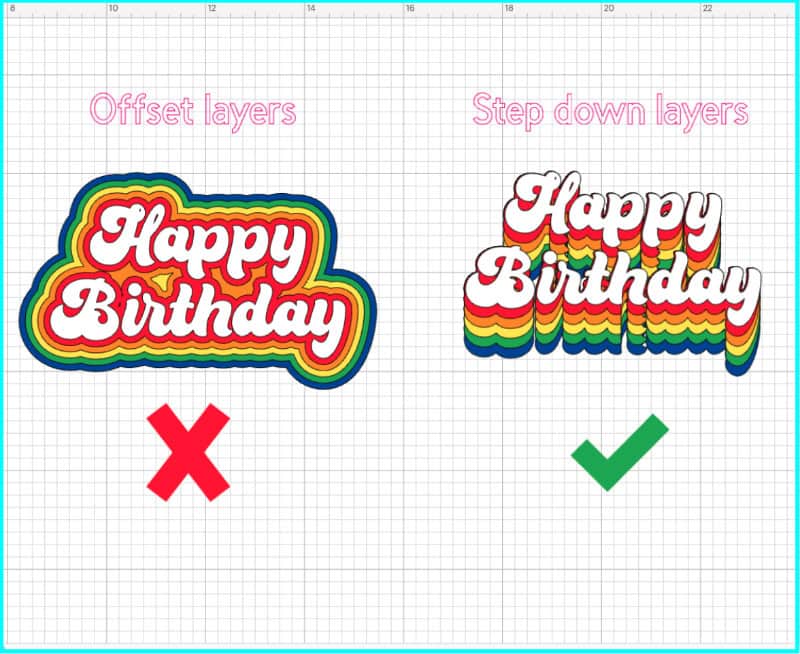
One important thing to note is that we’re not using the Offset tool here. Offsets surround the shape on all sides, but we want these rainbow layers to step down behind the letters, without expanding outward.
Since this is for a cardstock cake topper, each layer also needs to form a solid base for the one above it. I’m going to create that effect using multiple stacked layers of text.
Arrange and Unite your layers
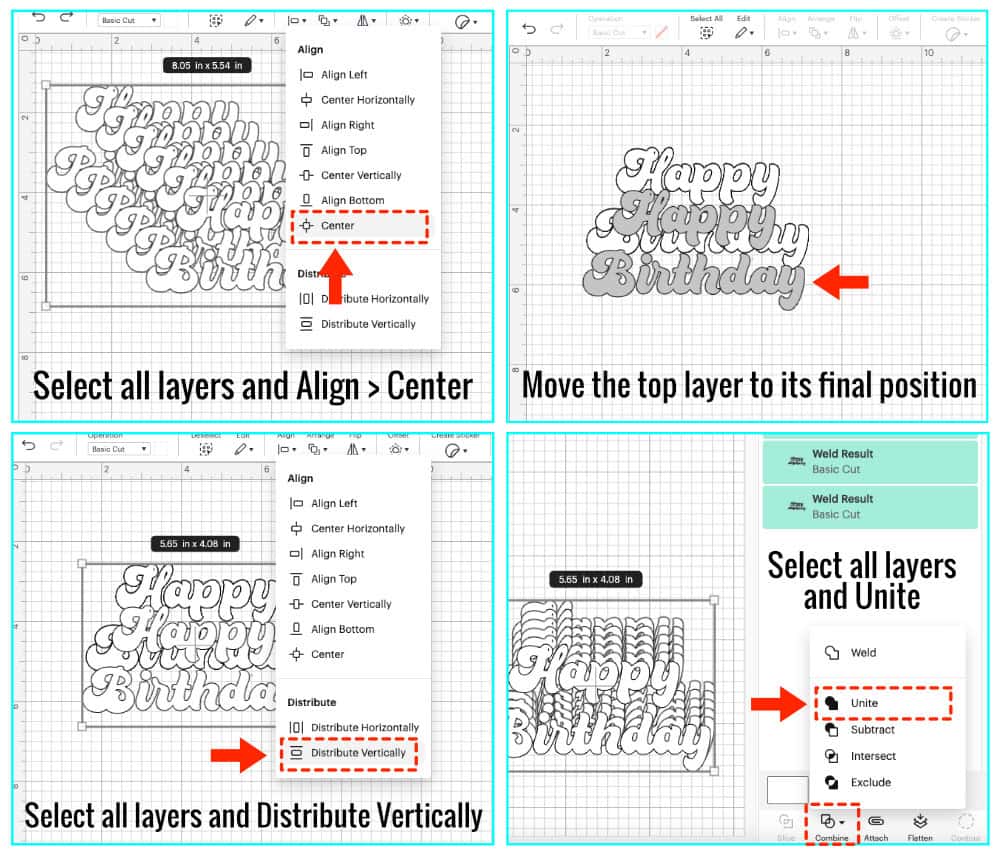
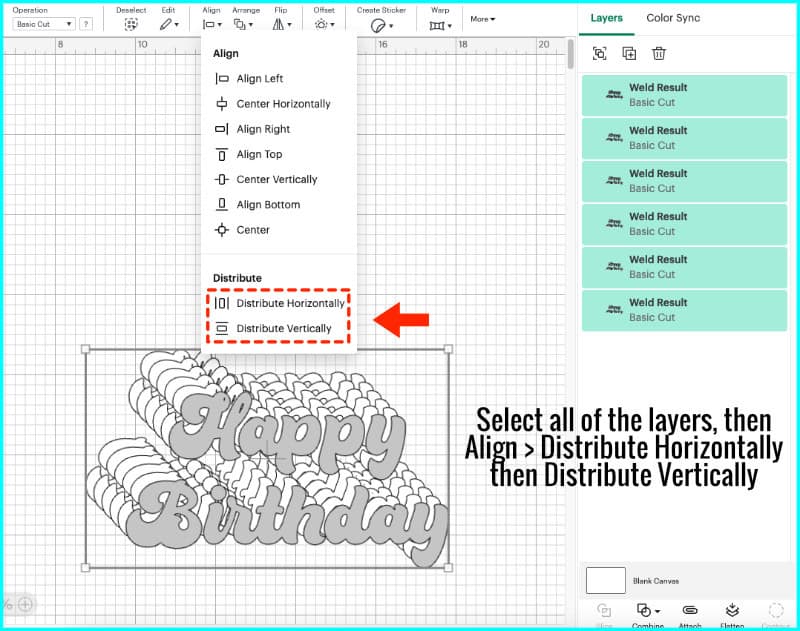
First, I need to get the spacing between my stacked layers right. Start by selecting all the layers and use the Align > Center option to stack them perfectly. Then, take the top copy and drag it down to where you want the final stacked layer to end. What I’m doing is determining the full range from the top text to the bottom-most rainbow drop shadow, so consider how tall you want the final result to be, and how wide or narrow you want each drop shadow to be.
Now, select all the text again, go to Align, and choose Distribute Vertically. This will make the height of each rainbow drop shadow equal. Follow that up with Center Horizontally just to double-check your alignment.
If you align everything and don’t like the total height of the text design or the height of the drop shadows, just center all of the layers and start again.
If you are happy with everything, select all the layers and click Unite to combine them into one shape. This will be the bottom layer, so I’ll change its color to blue.
Build the rainbow layers
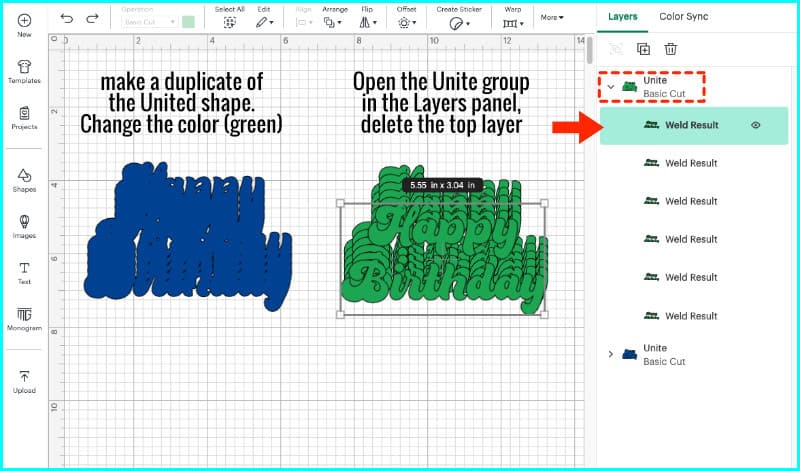
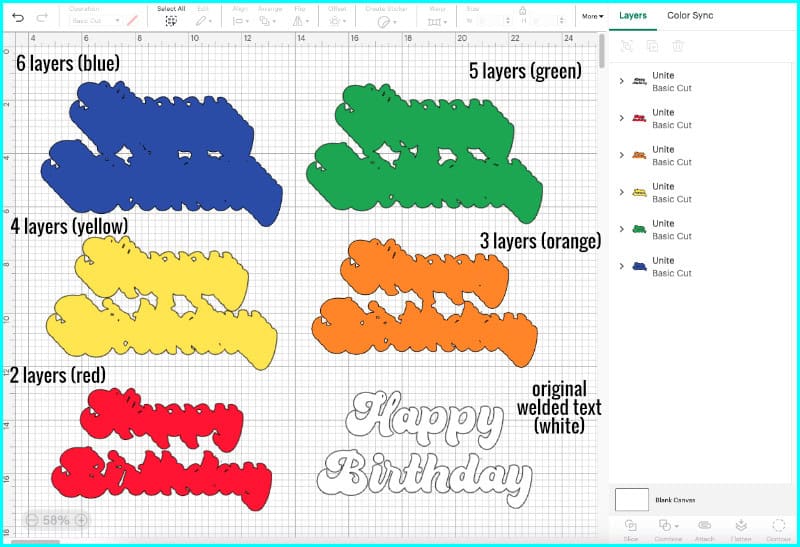
So now we build the rest of the layers starting from the largest bottom layer (blue) and working upward. Duplicate the blue layer and change the color to green.
Go to the Layers panel and open the Unite group for the green layer by clicking on the > symbol.
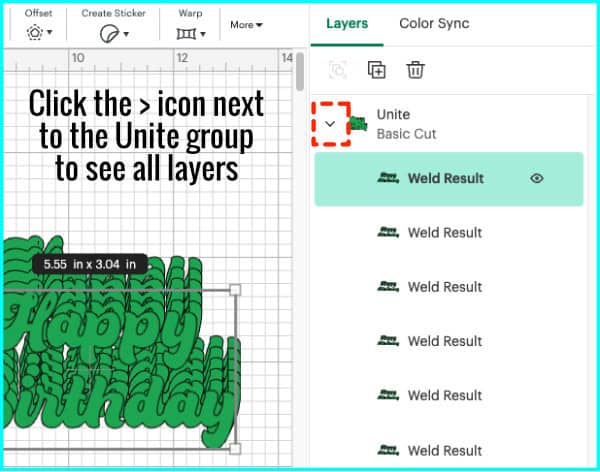
Click the top layer within the group and delete that top text layer. I’m going to make each layer smaller by deleting one copy of the text.
I’m now going to repeat this process for each color:
- Duplicate the green layer → turn it yellow → delete the top layer from the yellow Unite group
- Duplicate the yellow layer → turn it orange → delete the top layer from the orange Unite group
- Duplicate the orange layer → turn it red → delete the top layer from the red Unite group
- Finally, duplicate the red layer → turn it white → delete the top layer from the white Unite group. This will give me my top text layer back.
And now I’ve got the full rainbow stack! Each layer will nest neatly beneath the one above it.
Align everything
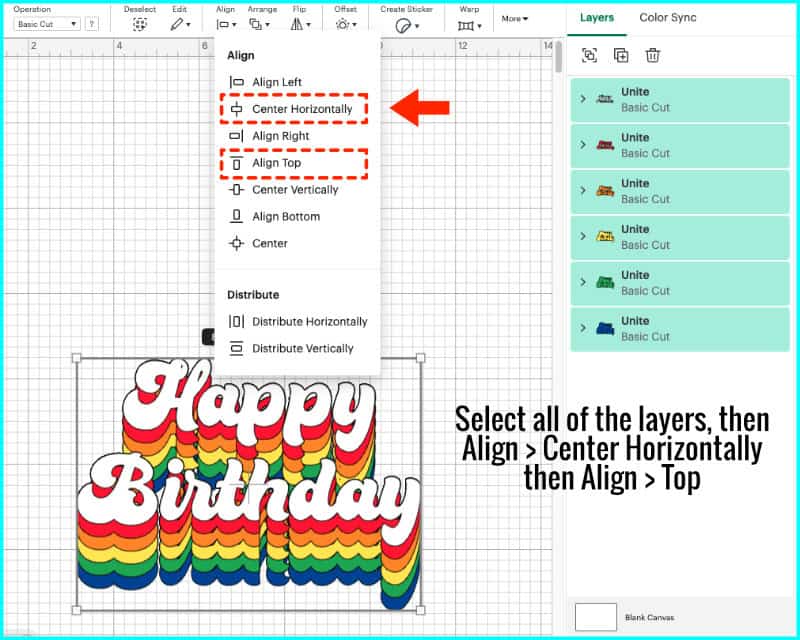
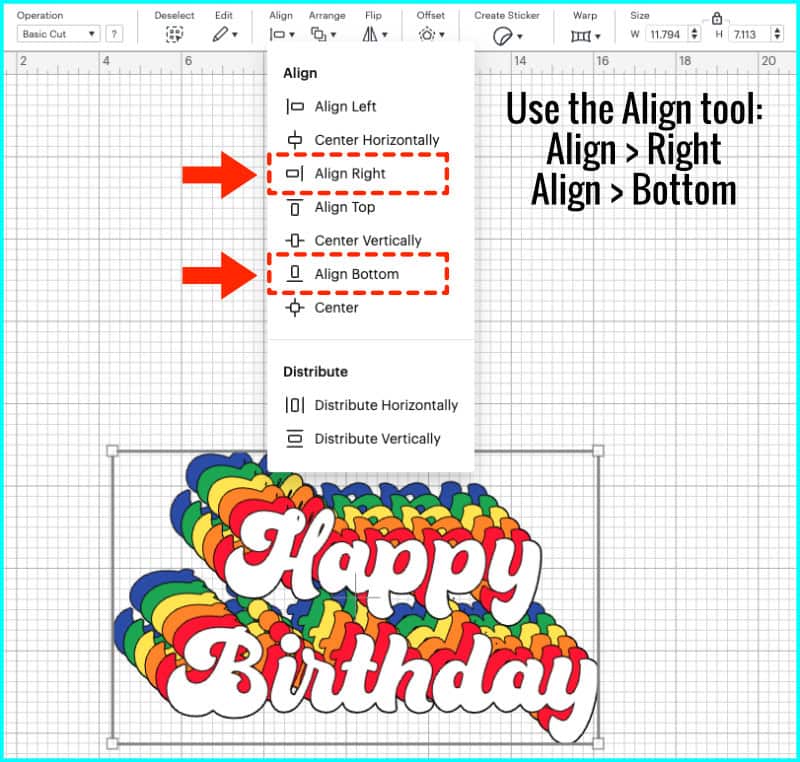
Now that all the layers are done, select everything and use Align > Top and Center Horizontally. Or, if you want to flip the orientation, align to the bottom instead. When you align the physical layers of cardstock for your project, you will be aligning them at the top the same way.
At this point, you can resize your design however you like. I’m sizing mine to 6.5″ wide to go on an 8″ round cake.
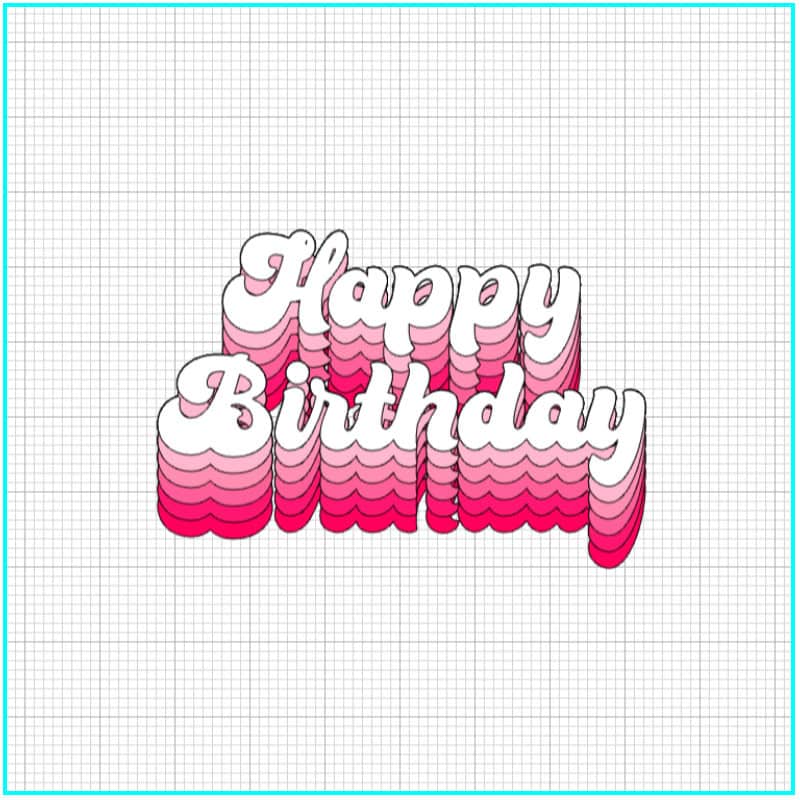
You don’t have to stick with rainbow colors, either. You could use different shades of the same color for an ombre effect instead!
Optional: Diagonal alignment
If you want a different look or orientation for your text and rainbow layers, all you have to do is change the alignment of your layers at the beginning, then the rest of the process is the same.
As an example, let’s make the rainbow layers skew to the bottom right instead of up and down.
This time, after duplicating your text layers, center them all, then drag the top layer diagonally to where you want the final stacked layer to fall.
Select all the copies, then go to Align > Distribute Horizontally and Distribute Vertically.
Now, Unite all the layers, and color this bottom layer blue.
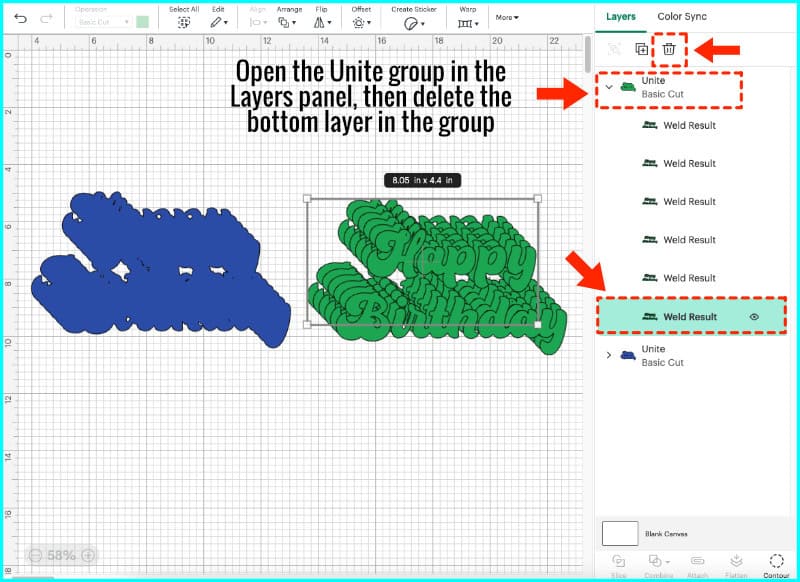
Duplicate the blue layer and turn it green. Open the green Unite layer in the Layers panel, then delete the bottom layer of text, instead of the top one like we did before.
Repeat the same process for the rest of the layers:
- Duplicate the layer → change the color → delete the bottom text layer in the Unite group
Work your way through yellow, orange, red, and white, always deleting the bottom layer from each Unite group.
Finish up by aligning everything to the Bottom Right. Another fun retro look complete!
I can align this at the top left, too, and it still looks good. You can change the orientation however you like, and once you get the hang of this, it’s super easy to make these designs in just a few minutes.
Assemble your layers into a cake topper
If you want to turn this retro layered text into a cake topper, it’s super simple to put it all together. All you need are your cardstock layers, an adhesive, and some bamboo skewers or cake pop sticks. I used holographic cardstock for my top layer instead of white.
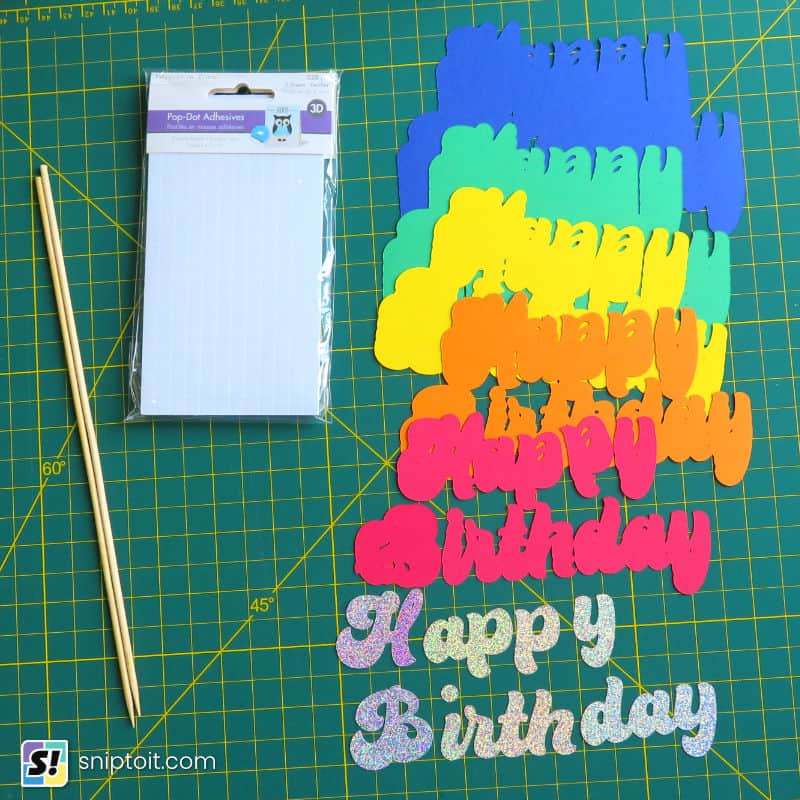
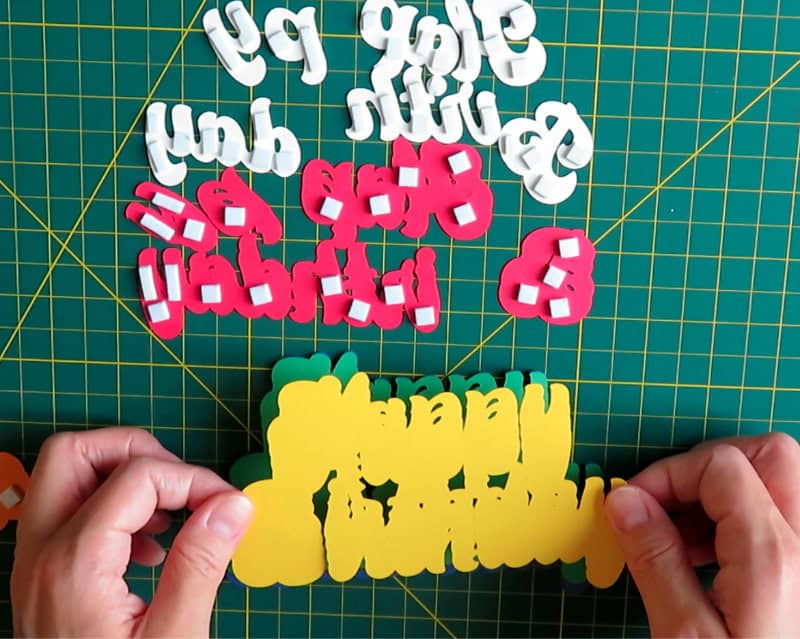
You can use glue to put your layers together flat, but you can also use foam tape or pop dots to create more dimensionality. I’m going to use foam squares to make my layers stand out.
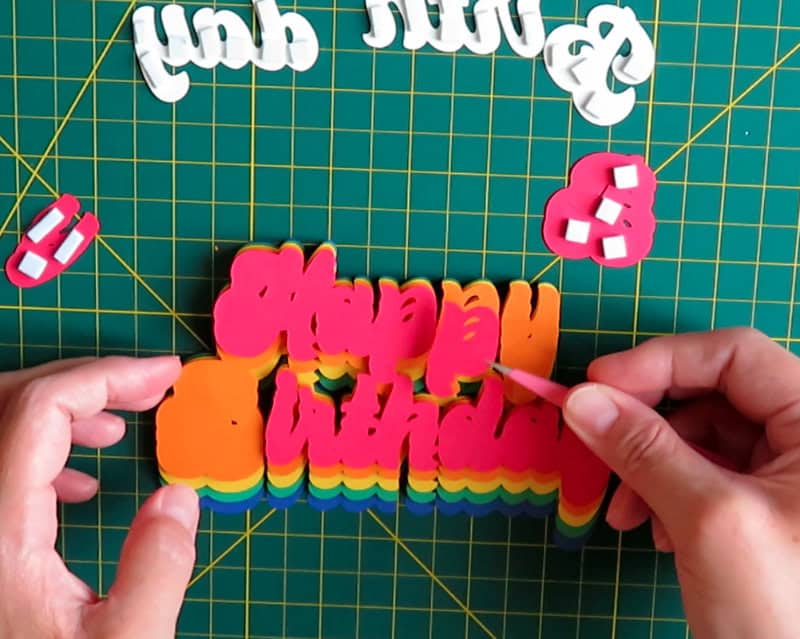
I add the layers starting from the bottom up, aligning each layer along the top: green stacked on blue, yellow stacked on green, orange stacked on yellow, red stacked on orange, then my last holographic text added to the top.
At some point you’ll probably have text that isn’t all attached, where letters or sections of letters are separate. You will still be able to see where to line up your text with the tops of the letters of the layer below.
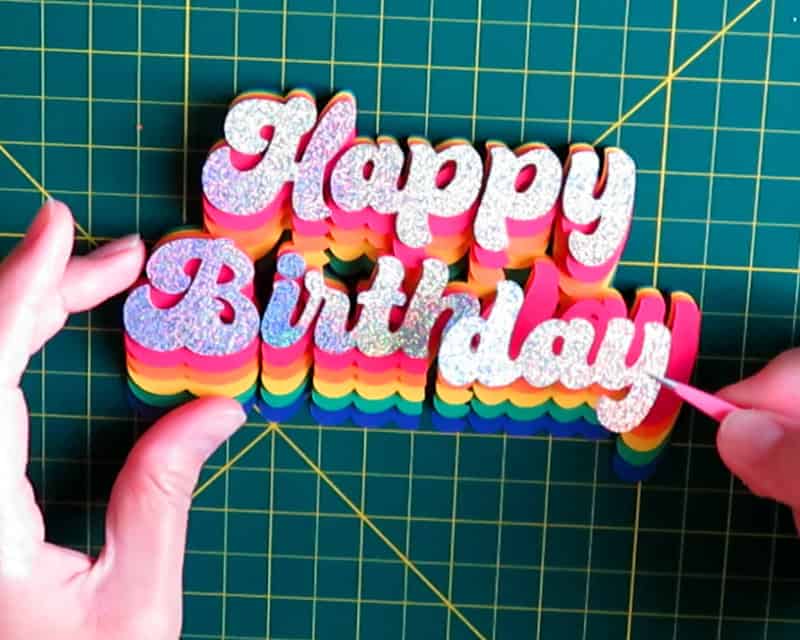
And that’s it! Just finish your topper off by using hot glue or tape to affix the bamboo skewers or sticks to the back.
So here are the 2 finished cake toppers that I made using rainbow layered text, one stacked to the top:

And the second topper stacked to the bottom right:

And that’s all you need to make this fabulous retro cake topper! If you have any questions, please leave them in the comments section below. If you try this technique yourself, we’d love to see what you make. Tag us @sniptoit on social media! If you’re still looking for Design Space inspiration, you might be interested in some of our other tutorials…

