
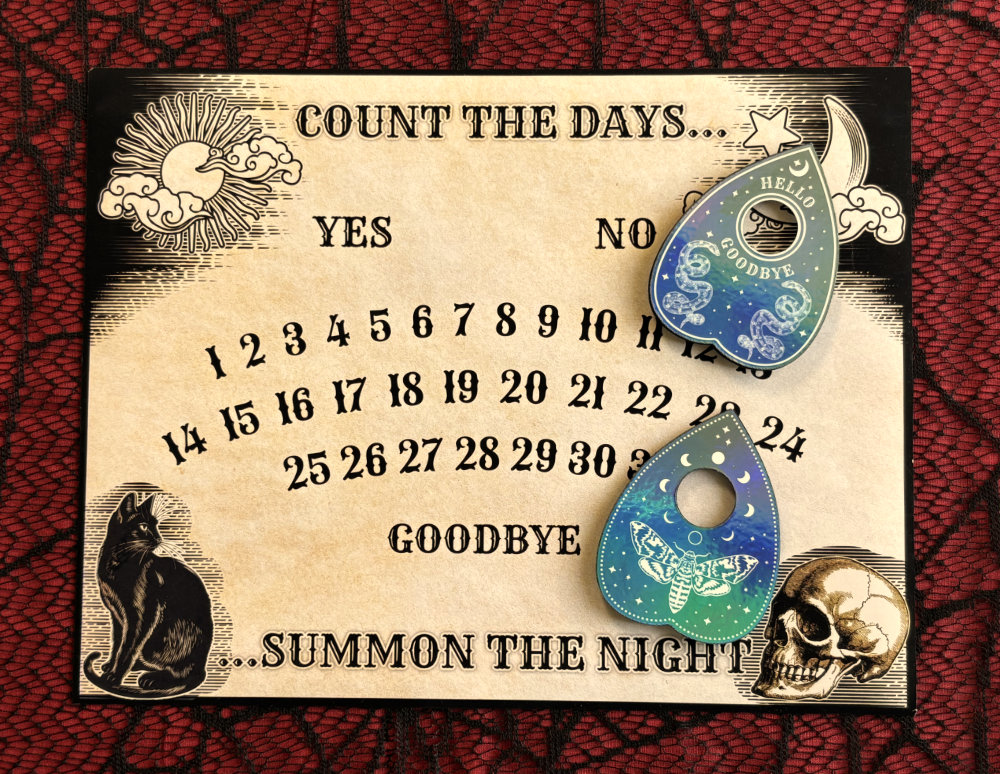
It’s spooky season! We’re giving you another taste of that timeless Ouija board style with a super easy print and cut Halloween countdown calendar fridge magnet with custom planchette magnets to mark the days. I’m going to make the project using the new Cricut Printable Magnet Sheets so I’ll be showing you how the material prints and cuts, how the different kinds of magnets I made perform, and how to get the best results for your project.
You can download the files for free, and you can use any machine you want – even scissors!
Video: Halloween Countdown Calendar DIY
What you need
For this project, you’ll need a printer but what you print on and how you cut are up to you. I’m going to be printing on the Cricut Printable Magnet Sheets (I bought the 8 pack from the Cricut site). You can use any brand you want, or you can even print on cardstock.
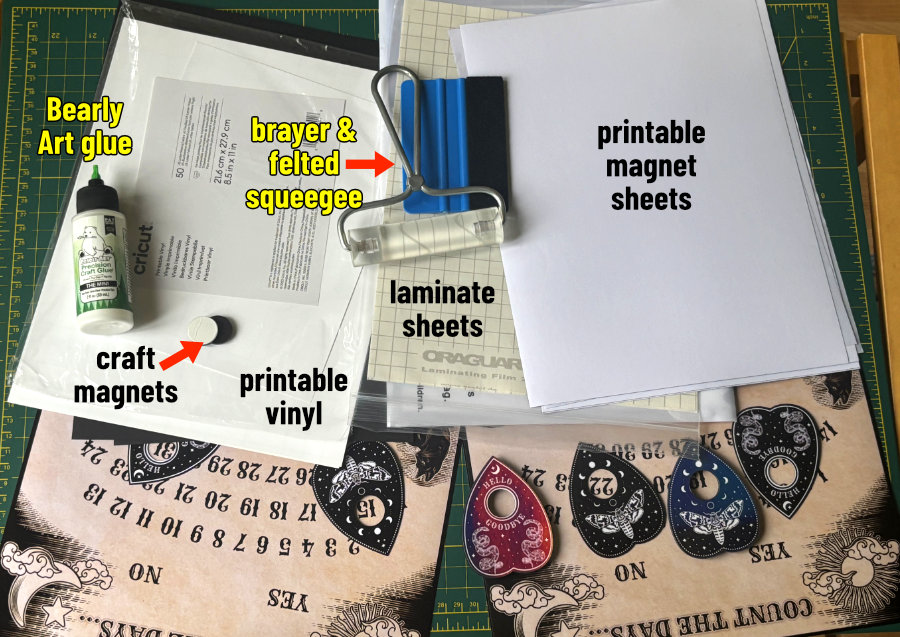
I’m also using 2 different kinds of laminating sheets: Oraguard (matte), and a holographic sheet that was part of a pack from Amazon.
To make thick, 3D versions of the planchette magnets, I’ll be using: Cricut Printable Vinyl, 110 lb black cardstock, Bearly Art glue, and dollar store craft magnets.
I’m cutting using an Xacto knife and straightedge (metal ruler), and my Cricut. I recommend a felted squeegee for adding laminate.
Get the files
You can get all the files for this project sent right to your inbox by signing up for our newsletter here:
Summon Your Freebies
Download the free Ouija-inspired countdown calendar + planchettes when you join the newsletter. A little spooky fun, right in your inbox!
Download the zip file to your computer and double click to unzip if you’re using a mac, or right-click and select “Extract All…” if you’re using a Windows machine. You’ll find the following files:
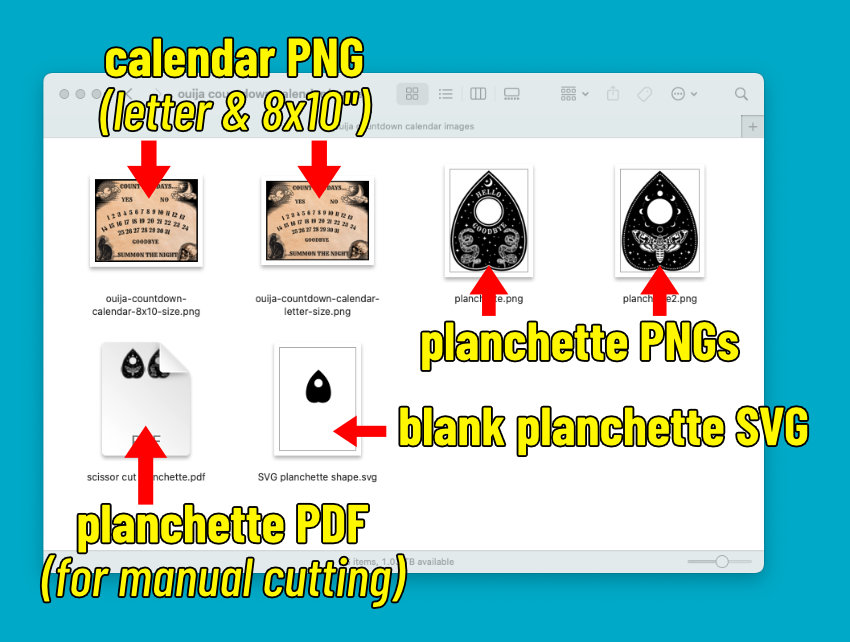
- an 8.5 x 11″ countdown calendar PNG, plus an 8 x 10″ version that fits a standard frame
- two different planchette design PNGs
- a blank planchette SVG so you can either add your own design, or if you want to make a layered, 3D version
- a PDF file with the two planchette designs if you want to print and cut them manually – the images will be sized correctly for use with the countdown calendar
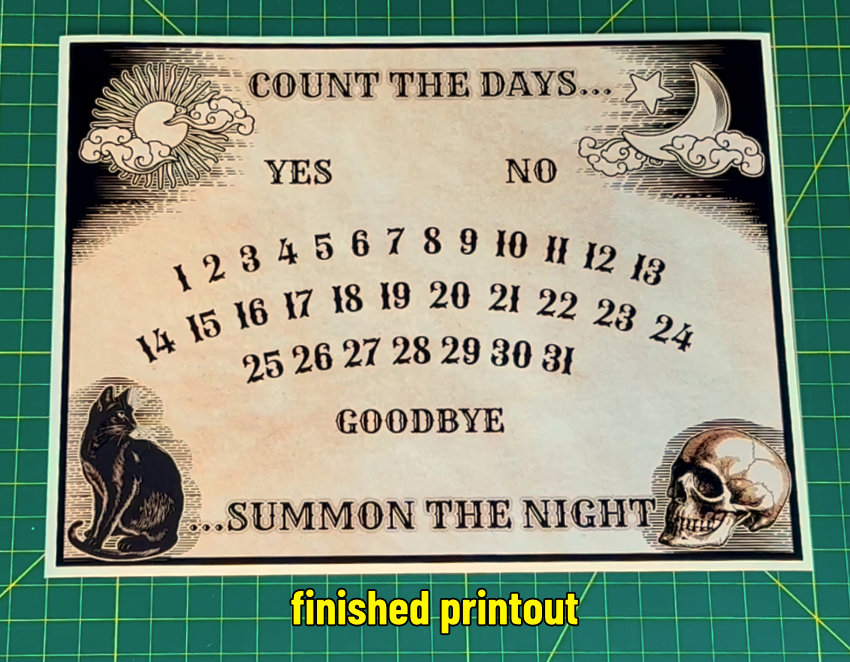
Print the countdown calendar
The countdown calendar is bigger than the maximum area for Cricut’s Print Then Cut, so we’ll print it outside of Design Space.
Double click or right click to open the PNG and print directly from the image viewer or preview window.
NOTE 1: if you plan to cover your countdown calendar with a laminate (recommended), measure your laminating sheet. The most popular size of laminating sheet from Amazon is A4, which is 8.27″ x 11.69″ – this will be a little too narrow for the letter-sized countdown calendar, so I recommend you print the 8 x 10″ version instead.
NOTE 2: magnet sheets are expensive and I don’t want you to waste your money! Before you print on whatever final media you want to use, please print your countdown calendar on plain copy paper to make sure it looks OK, with the correct size and border.
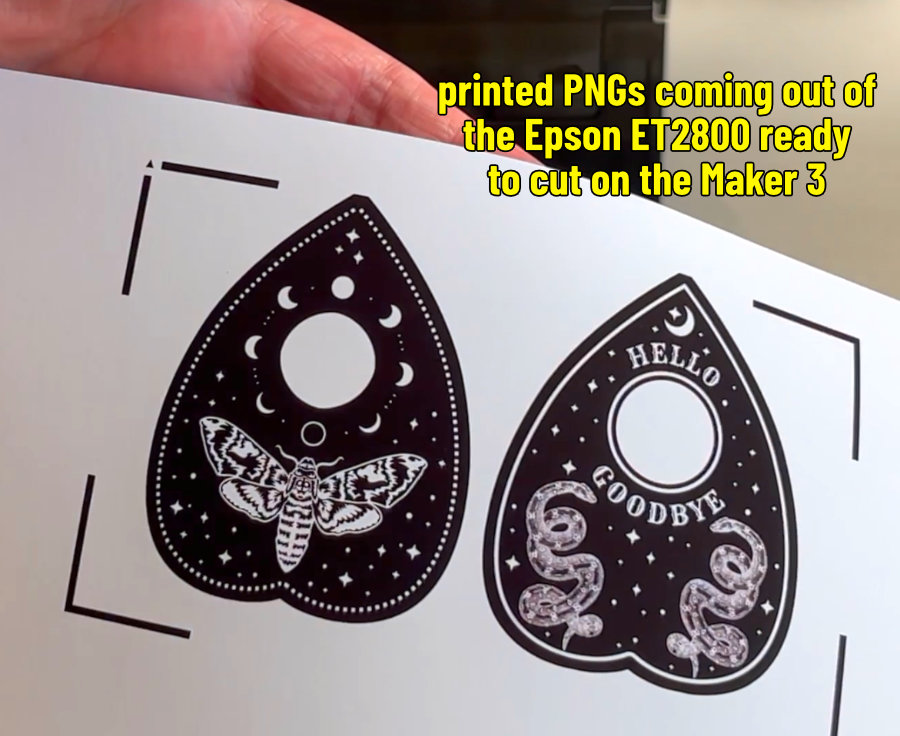
I’m printing the magnet sheet using my Epson ET-2800, using the a “presentation matte” setting. I recommend selecting best or high quality with whatever setting you’re using. Printer dialogs all look a little different, but the same settings you’d use for stickers or printable vinyl should work.

Once it’s printed, Cricut says to let the ink dry fully, but for me, the magnet sheets take the ink really well and the print was dry coming out of the printer. The print quality on the magnet sheet is really nice.
At this point if you want to cut out the planchette designs manually, select the PDF file called “scissor cut planchette” and you can print that directly from your image viewer like the countdown calendar. The PDF will produce planchettes at the correct size.
Apply the laminate and trim the calendar
Once you’ve got your countdown calendar printed, you can choose to apply a laminate sheet or just leave it as-is. I recommend an overlay to protect the surface of the calendar and allow the planchette magnets to slide easily over the surface.
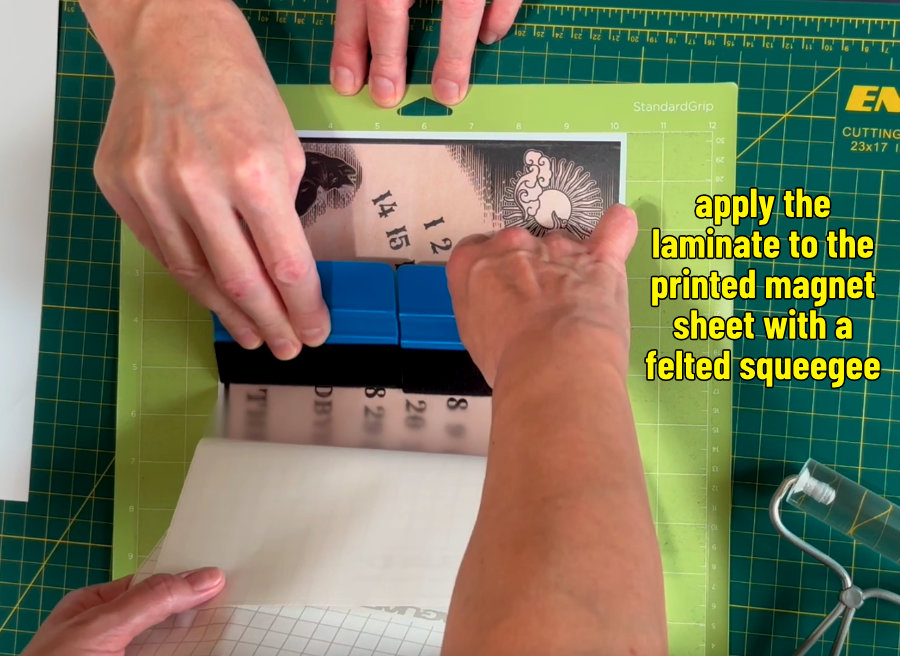
I’m using a matte overlay called Oraguard, but you can use any laminate you like: matte, gloss, or holographic, in sheets or a roll. I’m going to stick down one end of my laminate sheet then smooth it down using a felted squeegee, working from one end of the calendar to the other, pulling the backing sheet off the overlay as I go.
Now all that’s left is trimming off the white border around my calendar, although you can leave it if you prefer. I’m using an Xacto knife and a metal ruler, but you can use a paper trimmer or even just scissors.

Upload the planchette files to Design Space
The files for the planchettes include 2 different PNG images for simple Print Then Cut and a blank SVG. You can use the SVG to either design your own planchette magnet, or you can use it to cut cardstock layers to make a thick 3D planchette.
Upload the files into Design Space:
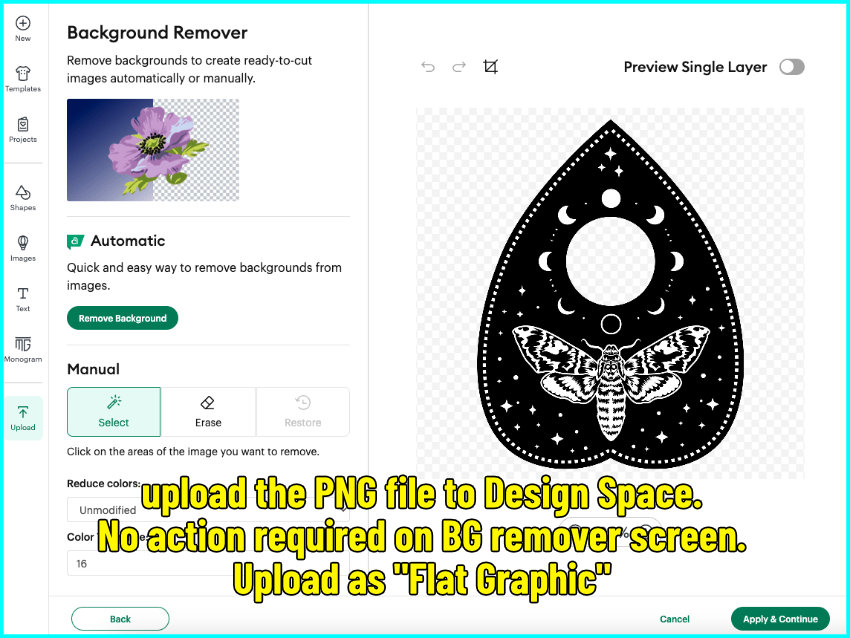
- Click ‘Upload’ and select your file
- No need to remove the background — just apply and continue
- Choose the flat graphic option at the upload screen
- Now upload
For the SVG, you’ll go straight to the final screen and upload from there. If you need more help, consult our guide to uploading images to Design Space.
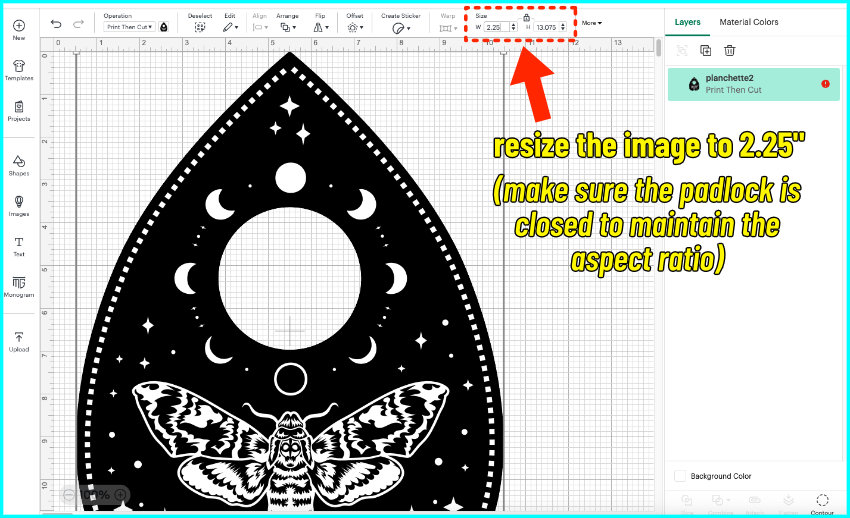
Now resize your planchette images to 2.25″ wide — make sure the padlock is closed so the proportions stay correct. This will ensure that the planchettes are the correct size to display the numbers on the countdown calendar (both the 8.5×11″ and the 8×10″ version). The blank SVG will already be sized correctly.
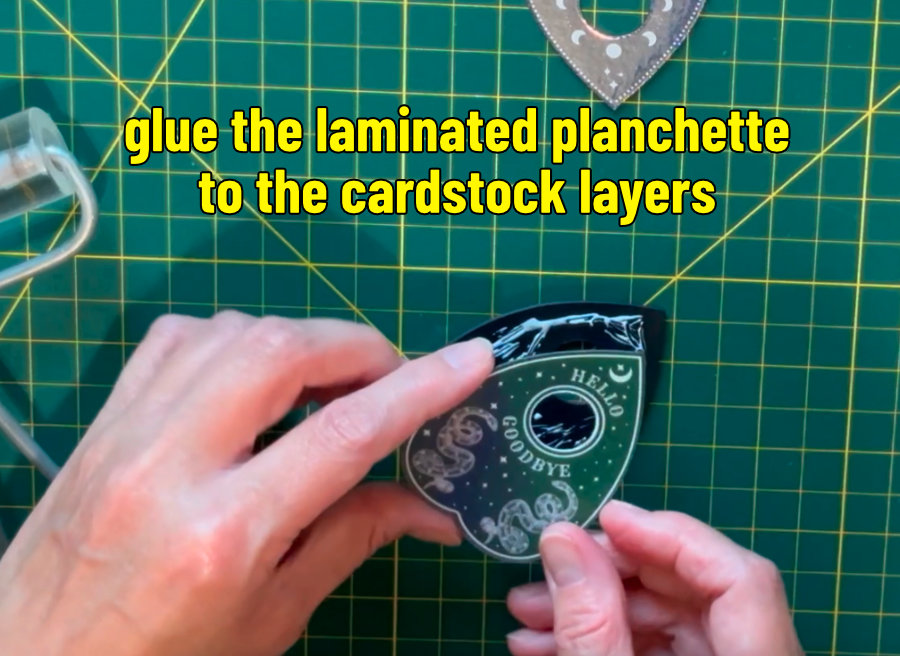
Make the planchette magnets
I’m going to make my planchette designs 3 ways, and then I’ll compare them to see which version is best:
- First, a print then cut out of the magnet sheet (no overlay)
- Second, I’m going to print on the magnet sheet, cover with my matte laminate, then cut
- Third, I’m going to print the images on printable vinyl, mount the vinyl on heavy cardstock, then cover with a laminate sheet and cut. Then I’ll add more cardstock layers underneath to create a thick, 3D planchette with a craft magnet stuck to the bottom
If your machine hasn’t been calibrated for print then cut, you’ll have to do that first, but otherwise the files are ready to Make.
Magnet sheet print & cut
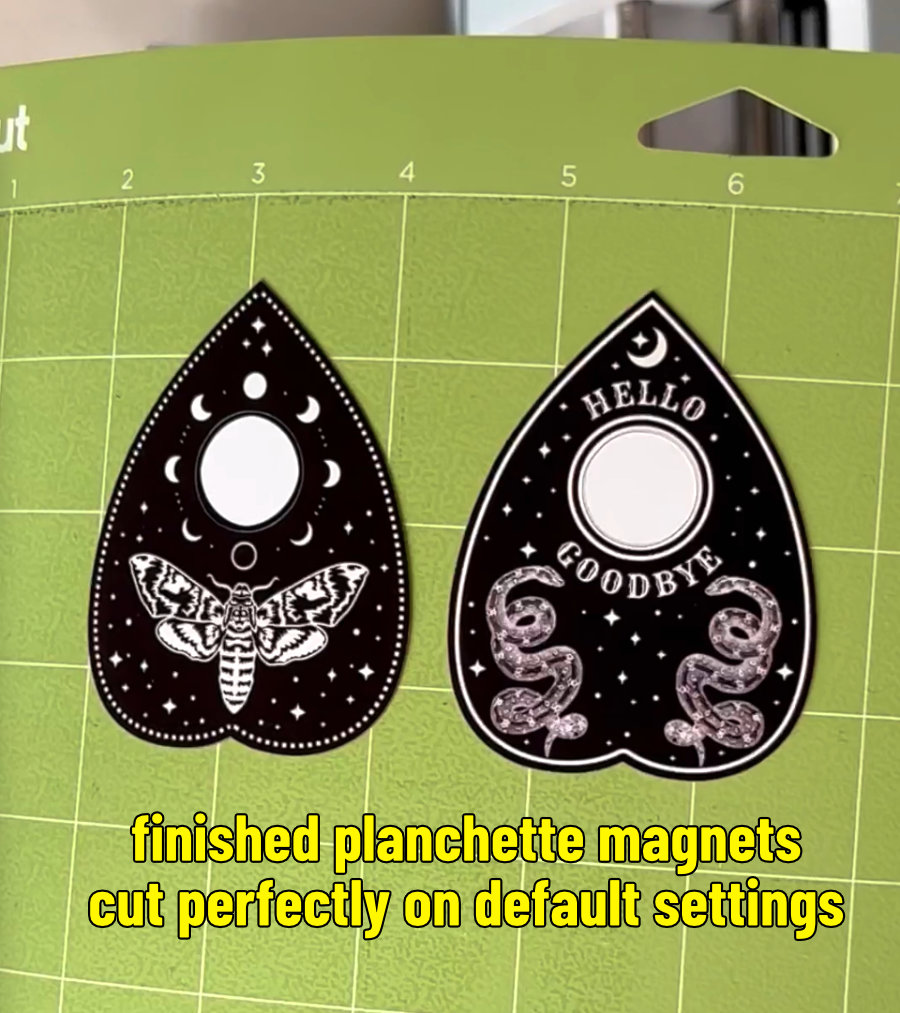
I printed my planchette designs on the magnet sheet, then they’re ready to cut.
Cut setting: Cricut Printable Magnet Sheet, Default pressure
Magnet sheet print & cut + overlay
I printed my planchette designs on the magnet sheet, then I smooth a piece of Oraguard laminate overtop of the images using a felted squeegee before cutting. It doesn’t matter if I cover the registration marks with the overlay, the Cricut reads them perfectly well.
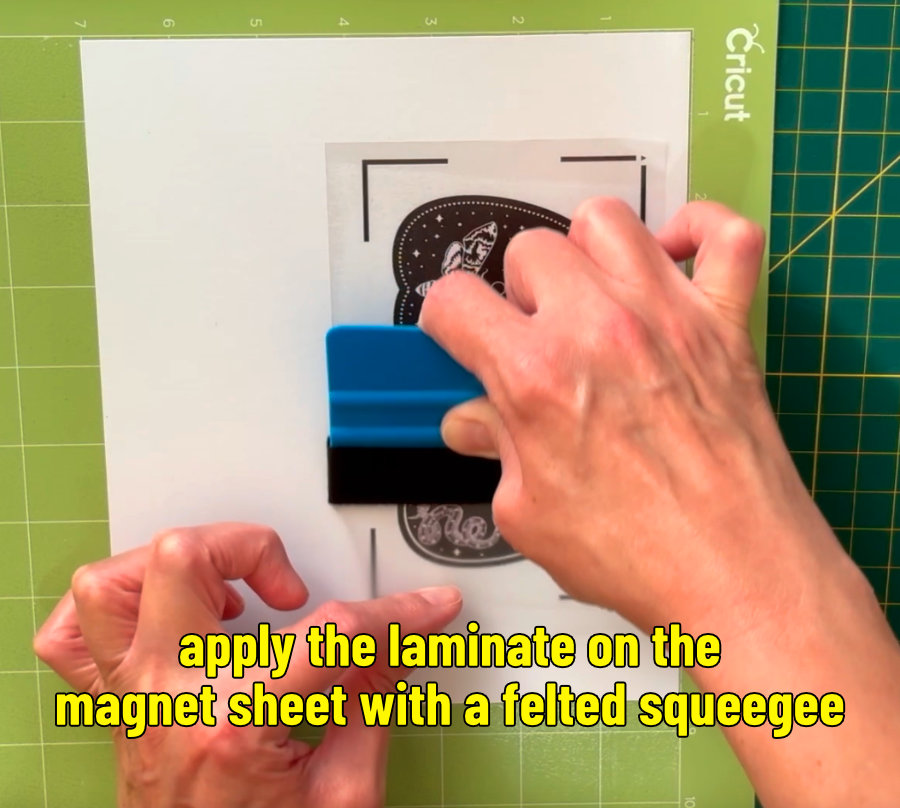
Cut setting: Cricut Printable Magnet Sheet, More pressure
3D planchette: printable vinyl + overlay + cardstock
Cut setting: Heavy Cardstock, More pressure, 2 passes
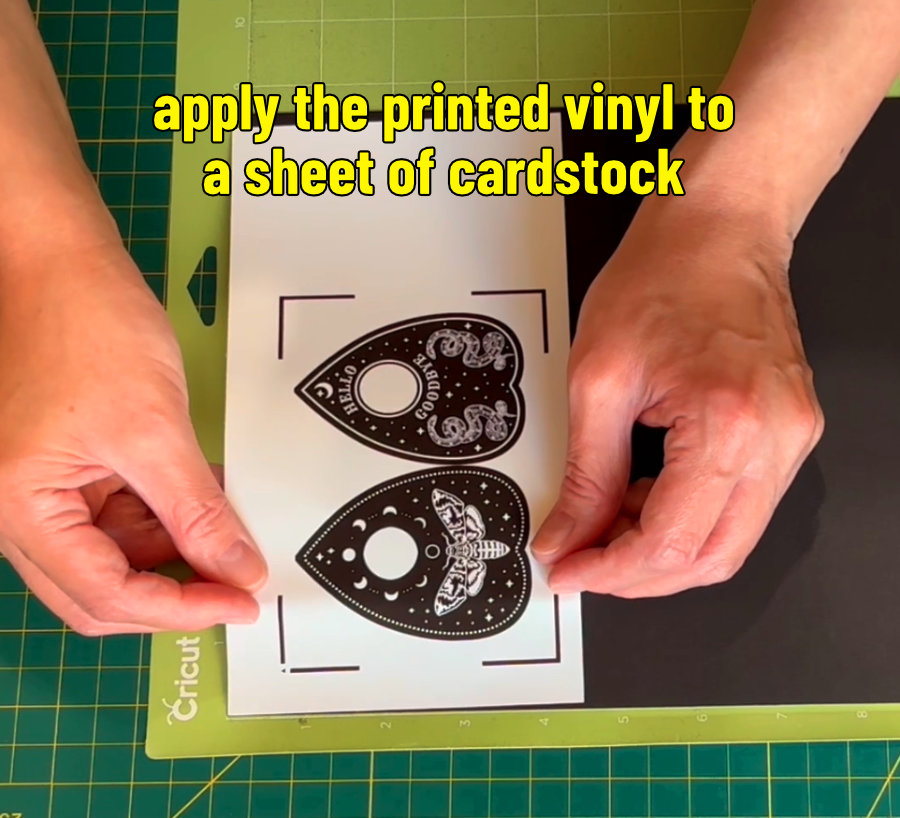
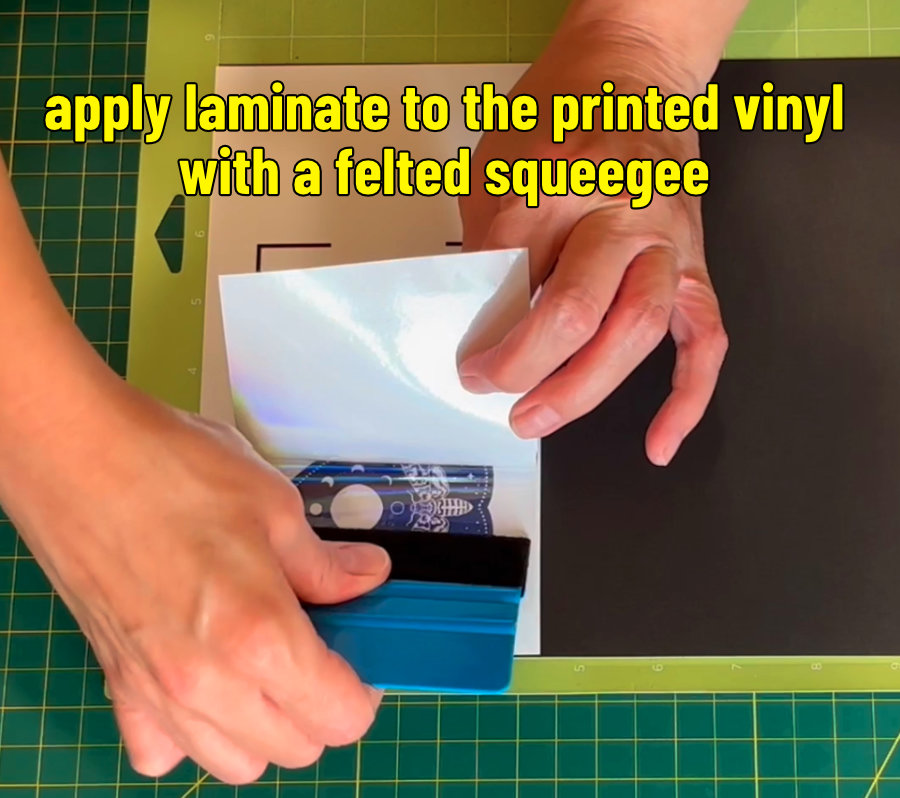
To make the 3D planchette magnets, I printed the images on Cricut matte Printable Vinyl instead of the magnet sheet. After printing, I layered the vinyl onto a piece of 100 lb black cardstock, then applied a piece of holographic laminate sheet overtop.
The layered planchette designs were cut using the Heavy Cardstock setting with more pressure, but it didn’t cut completely so I left the mat loaded and hit the Go button again.
I cut a bunch of the blank planchette SVGs out of the same 110 lb black cardstock and added 4 of those layers to each planchette. I finished the 3D designs by sticking a self-adhesive craft magnet to the bottom.
Printable magnet sheets: review of the results
So, the real test is on the fridge, right? I want to know how these magnets perform for our Halloween countdown calendar needs.
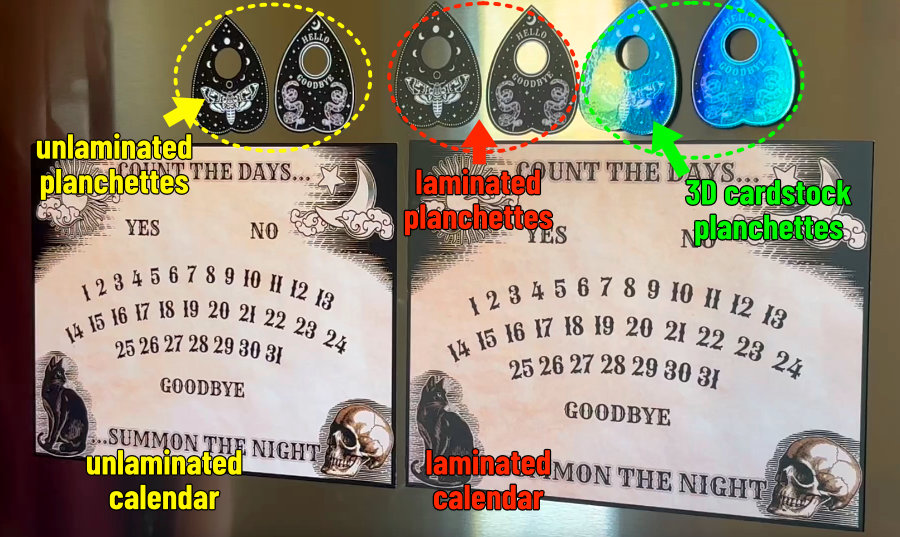
The calendars themselves both stay on the fridge nicely, but I definitely prefer the one with the laminate on top, because the planchette magnets slide so nicely on that one.
Comparing the 3 types of planchette magnets
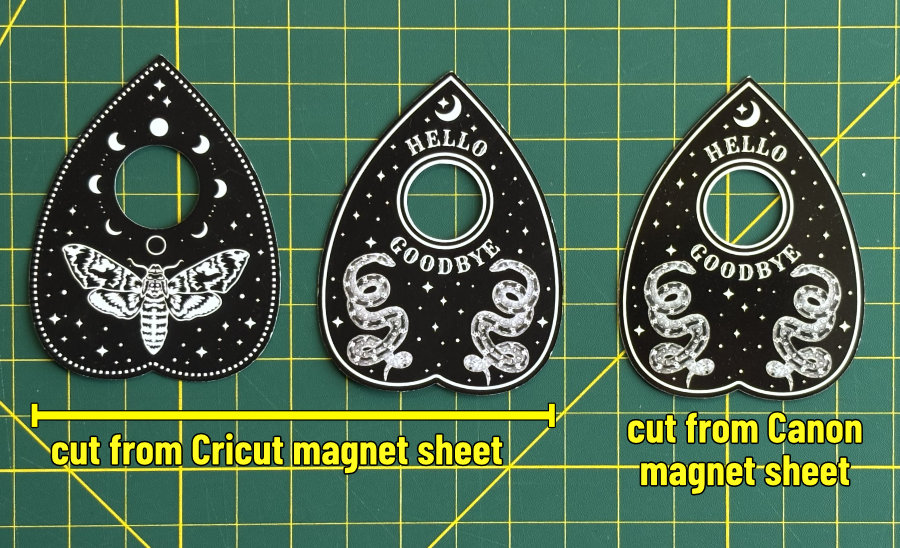
A couple of days after I made these, I noticed that the planchettes without a laminate had started to warp/curl a bit. But it’s not just the Cricut brand magnet sheets that do this. I printed and cut a planchette magnet out of Canon Magnetic Photo Paper (~same thickness as the Cricut sheets), and it also warped. The curling made the magnets fall off the countdown calendar.
Now a few days later, I’ve been keeping the magnets on the fridge, and that seems to have flattened them. After a few days of sitting on a metal surface, the magnets can stay on the calendar. I would still recommend laminating your planchette magnets.
TIP: to reduce warping, add a laminate layer on top. The planchettes that I printed and cut out of the magnet sheet that have an overlay definitely keep their shape better and stay on the calendar.
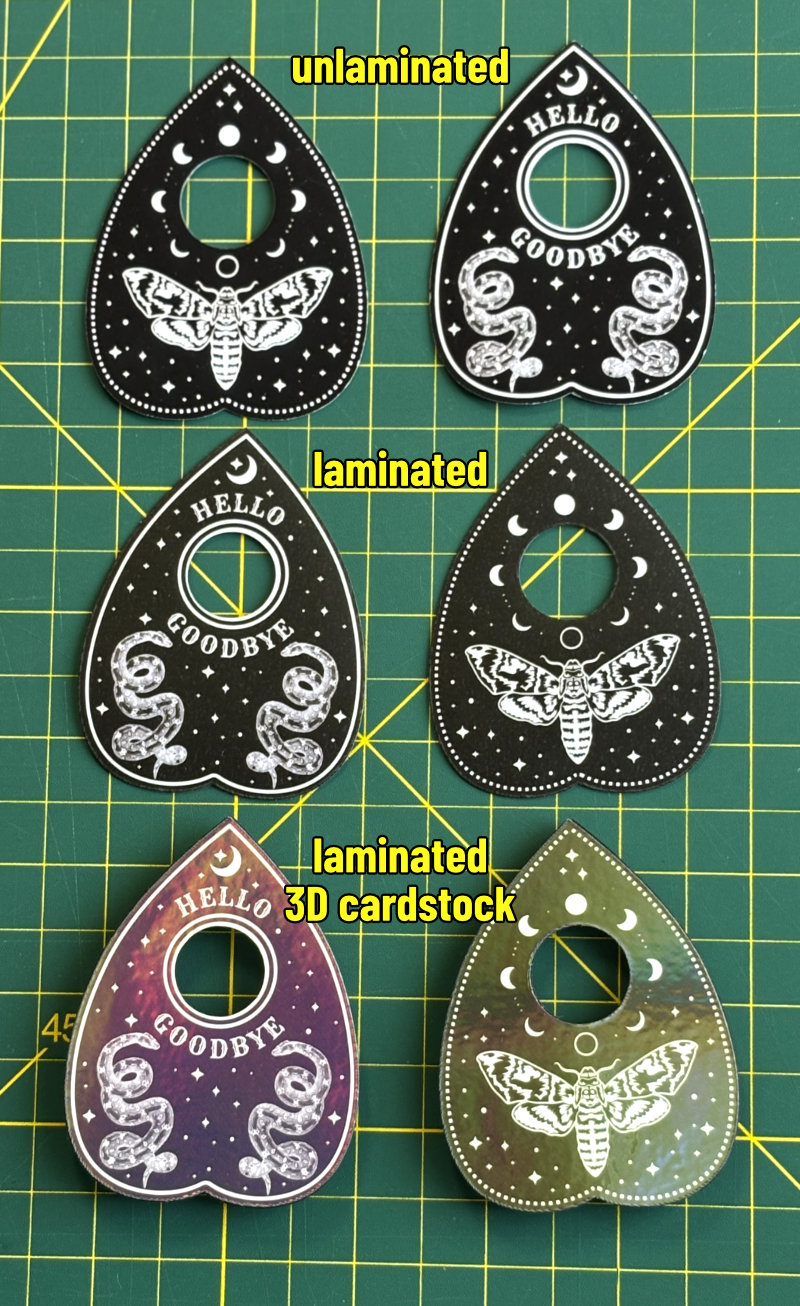
With that said, my favorite magnets for this project are the thick, 3D ones made with cardstock. These just look and feel cooler than the flat planchette magnets. Even though they’re a little more work to make, I love how they turned out. These are the ones I’m using on my own fridge with the countdown calendar for next month!
Before you go…
You might want to check out these other fun, free Halloween projects and resources:


