This article is part of our Print Then Cut section of the Mastering Cricut Design Space learning hub.
Do you want to be able to do double-sided Print then Cut projects in Cricut Design Space? All it takes is a little bit of setup and you will get perfectly aligned front and back every time!
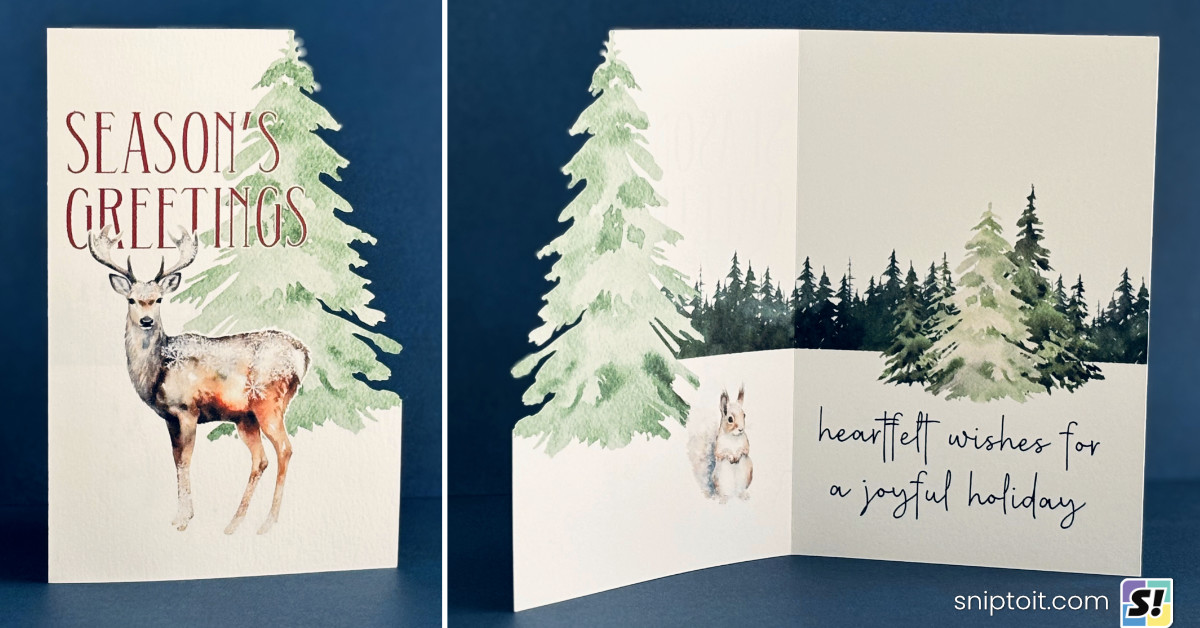
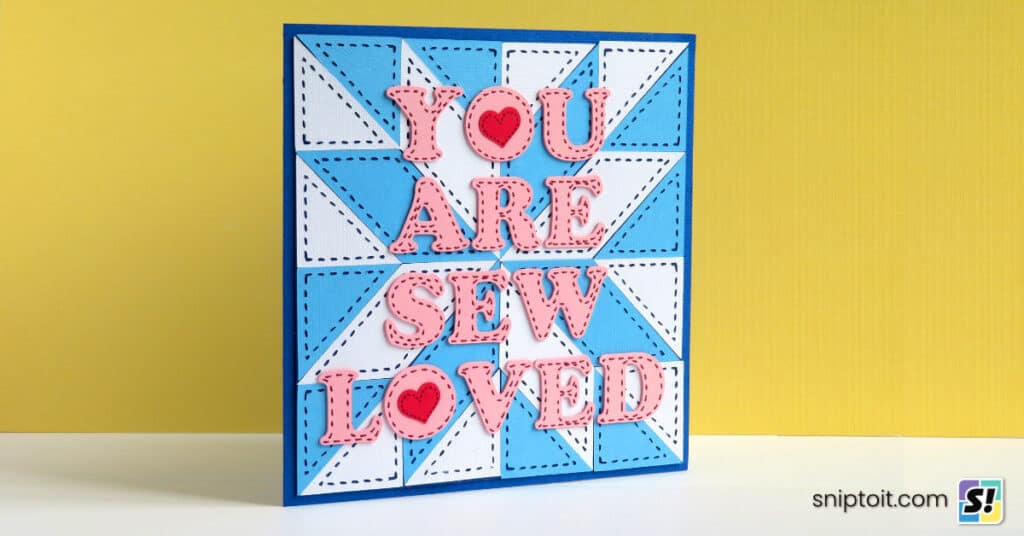
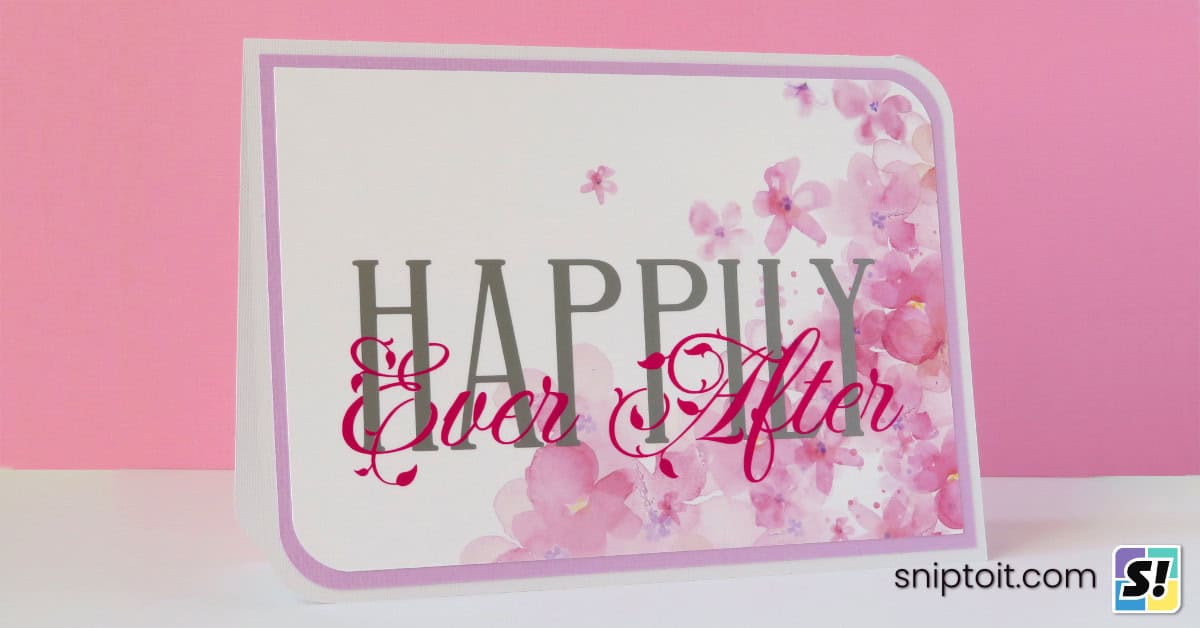
It’s super useful to be able to create bookmarks, gift tags, cards, ornaments, and more that are finished on both sides without having to glue 2 pieces of cardstock together. By the end of this tutorial, you’ll know how to make double-sided projects with one design or a whole page of different designs, even if they’re irregular shapes and have different images on the front and back.
Looking for the free Max Print then Cut Area SVG? Download it from our Resource Library.
Understanding double-sided printing
To do double-sided printing, you’ll run the paper through your printer twice, once for the front, and once for the back. This requires lining up the front and the back in the same position, on opposite sides of the paper.
That means that the position of the images on the paper need to be mirrored. For example, if your first image prints in the top left corner of the page, the matching image on the back needs to print in the top right corner, so when you flip the page, they align perfectly.

You can see how these match up when the page is flipped side to side; that’s what we’re setting up in Design Space.
The challenge is that Cricut automatically repositions images on the mat to save space, so you can’t rely on where Design Space places your images by default.
We need to lock in the positions before we get to the Mat Preview screen, and that’s what I’m going to show you how to do next.
Setting up your print then cut file
For my examples, I’m using artwork from Creative Fabrica that has both front and back images for the same figure. I’ll start simple, with one design, then I’ll show you how to do a full sheet of multiple images.
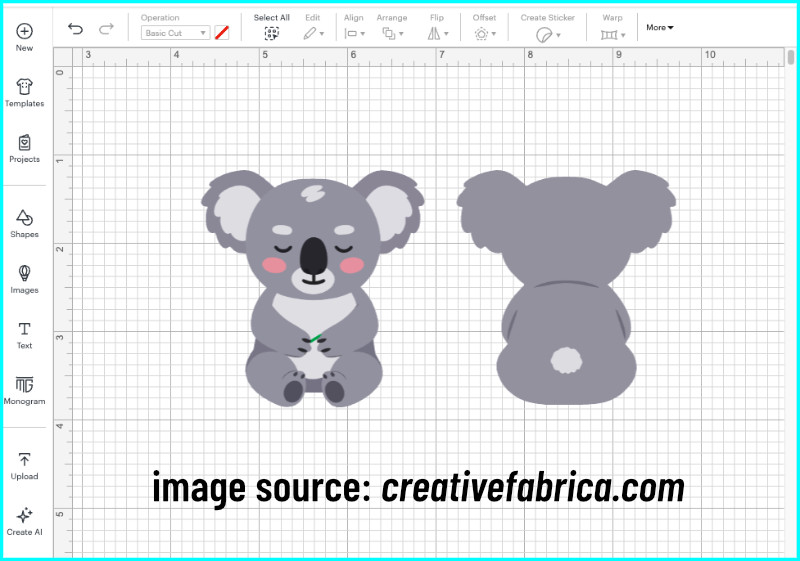
Make sure the front and back images are the same size, with approximately the same cut outline.
How Design Space sets up Print Then Cut
Now if I click Make, both Print Then Cut images end up on the same sheet. I could move one of these to a second mat, but it’s almost impossible to align them perfectly, especially if they’re irregular shapes.

Instead, I’m going to attach each image to a larger shape, which will solve the problem in 2 ways:
- Design Space will be forced to separate them onto different mats
- It locks each image’s position so Design Space can’t move or rotate them
Set up your images to outsmart Design Space
Add a square to the canvas and change the color to white. Set the width to 7.44″ (this is the maximum width for Print Then Cut), and set the height to 7.325″. This shape will now fill almost the entire printable area.
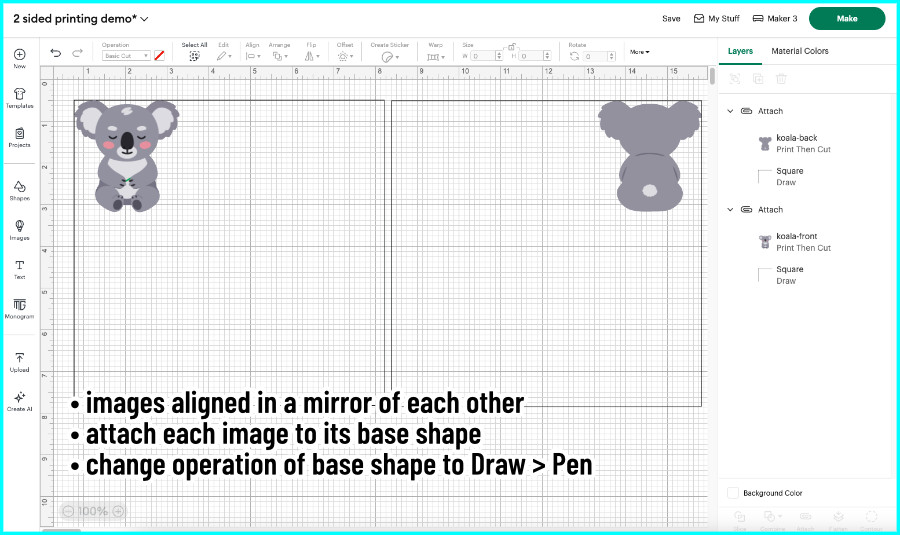
Duplicate the square so you have one to attach to the front image and one for the back. Now I’m going to position the front and back images to mirror one another, setting up a perfect front/back print.
- Select the front image and one of the squares. Open the Align tool, and choose Align Top and Align Left
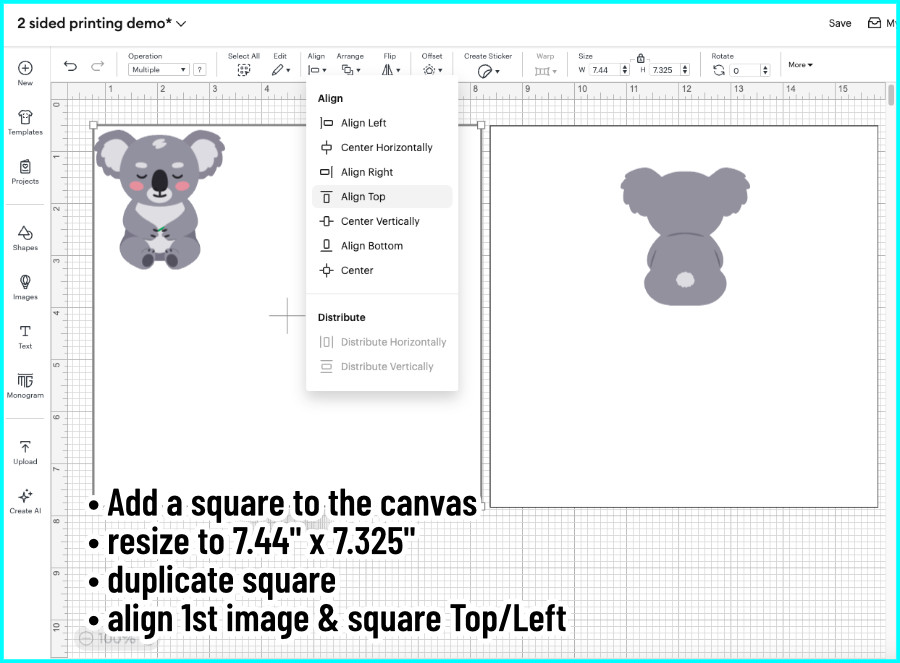
- Select the back image and the second square, then click Align Top and Align Right
- Attach each image to its square
- change the Operation for the white square to Draw so it won’t get cut when you do your print & cut
It’s not important that you always choose Top/Left, Top/Right alignment, you can easily choose top center, bottom left right or center, or even middle middle. As long as each image position mirrors the other one, it will work.
Printing the front and back
Now when I click Make, the images are on separate mats, locked in position so Design Space can’t move or rotate them.
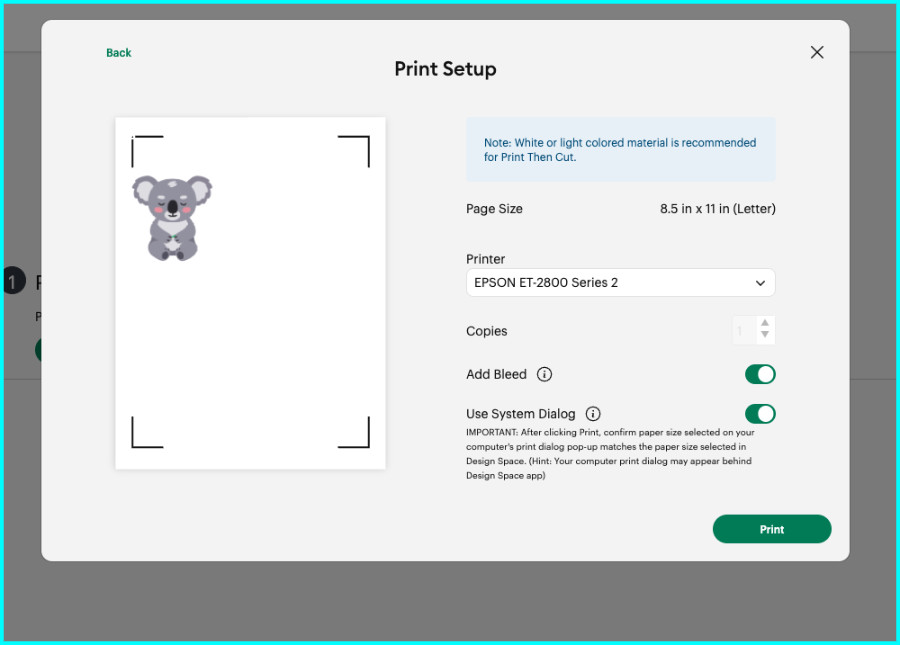
Select the mat with your front image, click Continue and then Send to Printer.
- turn Bleed on
- open the System Dialog so you can choose settings for your own printer (I’m using the plain paper setting and fine quality for this demo – choose high/best quality for a real project)
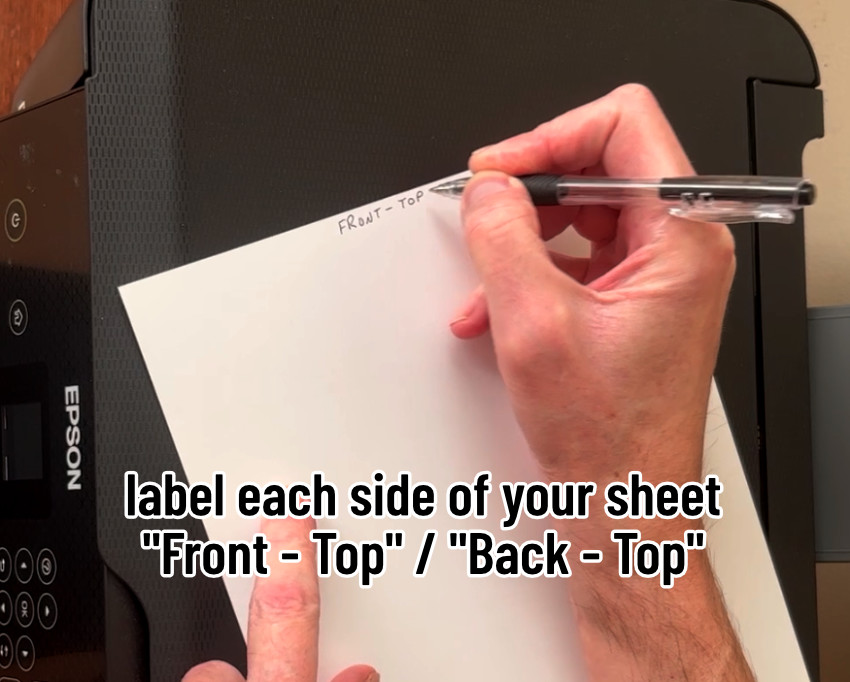
Before I print, I want to talk about how the page needs to be physically flipped when you print the second side. I’m going to label the front and back top of the page with a pen to make it easier to follow.
Rear-feed printers
Your inkjet printer is either going to load from the back OR use a front paper tray. The Epson I’m using is a rear feed printer, so I’m going to show you how to use this kind of printer first.
When I print, I load my sheet upside down, and the image gets printed headfirst, coming out in the bottom tray.


To print the back image, I will flip this side-to-side and feed it in upside down again.
Go back to the Set Load and Go screen, and instead of choosing a cut setting for the front printed image, click on the Mat with the back image. After clicking Send to Printer, I add a bleed, use the system dialog and print.

Now my design is ready to cut!
Front-loading printers
If you have a printer with a front loading tray, it will load like this:
- the top of the sheet will be loaded in the bottom tray, facing toward the printer, the front will be facing up

- the printed sheet will come out at the top, usually face down, with the top pointing toward you
To print the back of the image, you don’t have to flip the page, you just have to point the top of the blank side toward the printer again.

I recommend writing front, back, and top on your page until you get the hang of this. Don’t be too upset if you mess it up. We’re printing on cardstock here, not printable vinyl or sticker sheets, so mistakes are pretty cheap!
Cut the image
Now that both sides are printed, let’s cut! I’m going to load the sheet on the cutting mat with the BACK SIDE facing up (since it was the last image printed).

I’m using the Medium Cardstock setting. Just ignore it when Design Space prompts you to load a pen, we don’t want to draw the attached guide squares.
Setting up multiple images on one sheet
Now let’s take it up a notch with multiple designs per page. There are 2 ways you can do this:
- use the same square guide shape and use the align tool as before, OR
- use the whole print then cut area and set up your sheet by duplicating and mirroring
Option 1: using the square guide and Align
Add a square to the canvas, change it to white, and size it to 7.44″ wide and 7.325″ high. Duplicate the guide square.
Place your front images on the first square and use Align to arrange them at top left/top right/bottom left/bottom right and so on.

On the second guide square, use Align to mirror each of the front image placements with the back images. For example, if a front image was placed at bottom left, align the back image at bottom right.
Attach each set of images to their guide square. Set the square’s Operation to Draw. Now you’re ready to hit the Make button!
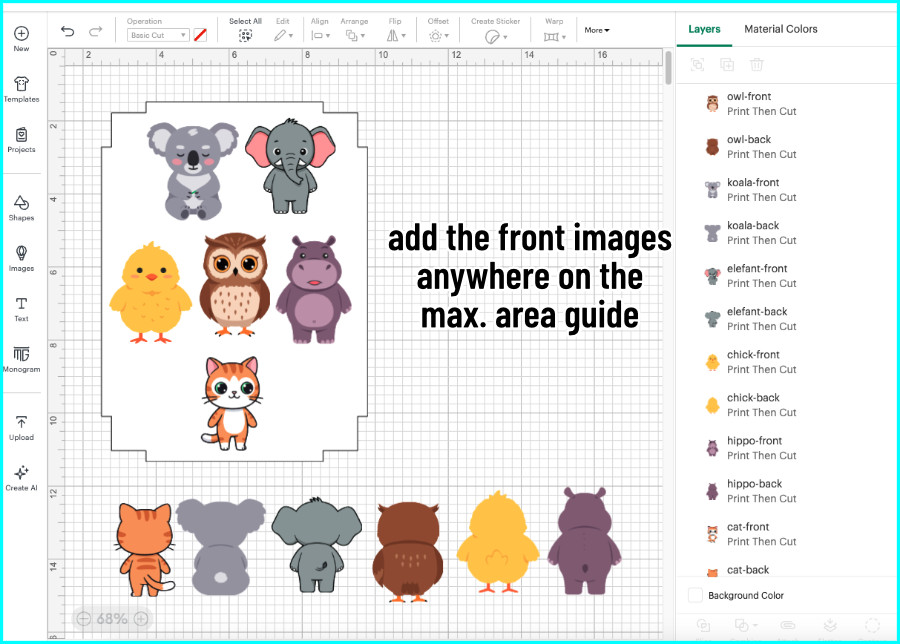
Option 2: using the max print & cut area guide
If you want to use the full Print then Cut area, you’ll have to use a guide shape for that, too. There are a few of these print then cut area guides in the Design Space community, or you can download my Maximum Print then Cut Area Guide SVG from our Resource Library.
Update: I have included a Max Print then Cut Area Guide for A4 paper, also in the Resource Library.
Add the guide shape to the Canvas and place your front images anywhere you want.
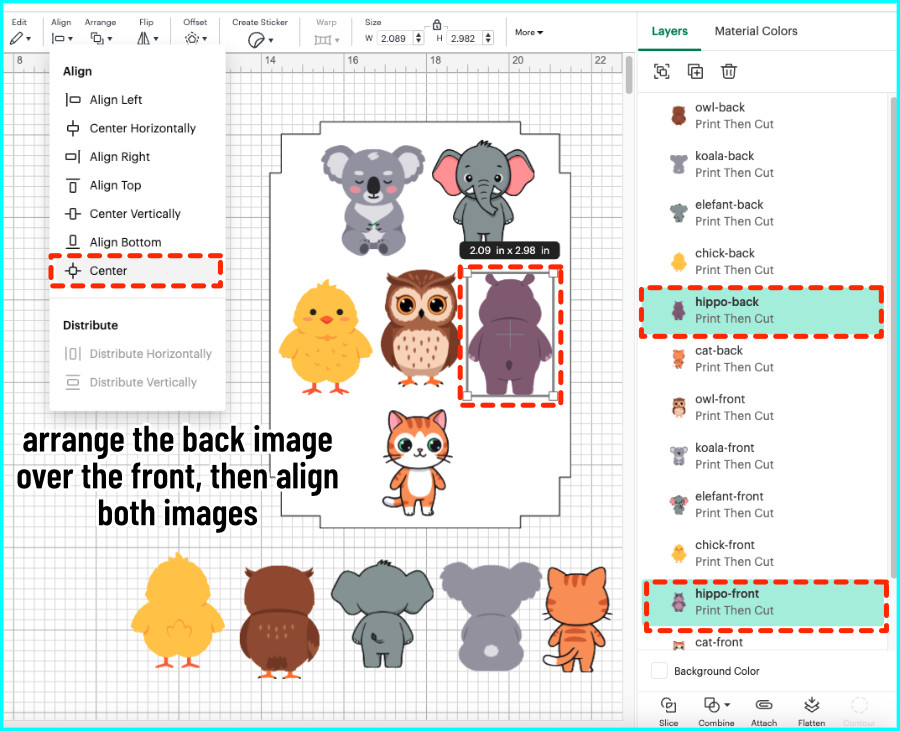
Select all of your corresponding back images, then:
- Flip Horizontally (this will allow the back images to line up perfectly with their front counterparts)
- select Bring to Front to make sure the back images will be at the top of the Layers Panel

- place each back image over its matching front image, select both images, and use Align > Center to match them perfectly
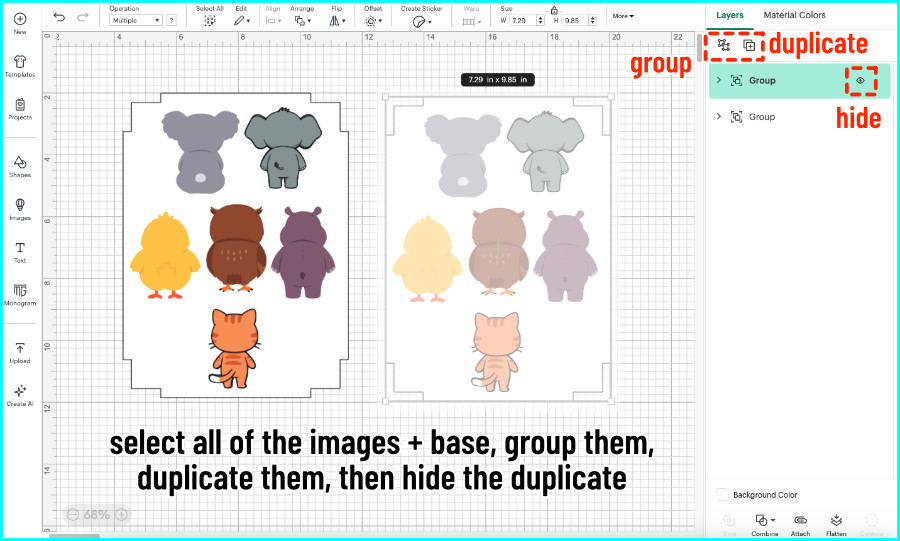
Once every image pair has been aligned, select everything (all images and the guide shape). Click Group, then Duplicate, then Hide that group in the Layers Panel (click the eye icon next to the group).
Now I’m going to remove all the back images from the front image sheet, and all the front images from the back image sheet.
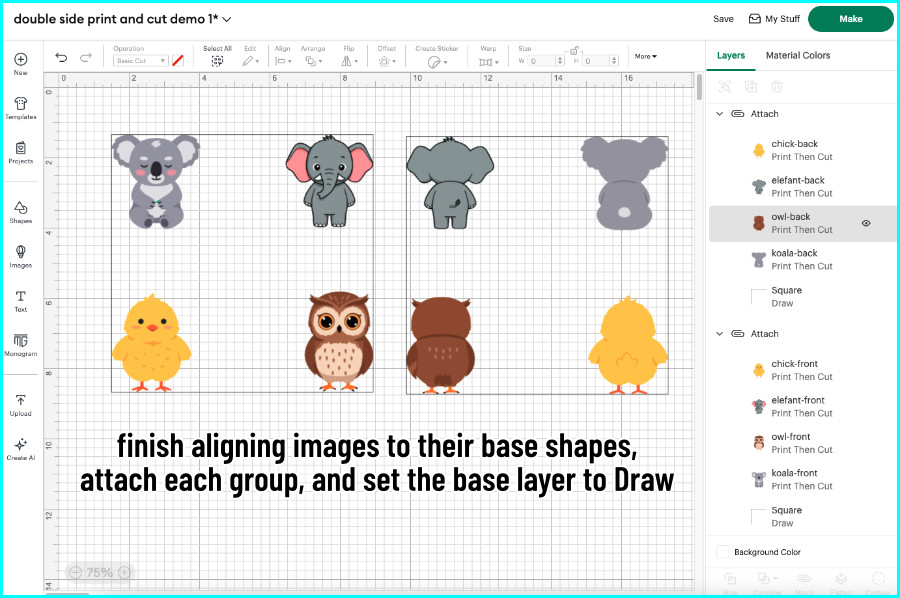
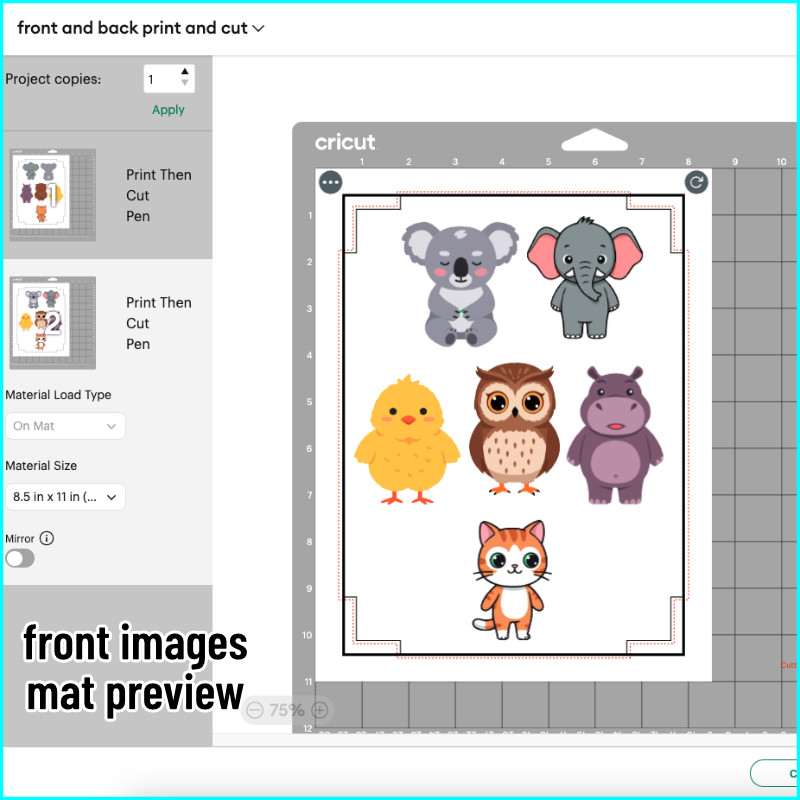
Create the sheet of front images
First, I’ll create a sheet of front images by deleting all the back images:
- in the Layers Panel, open the first image Group (click on the > next to the Group) so you see a full list of all the images
- all the back images will be listed together ABOVE the front images
- delete all the back images
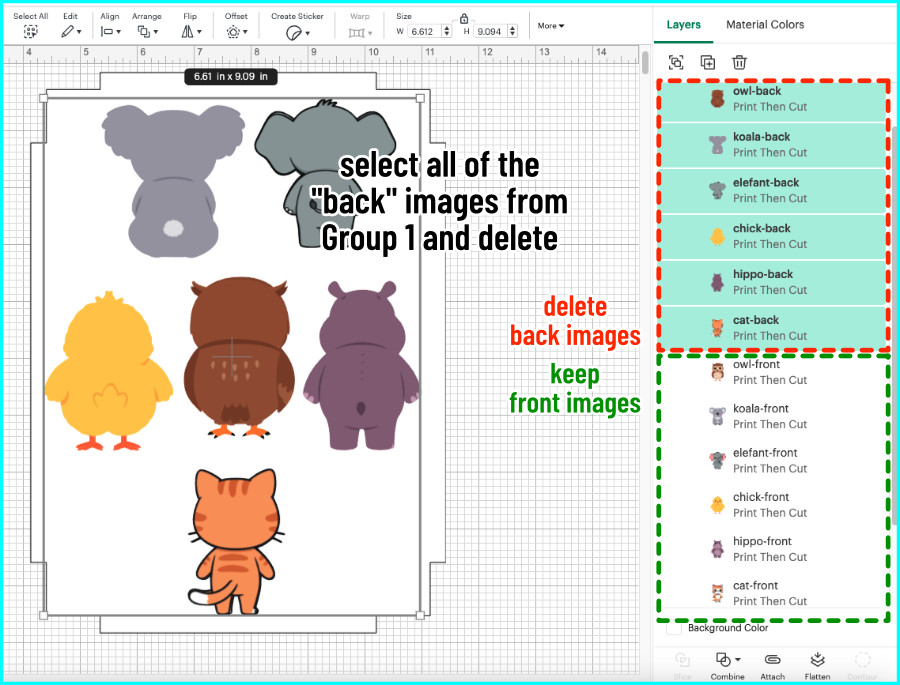
- when only the front images remain on the canvas, select all of the images and the guide shape and Attach
- change the Operation for the guide shape to Draw

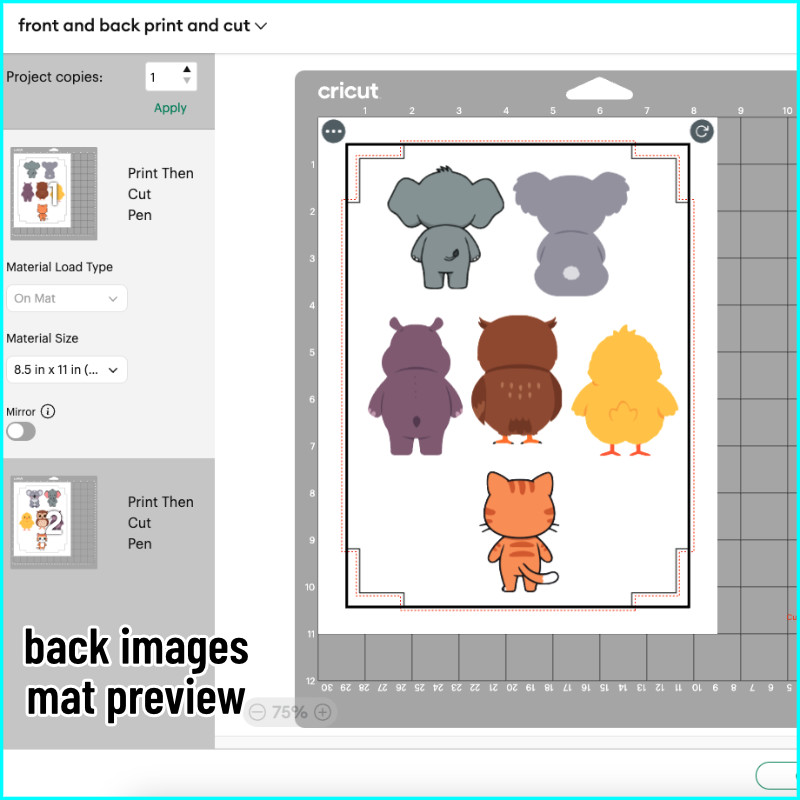
Create the sheet of back images
Now I’ll create a sheet of back images by deleting all the front images:
- in the Layers Panel, click on the eye icon next to the second group of images to Unhide the group
- open the Group and find the front images
- all the front images will be listed together BELOW the back images, just like with the other sheet
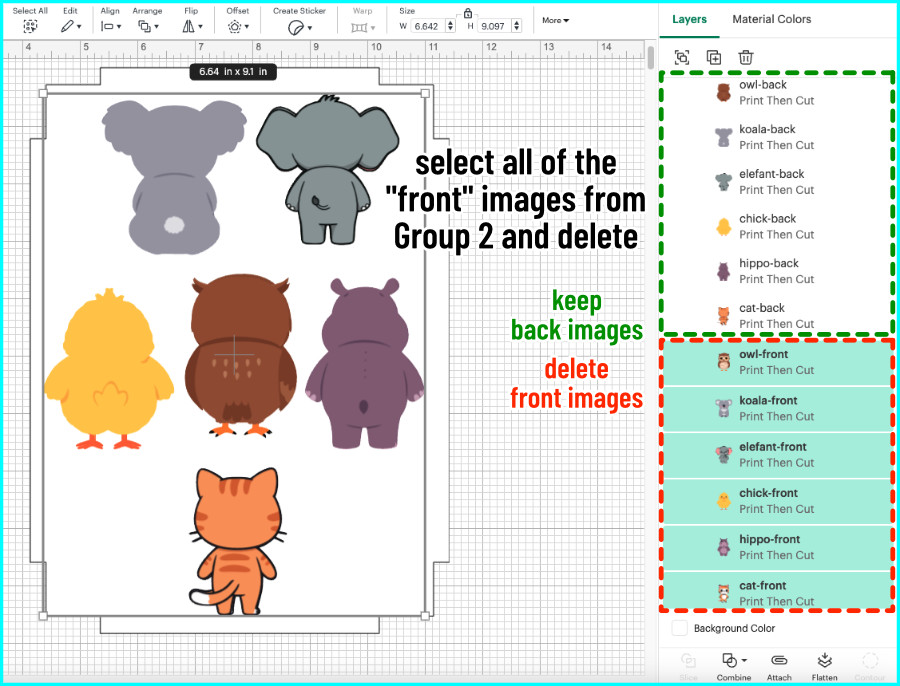
- delete all the front images
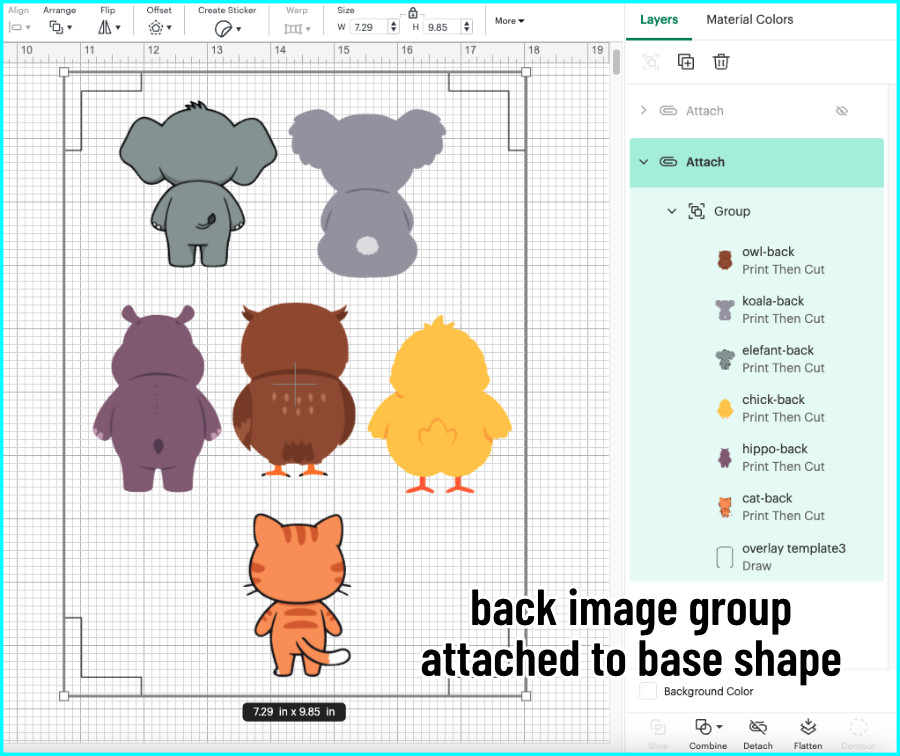
- when only the back images remain, select all of the images and guide, and Attach
- with everything still selected, Flip Horizontally to return all the images to the correct orientation
- change the Operation for the guide shape to Draw
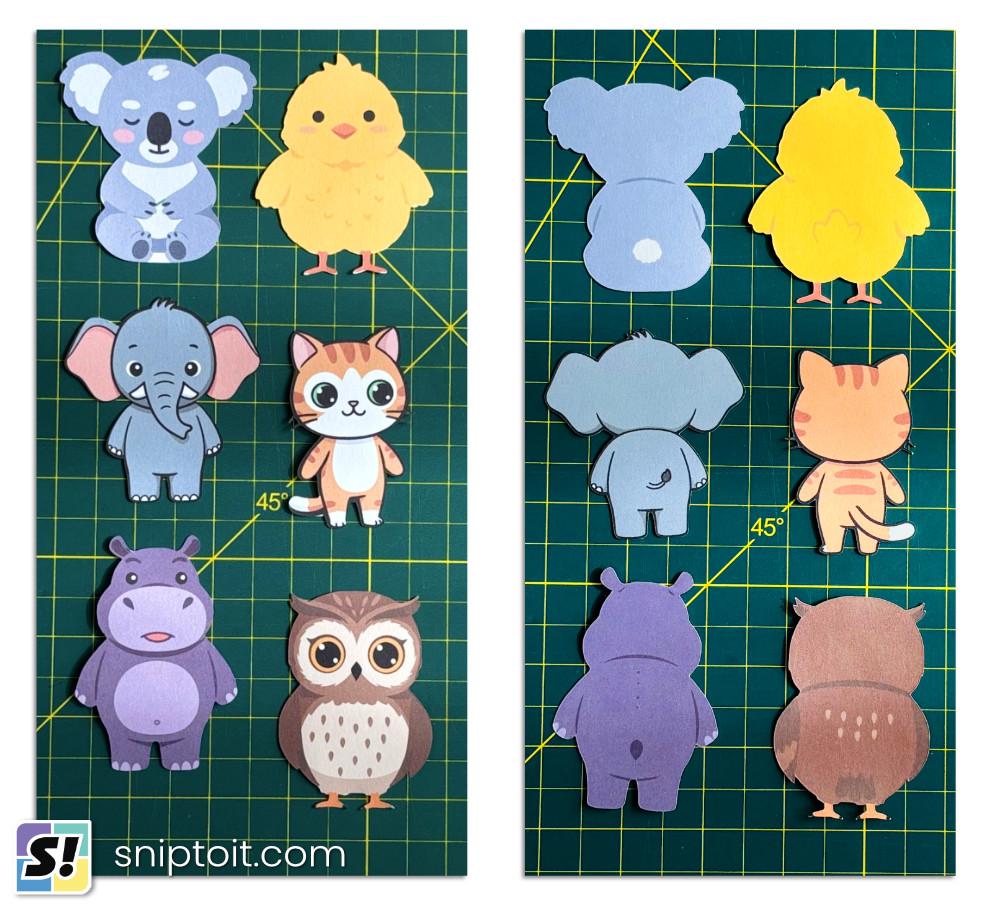
When I go to Make the project, there are now two perfectly mirrored mats. I’ll print the front images, reload to print the backs, then I’m ready to cut!
Cut results: be careful of front/back mismatches!
Remember: when you cut after printing, you are using only ONE cut line for both front and back. This means that if there are any mismatches between the front and back designs, you may end up with a few mistakes.
For the most part, the designs I used for this tutorial cut very nicely – even the cat’s whiskers were a perfect front/back match!
But there were a few areas where the front and back designs weren’t a perfect fit. The feet of both the chick and the owl show 3 toes at the front, but cutting from the back I cut off the front details. I could have included more details if I had printed the backs first, then printed and cut from the front.
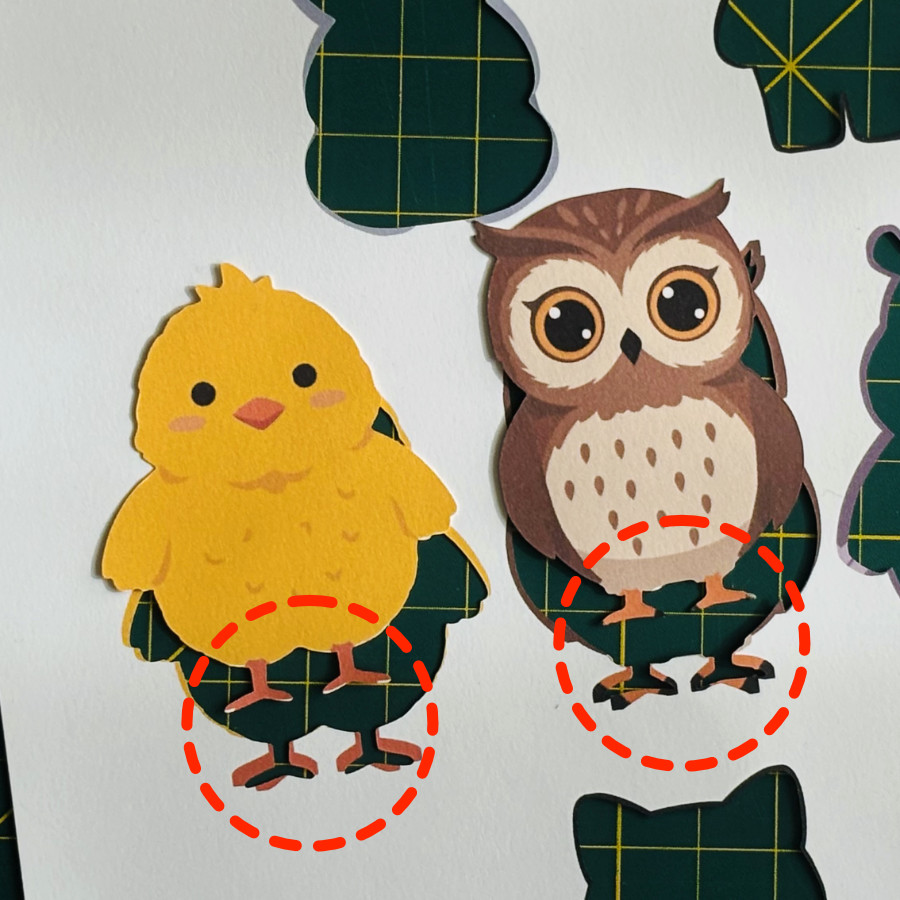
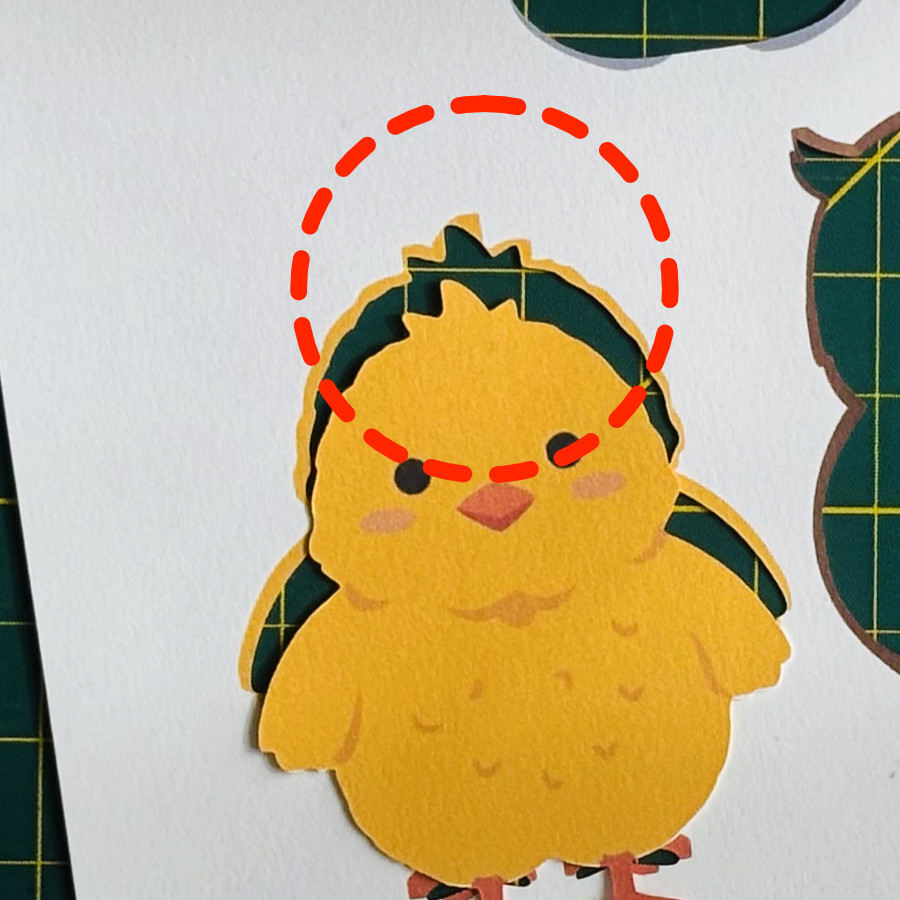
The chick’s head feathers were also was a bit of a mismatch, with the center spike facing different directions front and back. But in this case, the mismatch can’t be seen because I turned on the bleed when printing.
So here are a few considerations:
- if there is a mismatch, decide which cut line you want to use – front or back – and then print and cut that side last
- you should always turn on bleed when printing to cover any small mismatches
- you can always use an offset or flatten to a shape to get rid of mismatched cut lines between images
So now you’ve mastered double-sided print & cut in Design Space! Go ahead and make those gift tags, bookmarks, and cards like a pro!
Before you go…
You might enjoy some of our other more advanced Design Space tutorials: