This tutorial is part of the advanced techniques section of the Mastering Cricut Design Space learning hub.
In this tutorial, I’m going to show you how to make a faux stitch line in Design Space, using ONLY Design Space.
Unlike other hacks on this topic, my Cricut stitch effect method works on any shape, around corners, and on text and images! No using manual dies or cobbling together dashes – this is fully custom to any design you want!
If you can take a screenshot, you can do this, so let me show you this awesome new technique!
(Note: this technique only works in Windows or Mac; it will not work on Design Space for mobile devices or tablets)
Making a faux stitch line in Design Space: overview
It’s easy to create a stitch line in vector editor programs like Illustrator, Affinity, or Inkscape, but you don’t have to master (or pay for!) any of these software platforms to add a faux stitch to your Design Space projects.
My technique is simple:
- Create an Offset of your design
- Convert the offset to a Score line
- Convert the score line to a cut file
Note: This tutorial is demonstrated using the Live version of Design Space (v9.29.70) on a desktop computer. This method has also been successfully tested in the Beta version (v9.31.85). It has not been tested on an iPad or other mobile device.
Create an Offset
On the Design Space canvas, add the shape, image or text you want to add the stitch line to. To show you how unique your stitch line can be, I’m choosing a butterfly image (#M10DA9B21 from the DS library).
Highlight the image and open the Offset tool. The outline of the offset will be the edge of the stitch line. We’re going to add an internal offset which will be smaller than the cut shape. To add this internal offset, enter a negative number or drag the slider to the left.
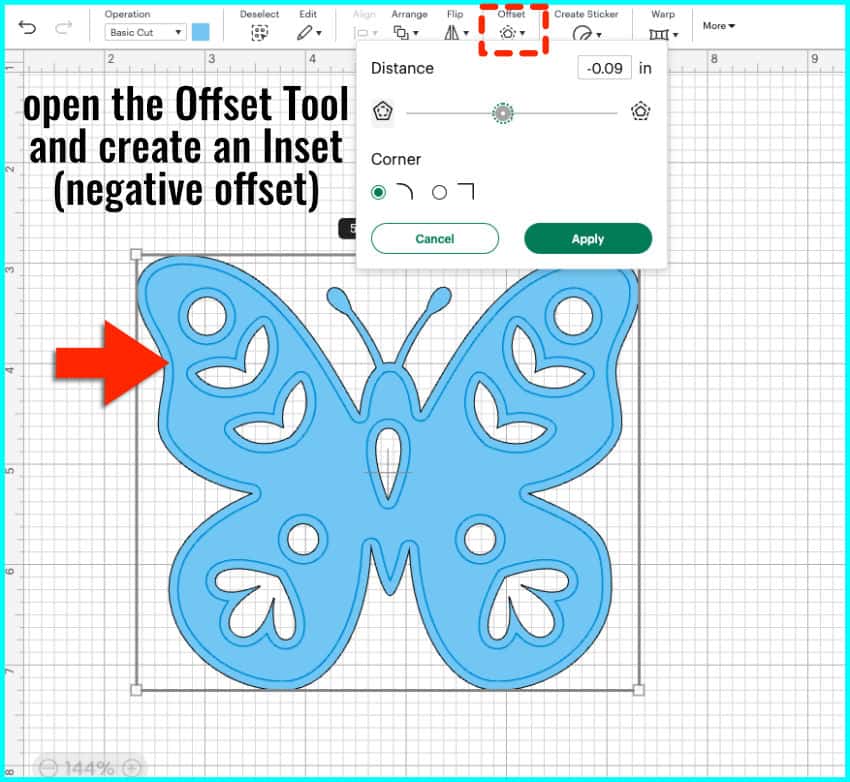
Add enough of an inset that there will be a decent margin between your stitch line and the outer cut line of your image/text/shape.
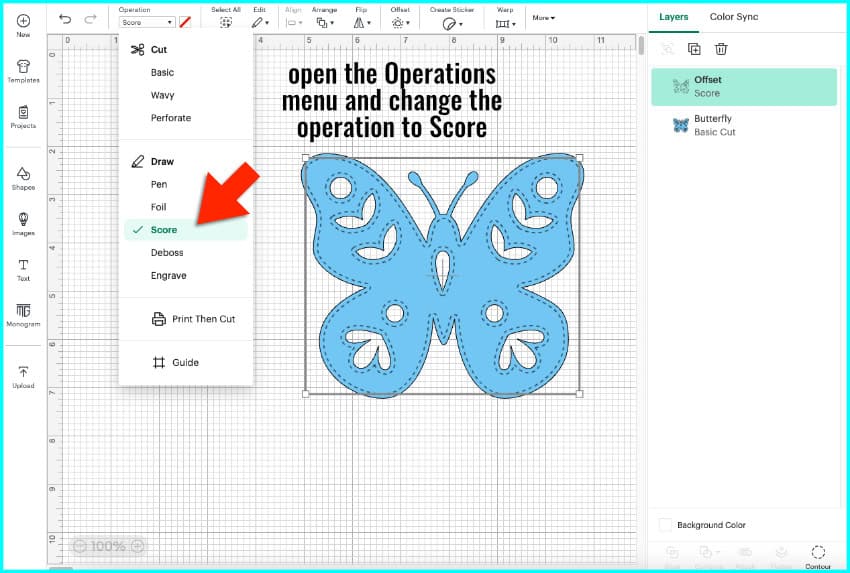
Convert to Score line
Select the offset shape and open the Operation menu. Change the Operation type to Score.
How does the score line work?
The score line is going to be the basis for the stitch line, and we are going to adjust the number of stitches by zooming in. (No, my fellow Cricuteers, this score line will *not* be a solid line when the machine makes the project – trust me!)
The Score line is dynamic. If you zoom out and the object on the canvas is small, Design Space shows you fewer dashes making up the score line. When you zoom in, Design Space shows you more dashes.
Here’s the big secret: You create a score line where you want the stitch line to appear, then you convert the dashed line to a cut file!
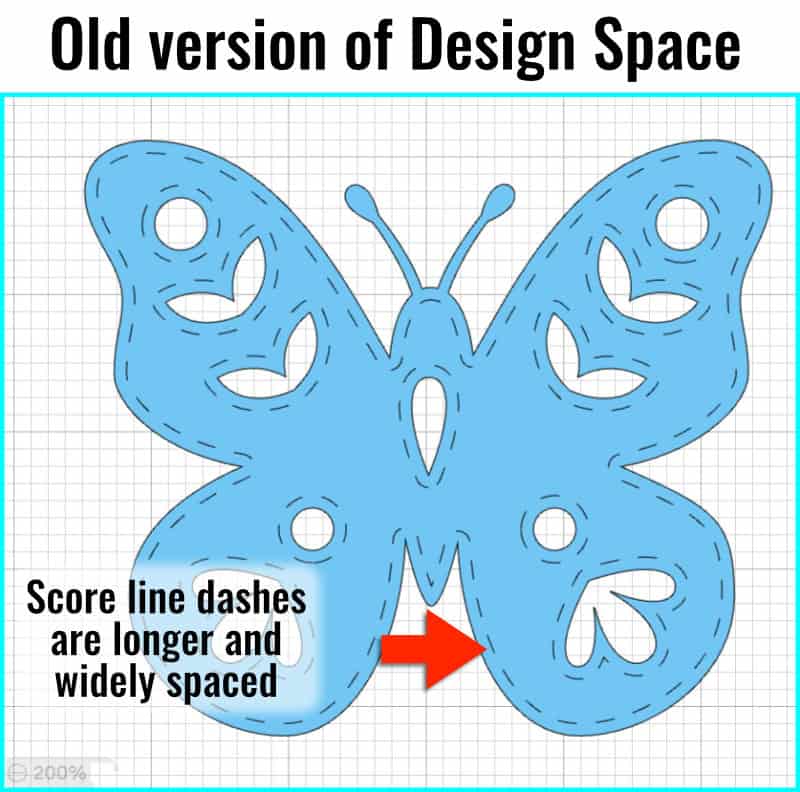
How have changes to Design Space affected the score line?
In the old version of Design Space, the default dashes in the score line were longer and widely spaced, which allowed for a ton of options when adjusting dash size. When you zoomed in, you’d see more dashes, and it was simple to make a clean cut file based on those dashes.
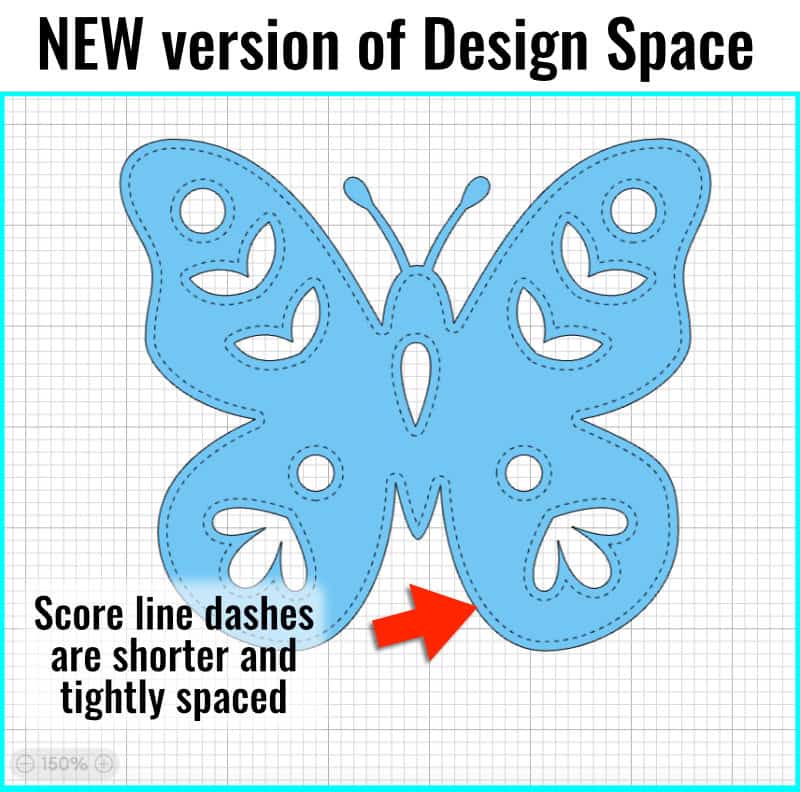
Now, the default score line is made up of tiny little dashes that are densely packed, which has severely limited how much you can adjust the dashes and still create a decent cut file.
A new solution off the Canvas: adjust the score line in the Mat Preview
Luckily for us, the Design Space developers didn’t mess with the score line OFF the canvas. Once you go into the Mat Preview screen, the score line reverts back to that older, better version.
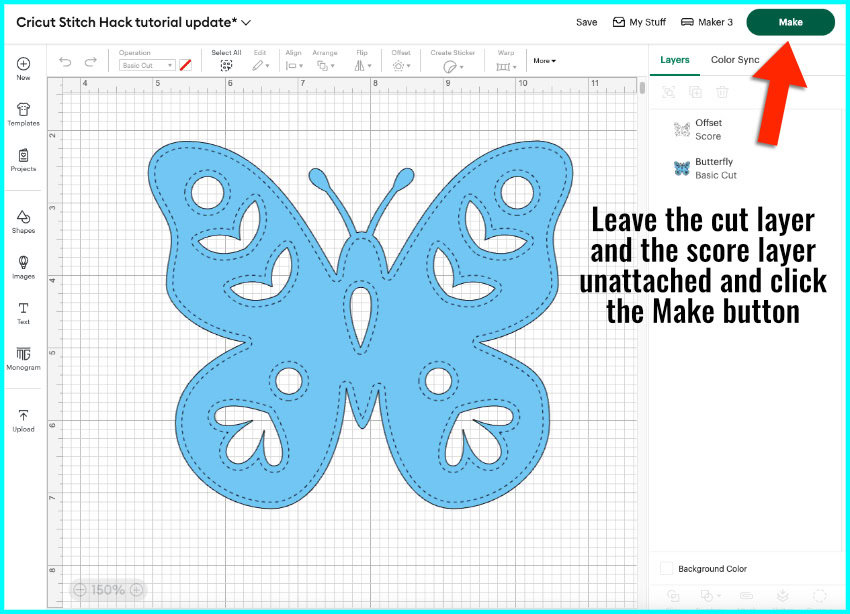
On the canvas, I have the butterfly image and the score line as unattached layers. I click the Make button to go to the Mat preview.
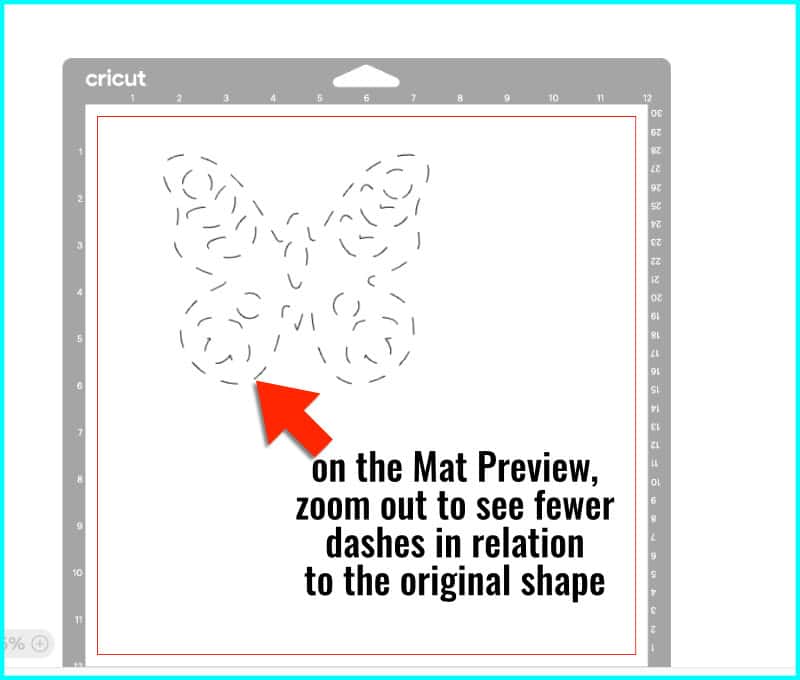
The score shape should be by itself on the white mat. It looks like it used to, with fewer, widely-spaced dashes.
- If you zoom out and make the butterfly smaller, you will see fewer dashes making up the line, appearing larger in relation to the original shape.
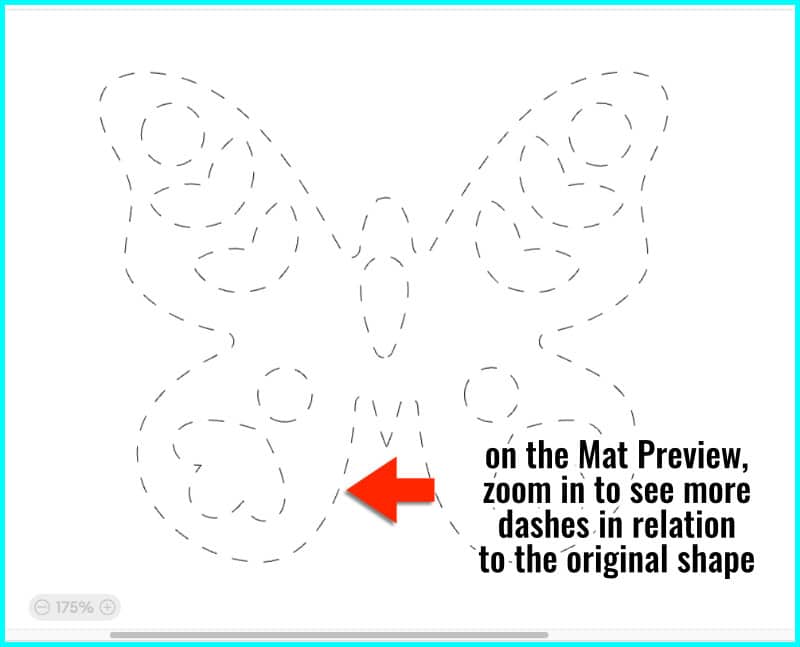
- If you zoom in and make the butterfly larger, you will see more dashes added to the line, appearing smaller in relation to the original shape.
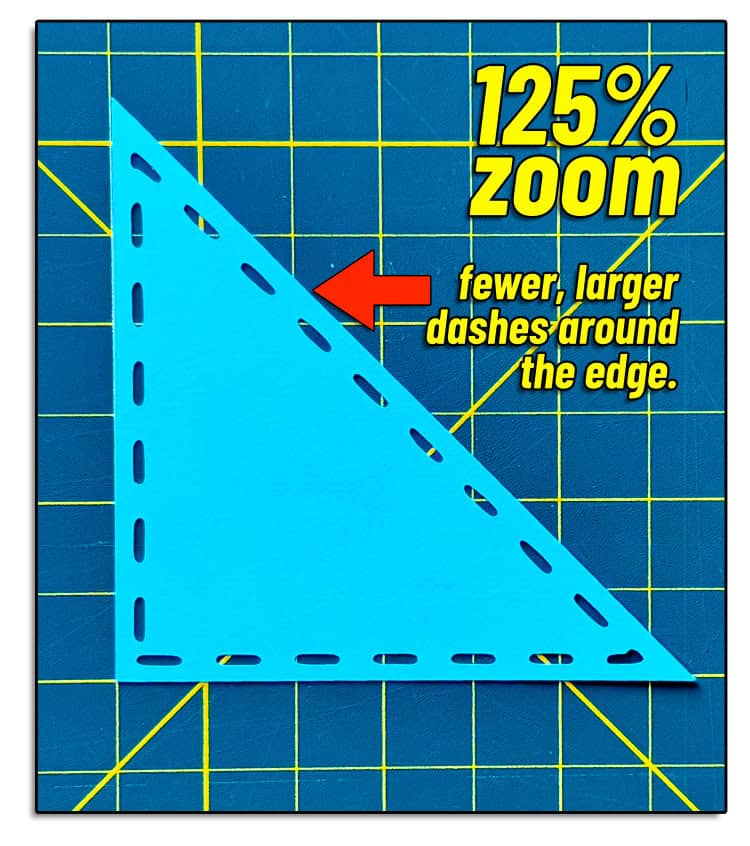
Here’s what that looks like when you complete a cut. These two triangles have stitch lines created at different zoom levels. The one on the left was zoomed in at 125% when the dashed line was captured, and the one on the right at 250%. You can see how much smaller and tighter the stitches look as you increase the magnification.

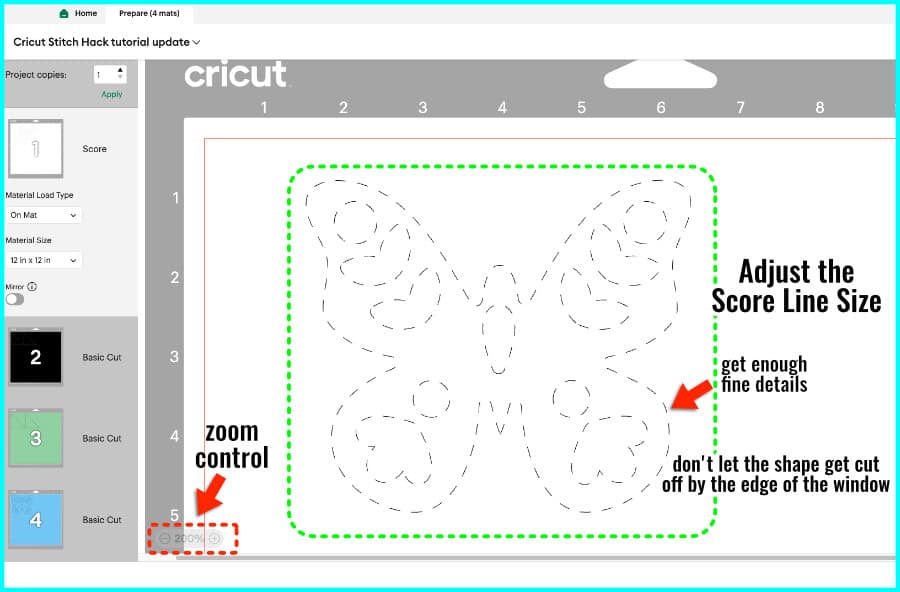
Adjust your score line to add dashes
With the image in the center of the mat preview, zoom in until you get the overall look you want for the stitch line. Keep these things in mind:
- you want enough dashes to look like a stitch line, but not too many tiny stitches that can’t be cut cleanly
- make sure the dashes look good around corners or bends
- if there are internal cuts, the dashes around them should not overlap with other parts of the score line
- your entire score line must remain visible on the Mat Preview, with no parts cut off
- if you want more dashes but you cut off part of your design by zooming in, you may have to break the design into smaller components (using the Contour tool)
Once you finish zooming in to get the dashed line looking right, make sure you click off the score line to get rid of the grid lines on the mat (the dashed line will have a blank white background).
The Key Moment: Take a screenshot
We know that the score line appears as a dashed line in Design Space but it ends up as a solid line when we use our machine. How do we get Design Space to turn that dashed line on the screen to a dashed cut line for our Cricut?
Here’s the secret to this stitch line hack: we take a screenshot of the score line and convert that image to a vector right in Design Space.
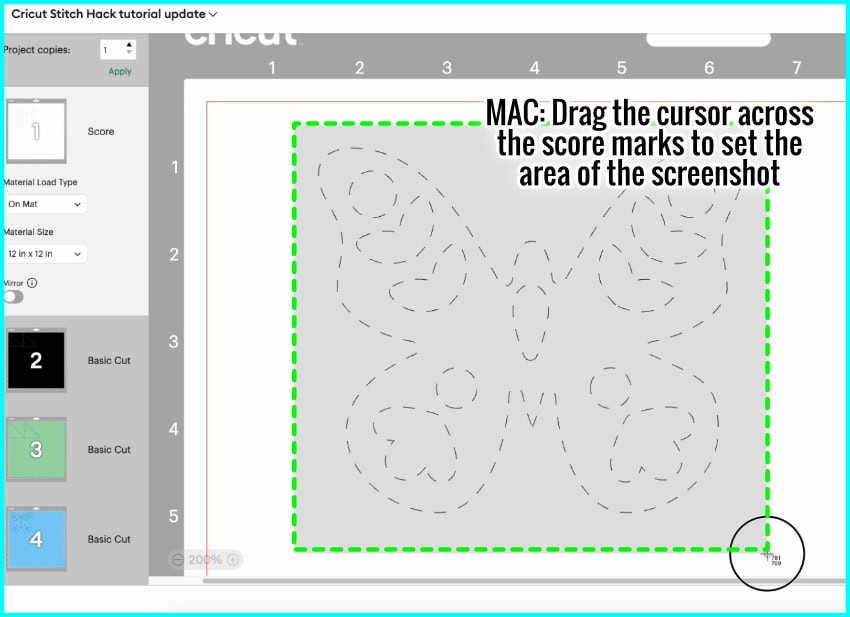
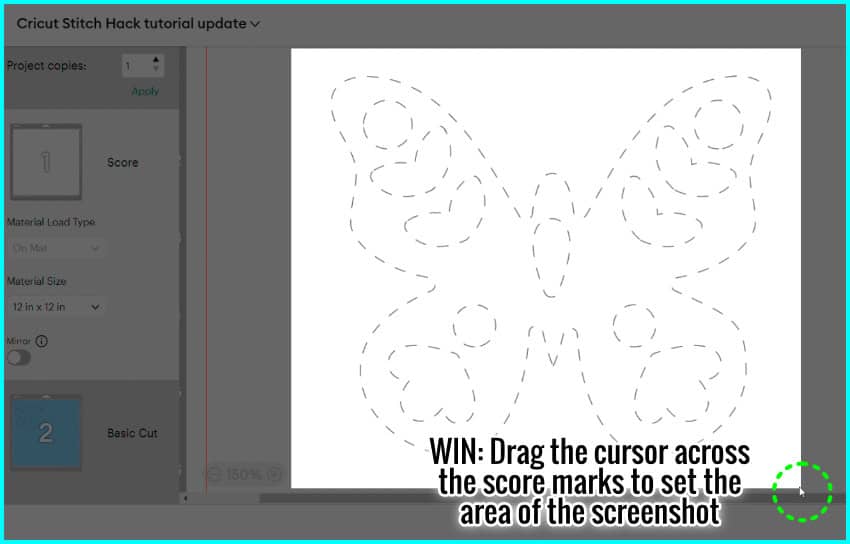
For a Mac computer
Press Shift + Command + number 4 key at the same time.

Your cursor will turn into a cross, and you just click and drag it across the screen where the score line is. If you mess up and accidentally cut off some of the dashes, don’t worry, you can just hit the keys again and the screenshot will be ready to go again.
On my Mac, the screenshots are saved by default to the desktop. If you haven’t made any specific changes to your system, that should be where your screenshots will end up, too.
On a Windows computer
Press Shift + Windows key + S at the same time to open the snipping tool.
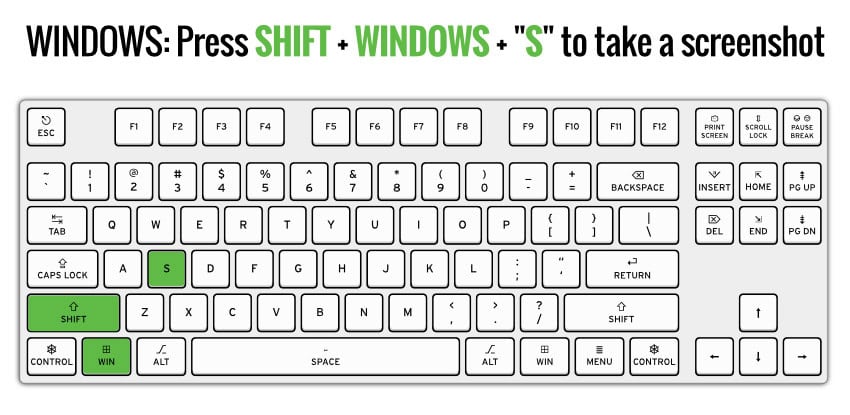
The screen will go dim and you’ll see a small box at the top of the screen. Your cursor will show up as a cross, just click and drag it across the screen where the score line is.
Once you’re finished, Windows will show you a popup saying your screenshot is copied to the clipboard. Click on the preview image and the screenshot will show up in the snipping tool editor. Either right click, or click on the icon in the top righthand corner to save the screenshot.
Upload the screenshot
Now that you’ve got your saved screenshot, it’s time to go back to the Canvas in Design Space. Click the Cancel button in the lower right hand corner of the Mat Preview Screen to return to the canvas.
The next step is to upload the screenshot you just took. (If you need some extra guidance, you can check out our detailed tutorial on uploading images to Design Space)
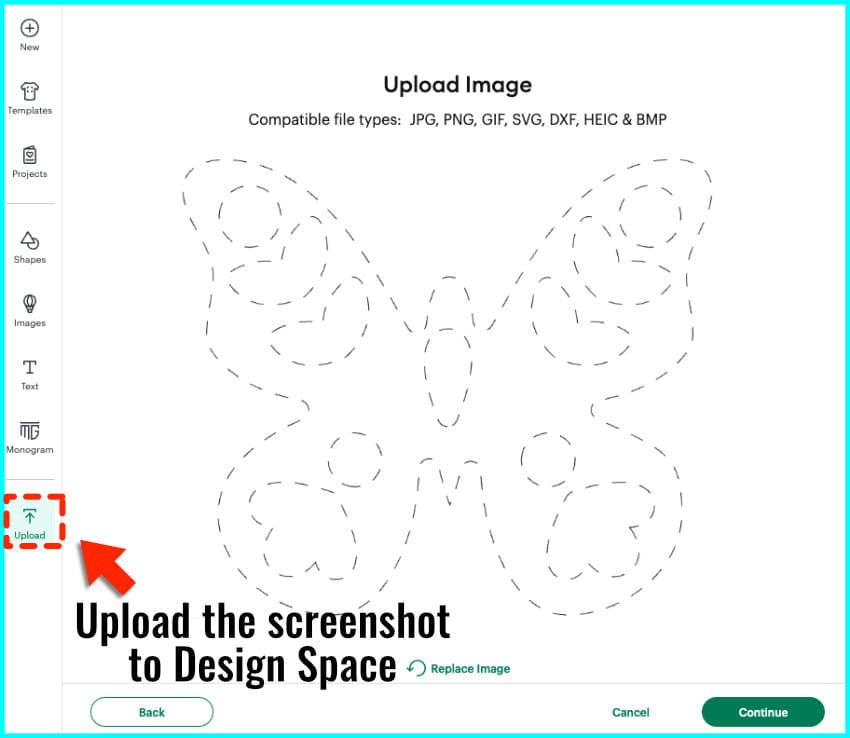
- Click Upload in the design panel (lefthand side of the canvas)
- Click Upload Image
- Drag and drop or browse to find your screenshot file
- Click Continue to go to the Background Remover screen
Remove the background
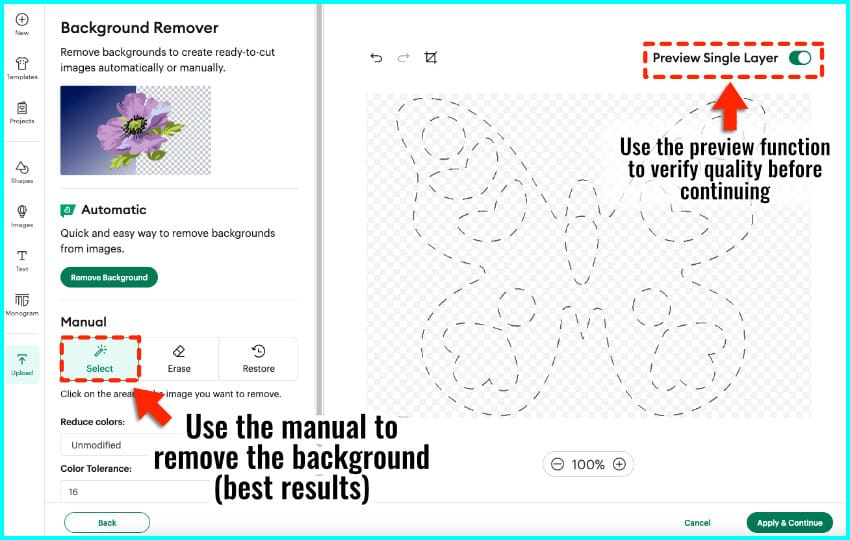
Whether or not you are an Access member, I highly recommend choosing the Manual option in the Background Remover screen.
- Click on the Select tool (the magic wand icon)
- Click on any of the white space surrounding your dashed line
- Click the Preview Single Layer toggle switch to check that you have removed the whole background. (any remaining background will appear dark gray when you turn on the preview)
- Click Apply & Continue
Select Single Layer in the Convert Upload screen and click Continue.
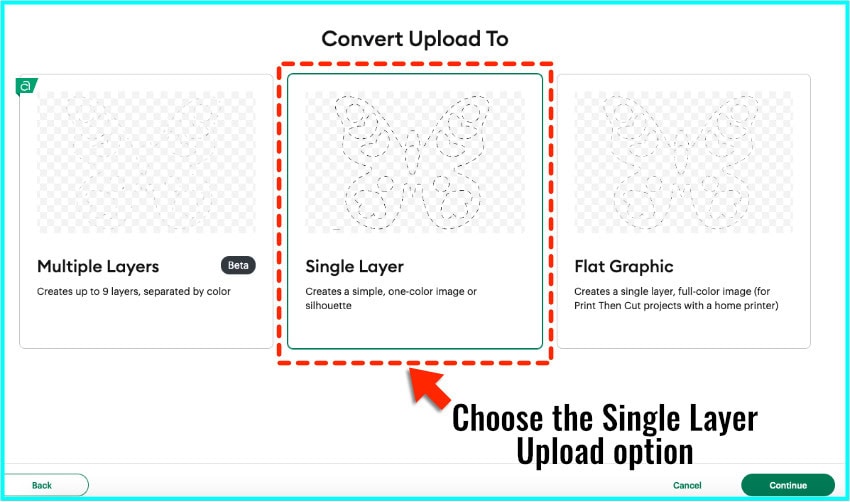
You’ll get the final preview of your dashed line as a cut file. Click Upload and it will be added to the canvas.
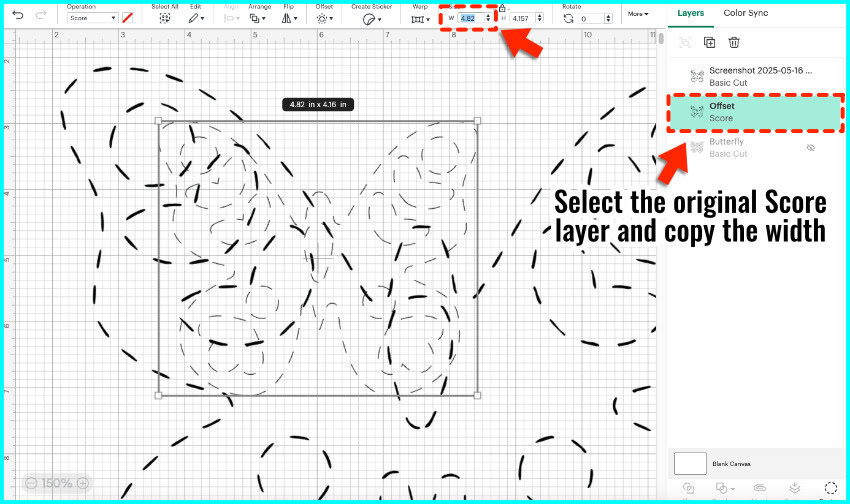
Resize the stitch line
When the image is added to the canvas, it will be bigger than your original score line, so you’ll need to resize it.
In the Layers panel, select your original score line and copy the width or the height. (found in the Size section of the Edit bar at the top of the canvas).
Select the uploaded screenshot, and paste the copied number into the width or height box. Make sure the padlock icon is closed to maintain aspect ratio.
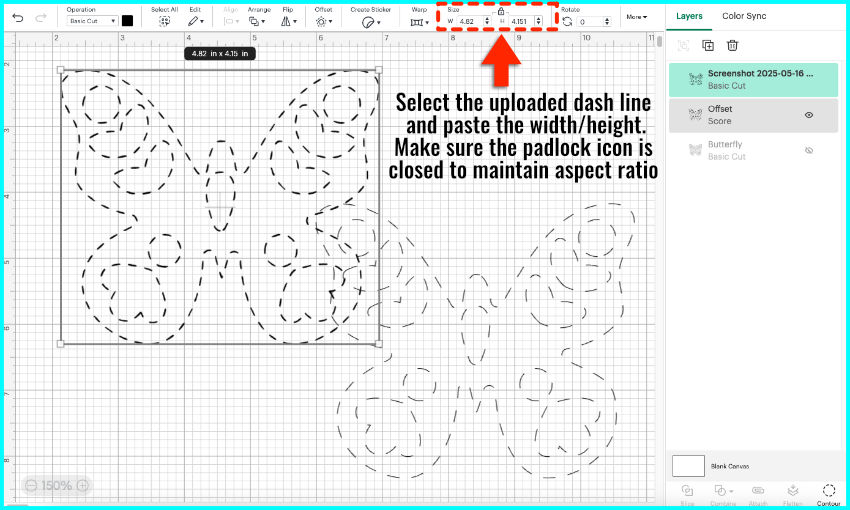
Now, you can hide or delete the score line layer.
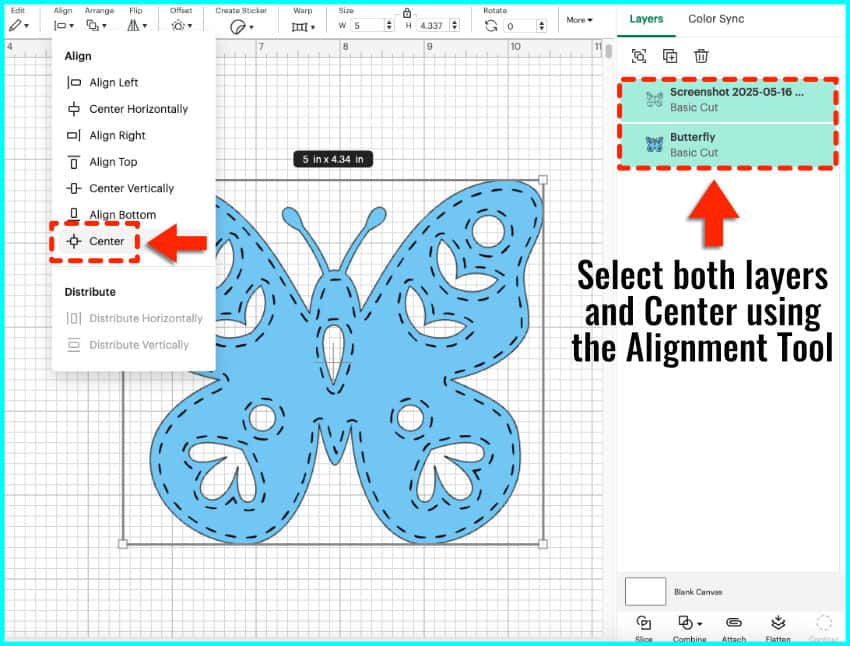
Select the original shape and your new dashed cut line. Use the Alignment tool to center them vertically and horizontally.
Choose the Operation and complete your image
What you choose to do next depends on how you want to make your stitched lines.
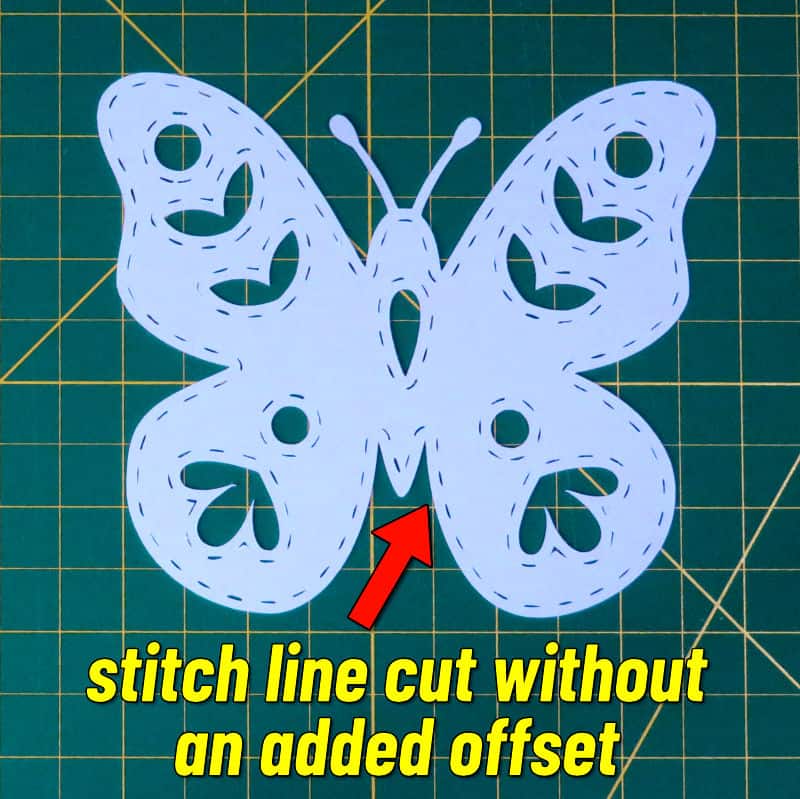
To cut the stitch line
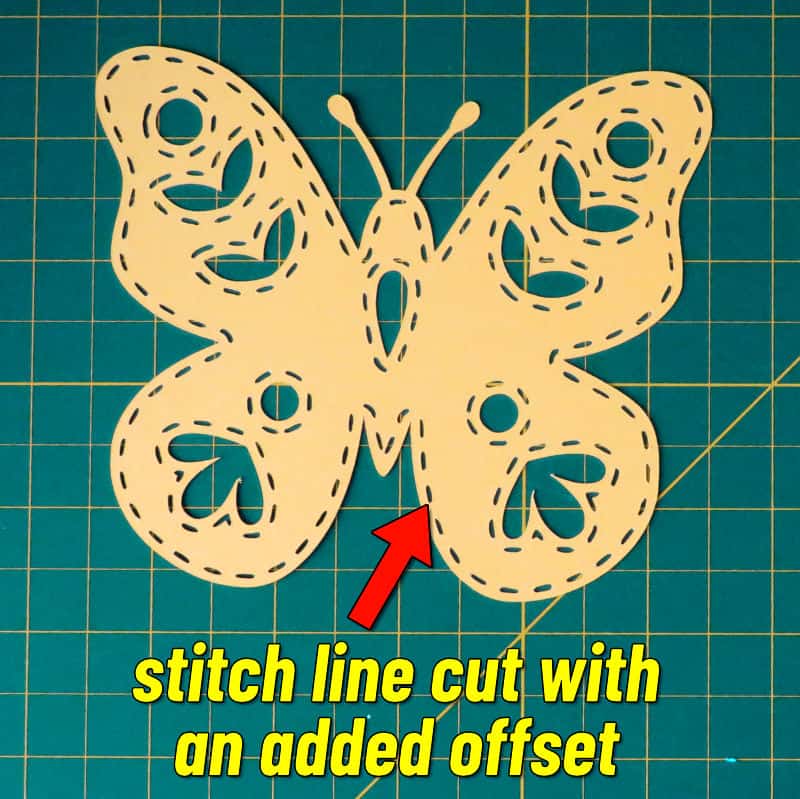
If you want to cut your stitch line, I recommend adding an Offset to make the stitches thicker. You can see in this example, the first butterfly’s stitches have no offset. They’re thin and don’t stand out much. The second butterfly has a stitch line with an offset, making the effect really easy to see, especially if this layer is mounted against a contrasting background.
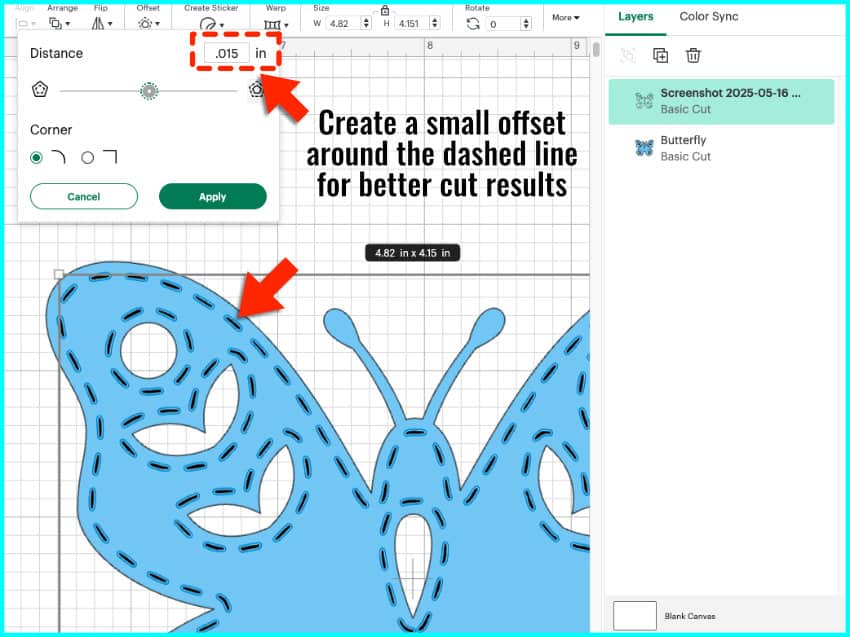
So select your dashed cut line and open the Offset tool. Add a small offset, like 0.01 or 0.015” to just make the stitches a tiny bit thicker.
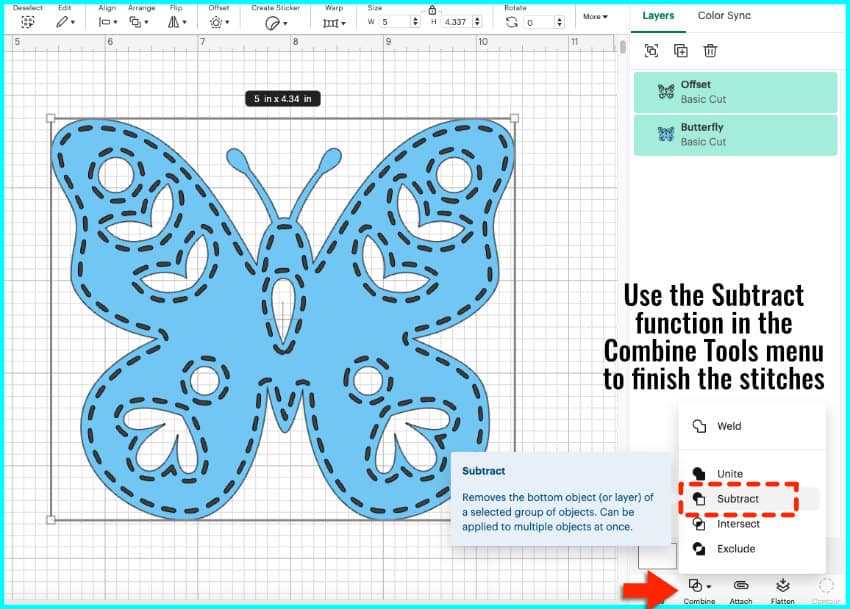
Select the new Offset layer and the original image layer, open the Combine tool menu, and click Subtract. Now all your stitches are ready to cut!
To draw the stitch line
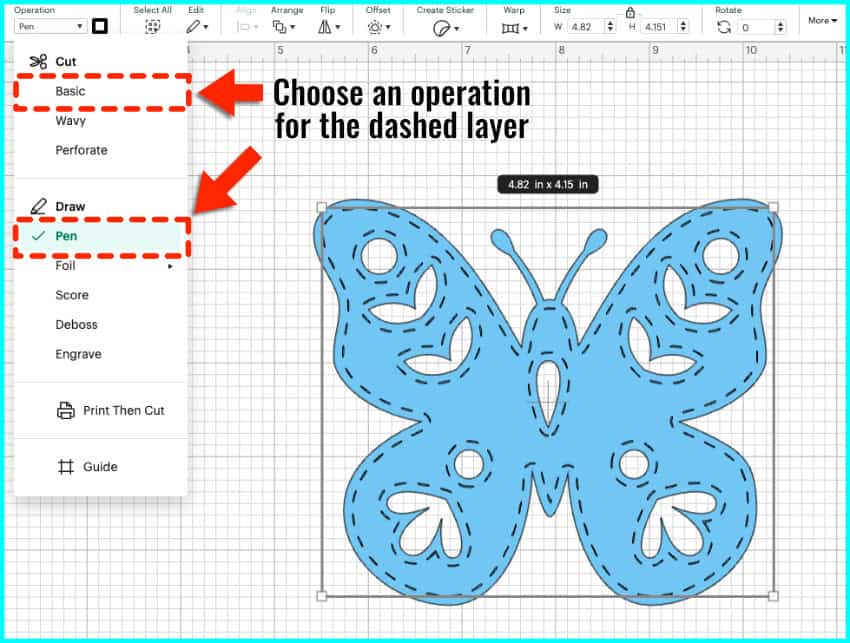
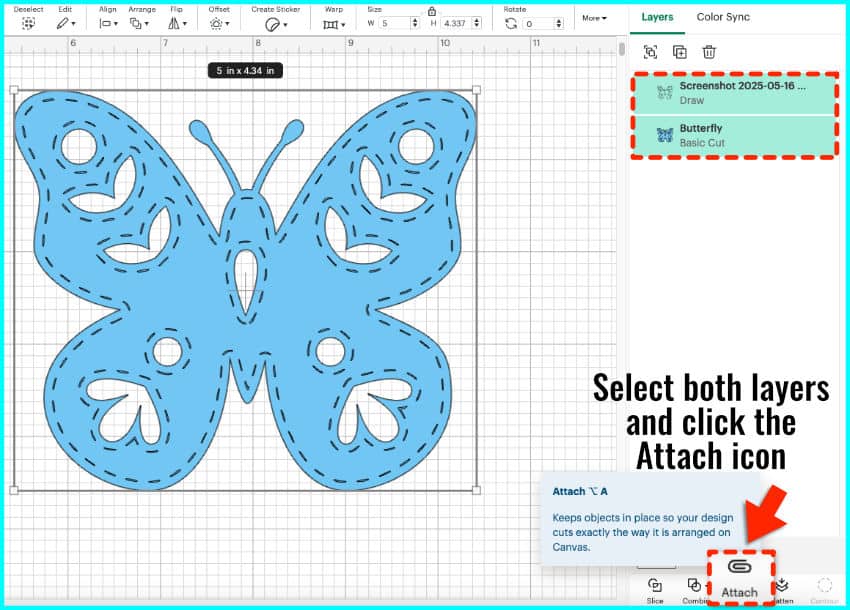
If you want to draw the stitch line, select the dashed cut line and go to the Operation menu, and select Pen under the Draw options. You could also engrave, deboss, or foil.
Now, select both layers and click Attach and you’re ready to Make.
More tips for getting the best results
I’ll show you a few tips using this quilt block card I made as an example.
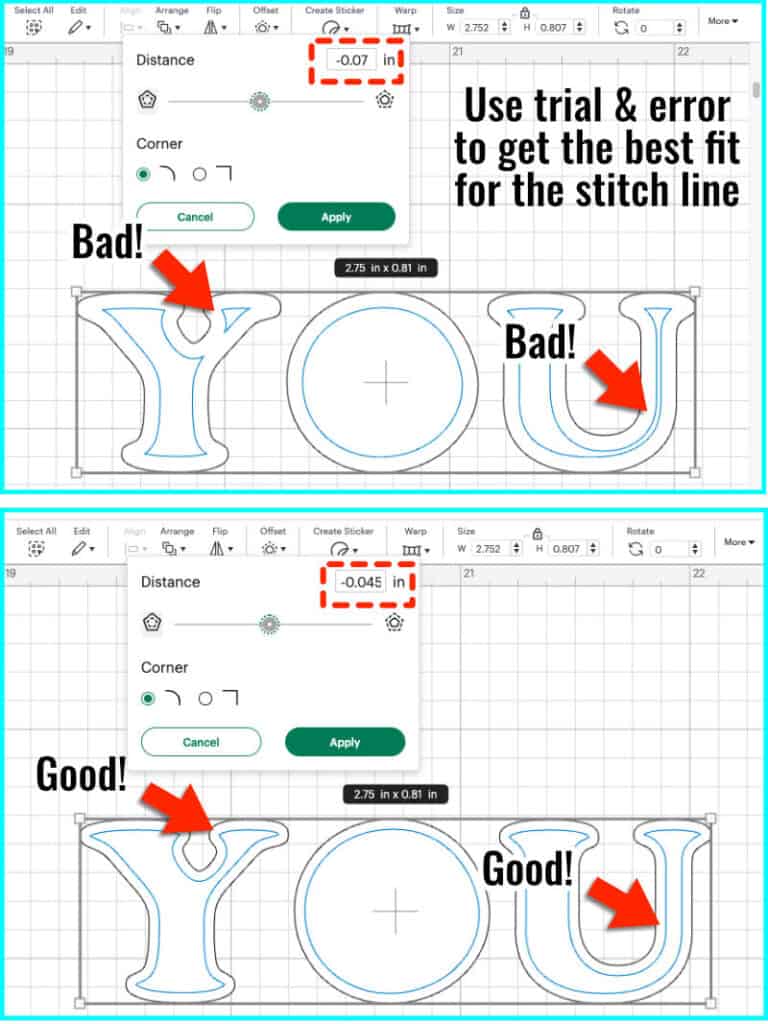
1. When creating an Offset for text or more complex images, you may have to use trial & error before you get an inset that will result in a continuous stitch line. If you get an inset with isolated pieces, make the inset a little narrower (e.g. if your inset of -0.07″ doesn’t work, try -0.045″).
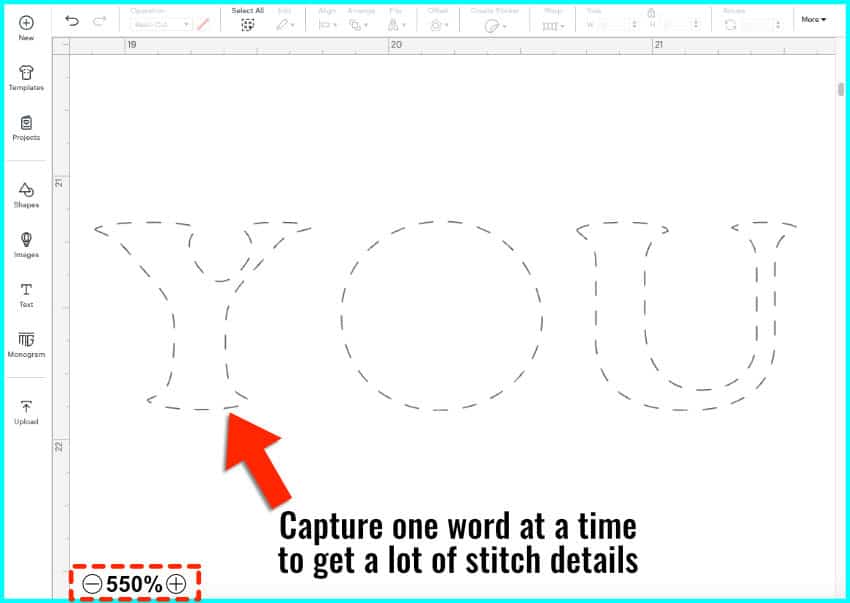
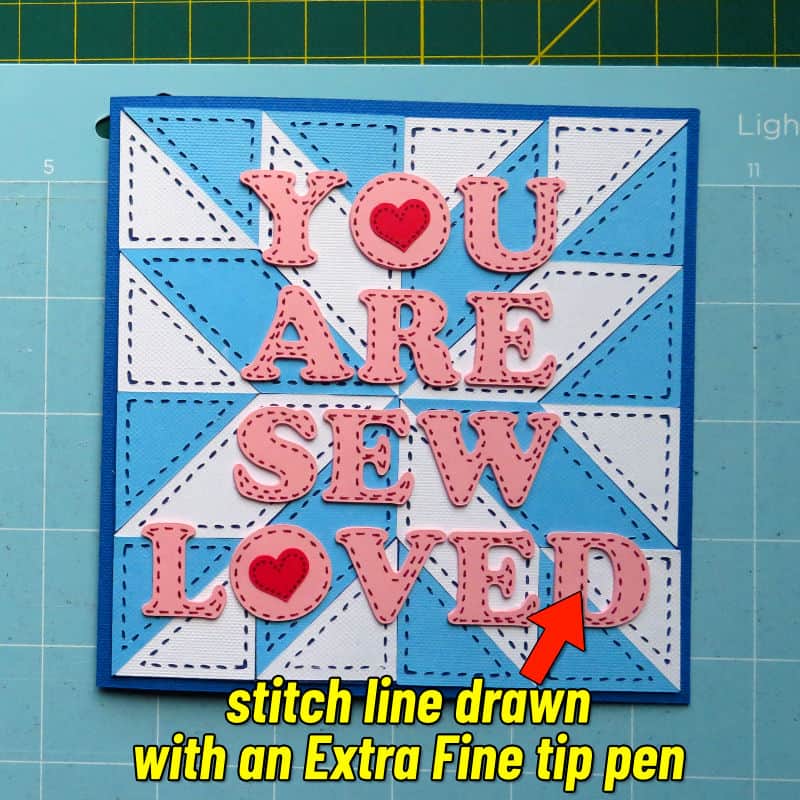
2. If you want to zoom in close to get lots of dashes, you may have to break your image or text into sections to be able to zoom in while keeping all the score marks visible. For the “You are Sew Loved” card, I had to zoom in on one word at a time to get the number of stitches I want. I zoomed in to 550% for the first 3 words, but had to zoom in to 450% for LOVED to keep all the score marks visible.
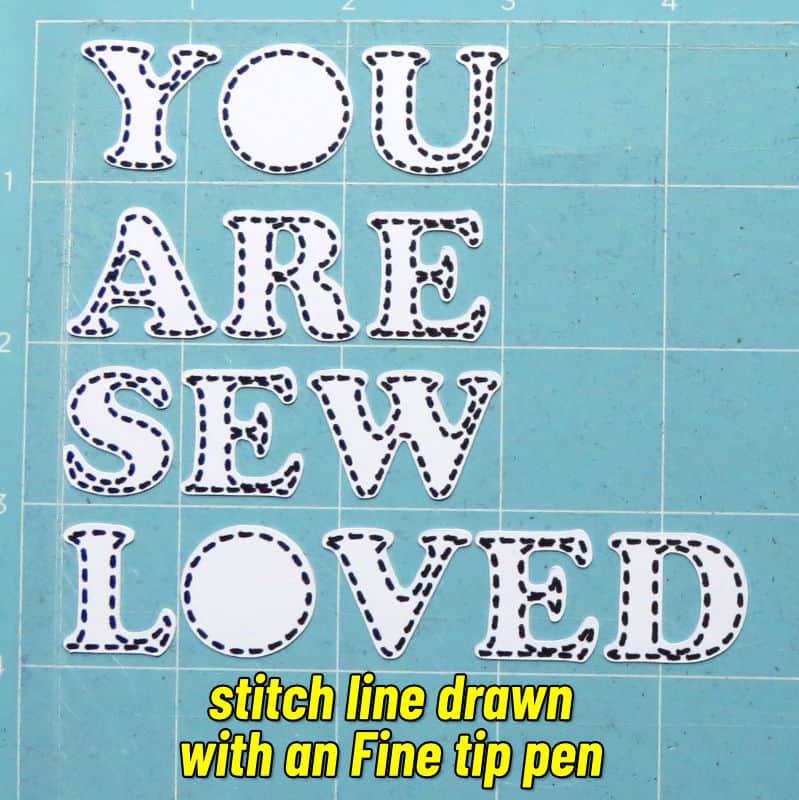
3. When you are working on smaller images, your stitch lines will look better when drawn with an extra fine tip pen. You can see the difference between the lettering marked with a Fine Point (0.4mm) Cricut pen vs an Extra Fine Point (0.3mm) pen.
4. Use your scraper/squeegee to scrape all those stitches off the mat. If your stitches are larger, they will tend to stay on the mat after you cut, and you won’t have to worry about poking out each one.
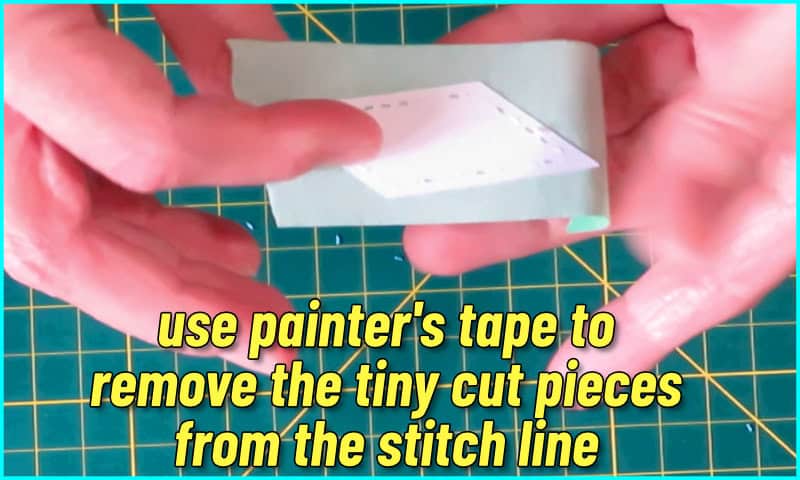
5. For smaller pieces with tons of tiny stitches like my quilt pattern pieces, you’ll probably have to remove some stitches after you take your pieces off the mat. You can use painter’s tape to remove most of the remaining stitch cuts in the cardstock. Any stray pieces left can be poked out using a weeding tool; my Tweezerman pointed tweezers are perfect for this job.
Finished Results
Here’s a closer look at finished quilt block cards made using just Design Space shapes, images and fonts. Using the stitch effect to embellish the details makes these cards go from cute to keepsake in just a few minutes.
I have included Design Space project links for each of these cards if you’d like to try your hand at adding your own stitch lines to these designs. Happy Crafting!
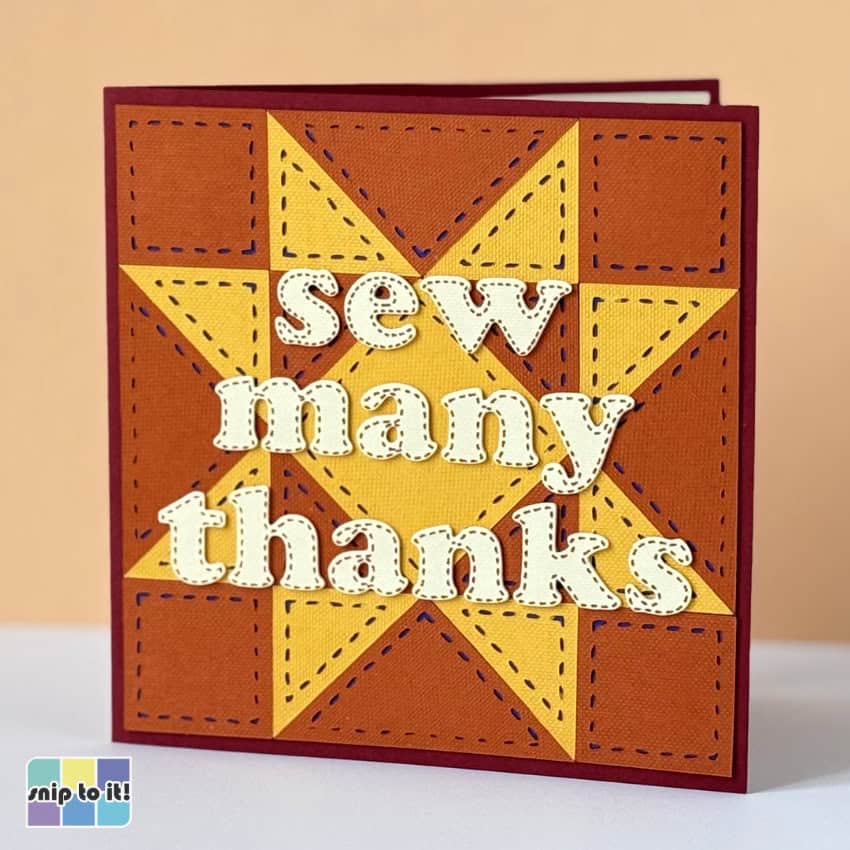
Sew many thanks quilt block card: https://design-beta.cricut.com/landing/project-detail/68acbf0dca122b03aab9e5c4
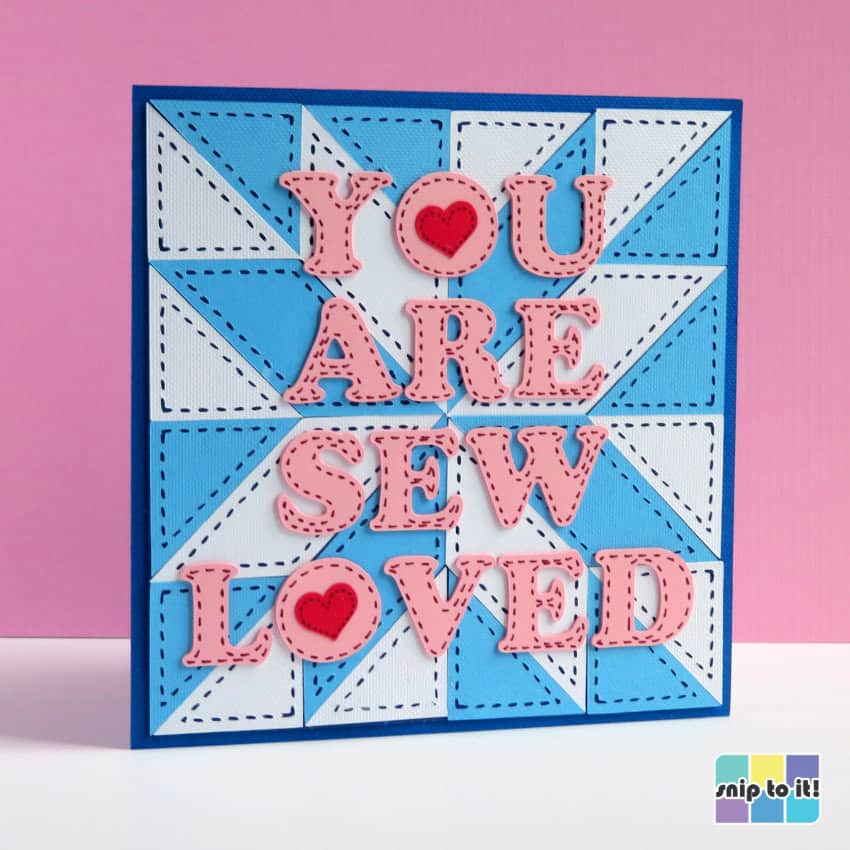
You are sew loved quilt block card: https://design-beta.cricut.com/landing/project-detail/683b29fb3330980370e532ca
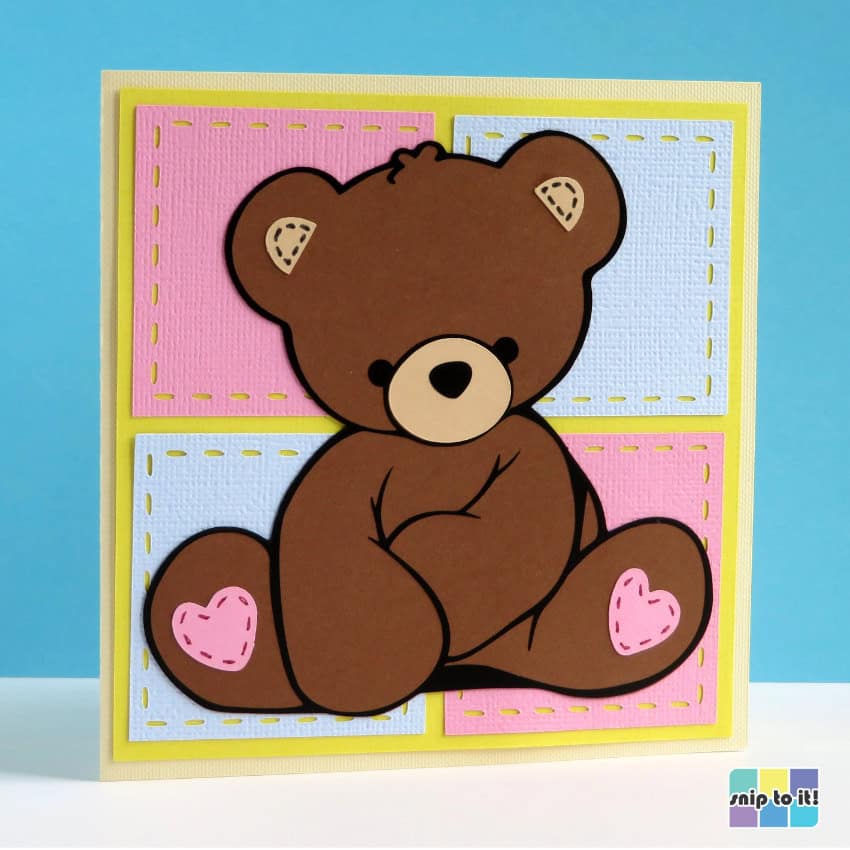
Teddy bear shower card: https://design-beta.cricut.com/landing/project-detail/68864ffcae3b3ee3327d76d4
Further Reading
And that’s it! I hope you enjoyed this tutorial, and if you have any questions or comments, please feel free to leave them below. We’d love to see what you make using this method! Before you go, you might want to check out these other tutorials where we teach you how to use Design Space to make awesome custom designs: