Stickers have so many uses around the holidays: sealing envelopes, labelling gifts, or even as fun stocking stuffers. If you have a home inkjet printer and almost any Cricut (Explore Air 2, Explore 3, Maker/3, Joy Xtra), you have the tools to make tons of any kind of sticker you want!
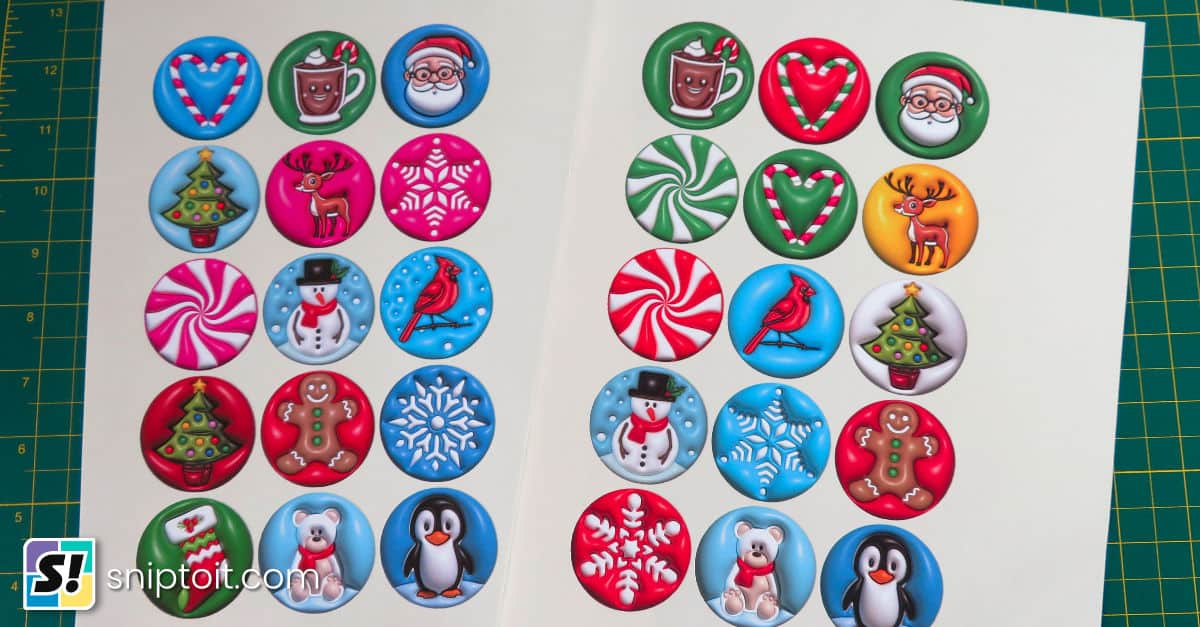
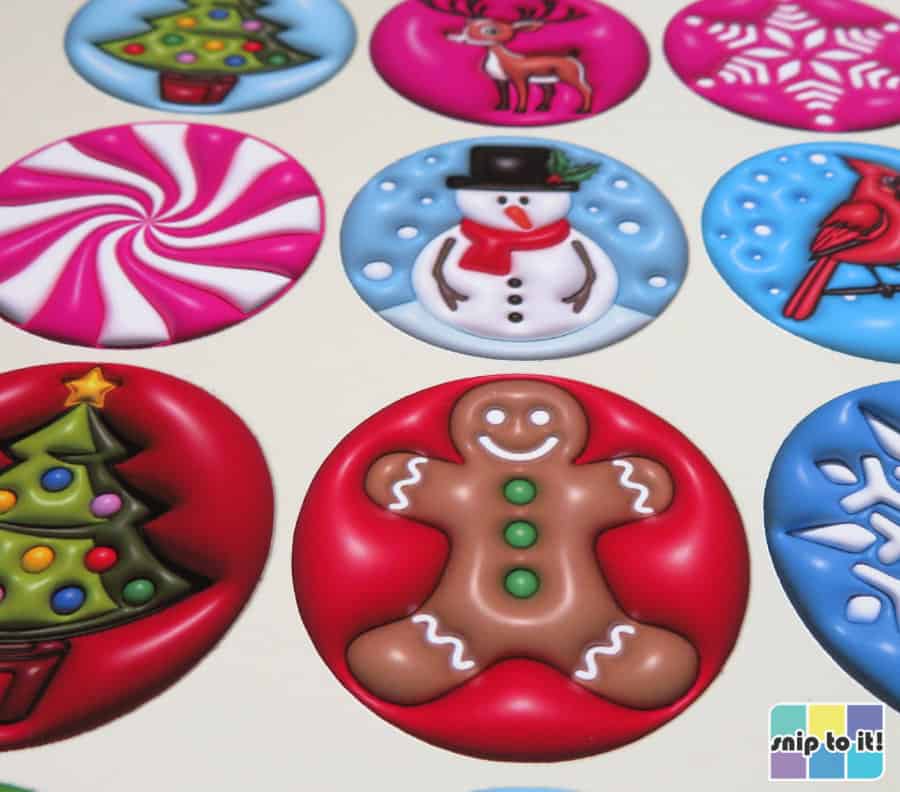
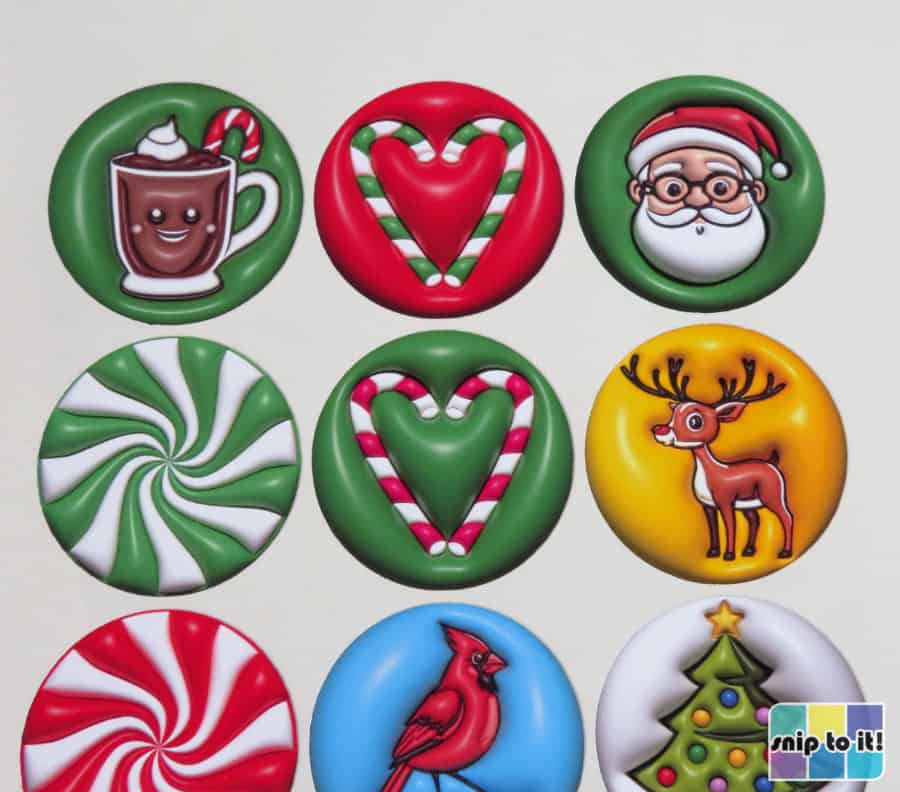
In this tutorial, I’m going to show you how to make incredible Christmas stickers that look 3D but are just easy-peasy flat stickers. Ian created the 3D effect for these images using Adobe Illustrator’s Inflate tool. The designs are in high resolution PNG format, ready to download from our library and use for your sticker sheets!
Video: How to make 3D effect Christmas stickers
Materials and tools:
- Cutting machine – I’m using a Cricut, but you can use a Silhouette or any other machine that does contour cutting
- Inkjet printer – I’m using an Epson ecotank, but any inkjet printer will do (rear feed tray is preferable)
- Sticker image files – these sticker images are for our newsletter subscribers. If you would like to join our list and get the free files, click here to jump to the form. Please note, these files are for personal use only; they are not for commercial use or distribution.
- Cutting mat – (unless your machine cuts without a mat). I’m using a blue mat
- Brayer or felted squeegee
- sticker paper or printable vinyl – I’m using Orajet 1917 printable vinyl, you can use Cricut or any other brand
- if you want to use Cricut sticker paper or printable vinyl, only get the new kind that is marked for use with the Joy Xtra, the old stuff is thicker and tends to jam printers
Sticker paper

Cricut, Silhouette, Oracal, and about a thousand other brands on Amazon (Zicoto, Koala, HTVRont, etc.) all make printable vinyl and sticker paper.
These 3D holiday stickers are simply meant for fun, indoor use, so I am using a simple matte, white printable vinyl made by Oracal called Orajet 1917. Orajet has printing on the back of the sheet so it is easy to know which side gets printed.
You can use any printable vinyl or sticker paper you like. I recommend using white to show the highlighting that makes the 3D illusion possible. I am not using an overlay of any kind.
How to make 3D Christmas sticker sheets
Download the designs
To get the full set of 3D Christmas stickers, simply complete the form below to sign up for our email list. The download link will be sent to your inbox and you can instantly access all of the files in PNG format, ready to print & cut!
Get the 3D Holiday sticker pack!
Get our pack of free 3D Christmas sticker designs when you join our newsletter!
Just add your name and email to get these fun & festive print & cut images!
Click to download, and then unzip the folder to use the images:
- Windows: go to your downloads folder and right click on the zipped folder, select “Extract All”
- Mac OS: locate the file and double click, it will automatically unzip the folder
Import the designs into Design Space
Open Design Space and go to the Canvas. The designs will have to be uploaded one at a time. Click the Upload icon on the left sidebar and follow the prompts:
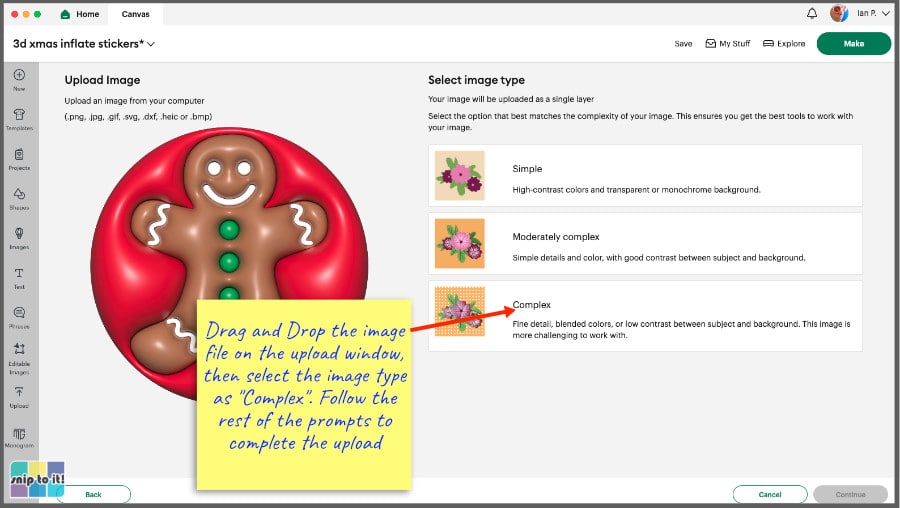
- click the Upload Image button and either drag and drop the file from your Downloads folder, or click Browse to find the file
- select image type “Complex” > Continue
- on the Background Remover page, click Apply & Continue (no action necessary, images already have transparent background)
- Select Upload Type > click on Print Then Cut Image
- in the right hand menu, you can also change the image name, add tags, and add the image to a collection
- click Upload
The PNG will now be in the Recent Uploads section, and you can click on it and select Add to Canvas.
Size the designs
As you add your 3D sticker images to the canvas, you will see they are very large in size. This is simply a byproduct of keeping the image resolution high. Don’t worry! It is very easy to resize your images in a batch:
- add all the sticker images you want to use to your canvas and select all (you can use the Select all button in the top toolbar)
- go to the Align menu in the top toolbar and choose “Center” – this will create a stack of all your images
- now you can resize your images as a batch: change the width or height value once and it will apply to all the stacked images
I sized the images to 1.75″ diameter so I could fit 15 stickers on an 8.5×11″ sheet.
Calibrate your Cricut for Print Then Cut (if necessary)
We have a detailed guide to print then cut calibration if you haven’t calibrated your Cricut before. The brief tutorial walks you through with screengrabs and photos of each step.
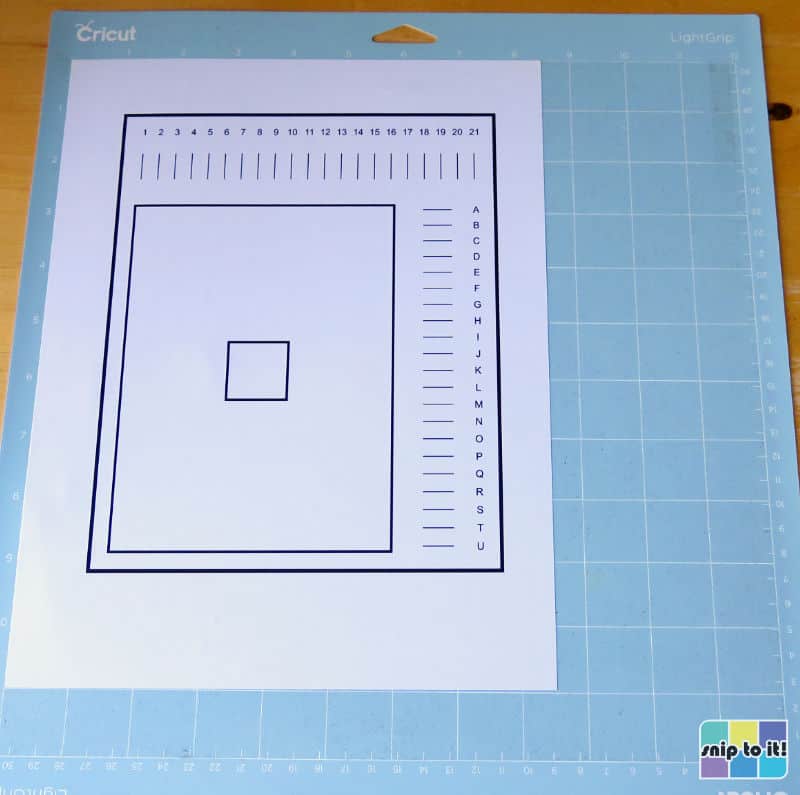
- find the Account Settings by clicking the pulldown menu next to your name and profile picture in the top right hand corner of Design Space
- select Settings
- in the Settings window, select the Machines tab > Machine Calibration > choose your machine from the pulldown menu
- click Start and follow the prompts to calibrate your machine
- if you have a Maker or Maker 3, you will choose Print Then Cut out of the options listed (there are calibration options for the Rotary and Knife Blades)
- if you have any other machine, you will only get the option to calibrate for Print Then Cut
Test cut your sticker sheet material (optional)
Once you print, Design Space will be cued to automatically go to the cutting step, so you should know what cut settings you need before you print your stickers. Cut settings depend on the brand and style of sticker sheet, and whether or not you are adding an overlay like clear vinyl.
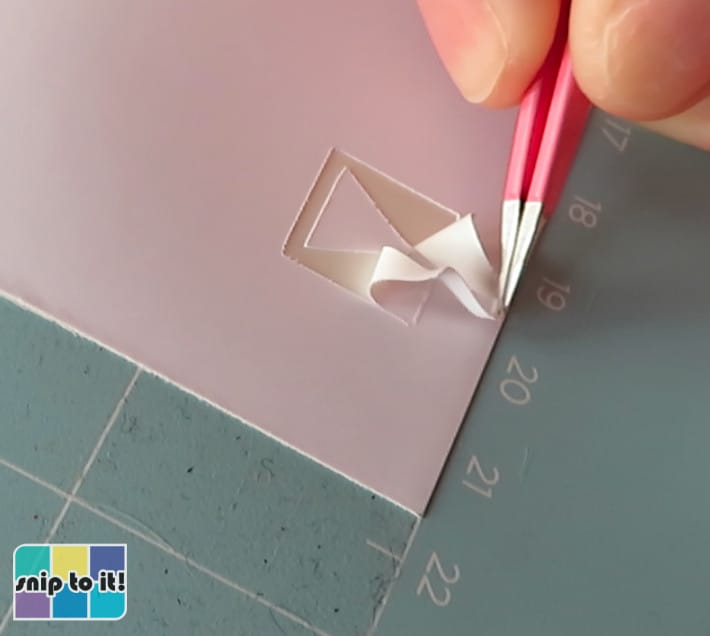
If you are using a material for the first time, I recommend doing a test cut:
- create a test cut shape (a triangle attached inside a square, sized to 0.5″)
- click the Make button and place the test cut shape close to the edge where it will be outside the print area of your sticker sheet
- run the test cut. If the cut weeds cleanly, proceed with cutting the stickers using the same cut setting. If it doesn’t weed cleanly, edit the test cut mat, move the test shape to another empty part of the mat and repeat the cut on a different cut setting. Repeat until you get a clean test cut.
There are Cricut printable sticker sheet cut settings under “Paper” in the Custom Materials menu, and these work for most sticker sheets (use Gray Liner for more pressure, Green Liner for less). I use Printable Sticker Paper, White (Gray Liner Printing) to cut Orajet, and I use Medium Cardstock setting if I add a vinyl overlay over the stickers.
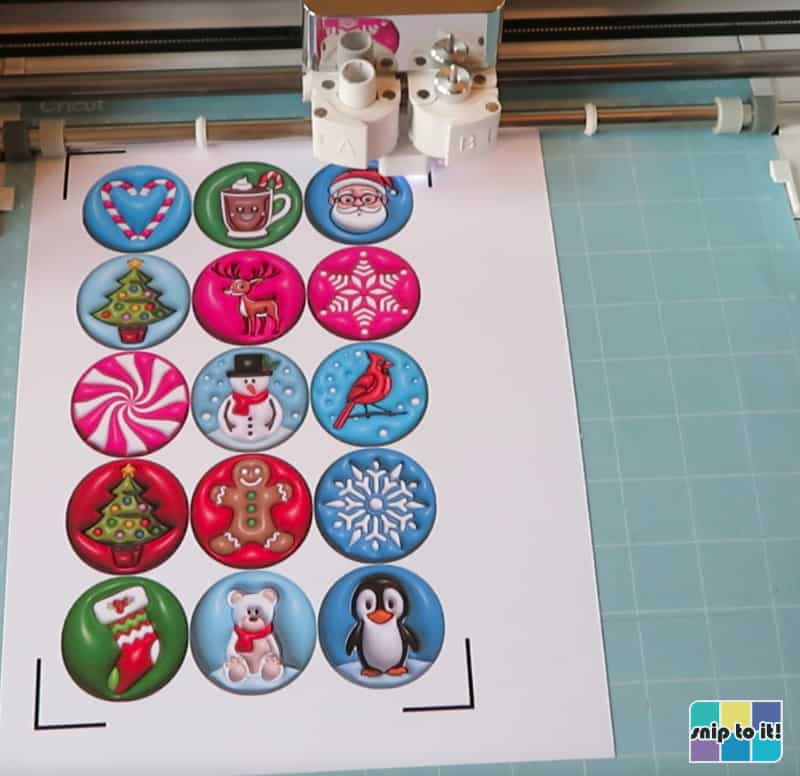
Print your sticker sheet
These 3D sticker images were already uploaded as Print Then Cut images, so there is no need to flatten, they are ready as-is. Because this was a large file, I printed using a USB connection to my printer (it was taking a very long time to print via wireless connection).

- Click the Make button on your Canvas to go to the preview screen. The stickers are automatically arranged for an 8.5×11″ sheet. Click Continue to go to the Set, Load, and Go screen
- Click Send to Printer and choose the number of copies you want
- The Add Bleed option is pre-checked, and I recommend leaving it that way for kiss cut stickers without an offset
- You can either click Print directly, or click the Use System Dialog toggle, which will open the printer dialog box from your computer to choose your paper type and print quality
I used the system dialog option and set my media to matte photo and print quality to best.
If you select the system dialog option, it may look like Design Space is frozen and the window never opens. For whatever reason, DS sometimes opens the system dialog box behind every other window, so you just need to look for it!
Cut your stickers
There are two options for cutting stickers:
- kiss cut: cuts just the vinyl/sticker paper, leaving the backing sheet intact (creates a full sheet of stickers)
- die cut: cuts through both the sticker sheet and the backing paper (creates individual stickers)
The method I’m demonstrating here creates a full sheet of kiss cut stickers.
After the sheet comes out of the printer, put it on your cutting mat using your brayer. Select your cut settings on the Set, Load and Go screen in Design Space. For cutting Orajet 1917, I used the Printable Sticker Paper, White (Gray Liner Printing) setting with more pressure.
Your stickers are now finished!
Go wow your friends and family with your awesome little puffy-look stickers to add the final touch to your Christmas card envelopes or giftwrap. You can even use them on advent calendars or ornaments!
Before you go, you might like to check out our guide to addressing envelopes with your Cricut or our guide to Cricut writing fonts (free and Access fonts) for all your holiday card-making!
You can also check out our other holiday projects:

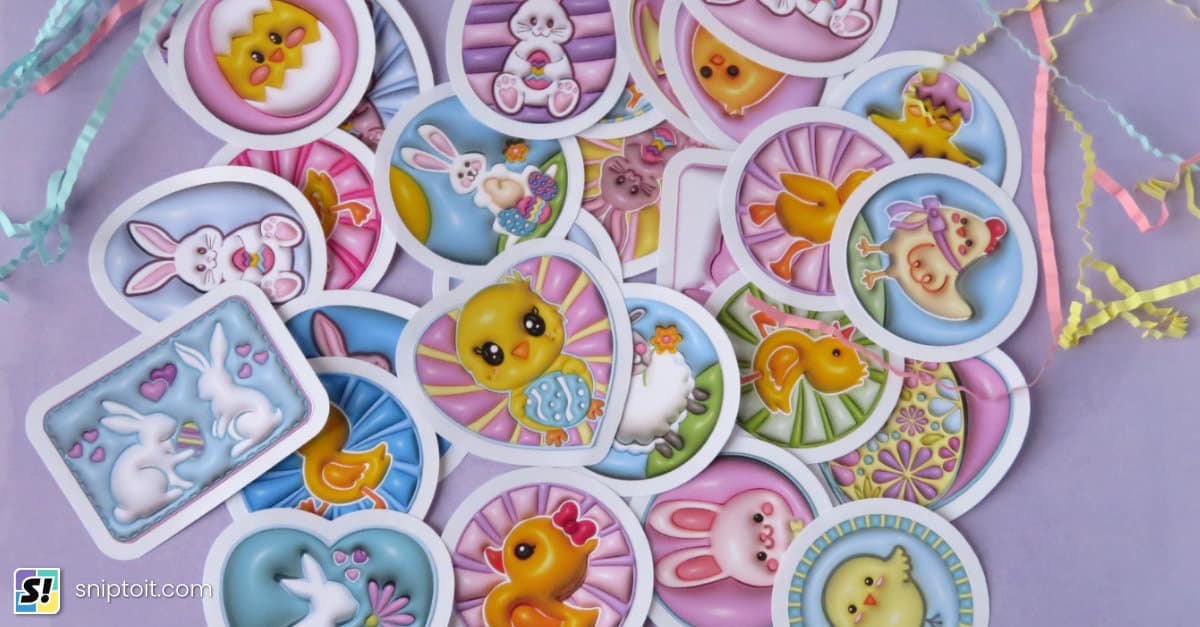
If you are looking for more 3D illusion sticker projects, try our Easter designs: