
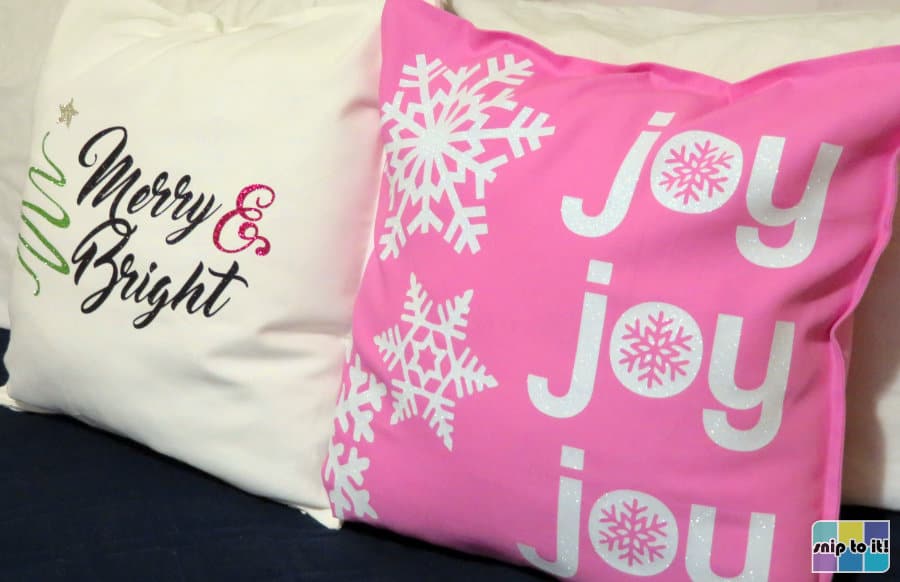
I love creating fresh looks for throw pillows! It’s an easy way to change my decor or make a beautiful gift. It would be a perfect, DIY addition to a Brr Basket this year. And a pillowcase is such a great blank: just a huge, flat square that can be decorated with much heavier, textured iron-on than I use for shirts.
Christmastime is glitter time! For this project, I am using only glitter HTV (heat transfer vinyl) to decorate 2 throw pillows. You can choose any color of pillow cover you want; I am making mine white and pink this year.
You can download my SVGs for free, and follow along as I make this incredibly easy, fast project that is perfect for beginners!
Quick navigation:
- Materials and tools
- Download the SVGs and prepare them for cutting
- Choose cut settings and cut your design
- Press your design
Video: How to make Glitter HTV Christmas Pillows
Choosing a blank
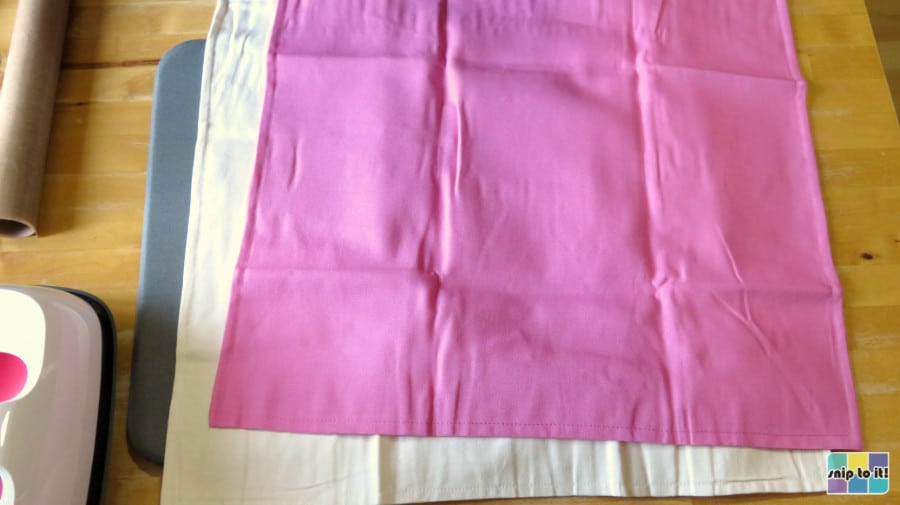
I am using heavyweight 100% cotton pillowcases for my designs. For only $4 each, I like the GURLI ones (20×20″) from IKEA, which are well made and have a good zipper. They also come in lots of colors, including an awesome bubblegum pink.
Heavyweight cotton canvas is great at handling heat. If you want to use poly/cotton or polyester, I recommend test pressing an inconspicuous area to check the heat sensitivity of your fabric.
Glitter and other thick HTVs (like Siser Twinkle or StripFlock Pro) are a perfect match for heavyweight blanks like canvas pillowcases because they don’t show the texture of the base material.
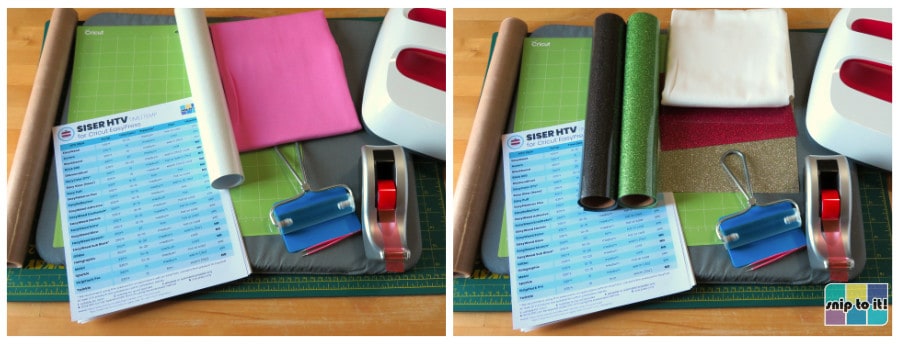
Materials and tools:
- Cutting machine – I’m using Cricut, but you can use a Silhouette or any other machine
- Cut file – you can download the SVGs from our Resource Library
- Cutting mat – (unless your machine cuts without a mat). I’m using both a green Standard Grip mat and a 12″ x 24″ blue Light Grip mat.
- Brayer or squeegee
- Glitter HTV – I’m using Siser Glitter in white, black, green, gold, and hot pink. Make sure to calculate how much of each color you will need, because these are large designs
- Weeding tool – mainly you’ll be using your hands, but a pointy tool to start is good
- Base material/blank – I am using 100% cotton canvas 20×20″ IKEA pillow covers; you can also use polyester or poly/cotton
- lint roller
- Heat press – I will be using a 12×10″ EasyPress, but any heat press is OK
- Pressing mat – I’m using a Cricut 16×20″ mat
- Cover sheet – teflon or parchment paper
- our heat press guide to using Siser HTV, free to download from our Resource Library
Download the SVGs
If you want to use one of our 3 ready-made designs, download the SVG from our Resource Library. (You can find the SVGs in the Christmas section, just scroll down the page)
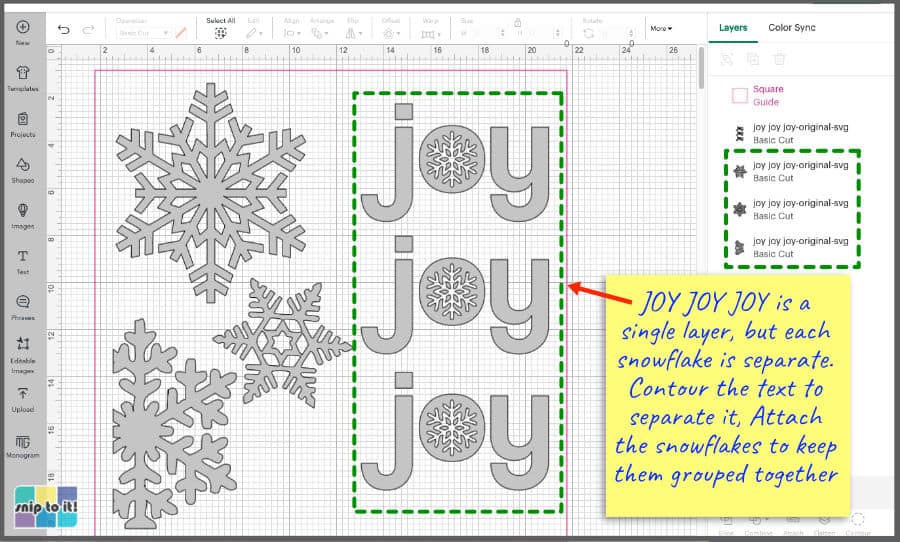
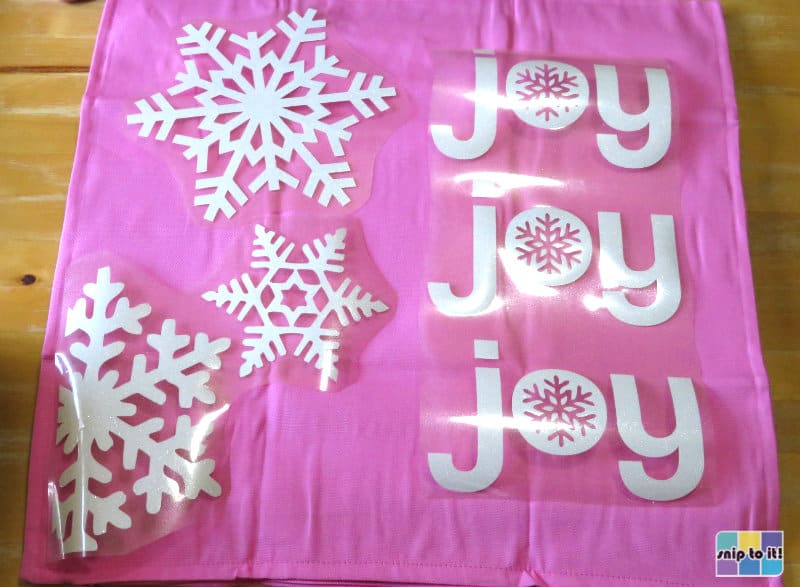
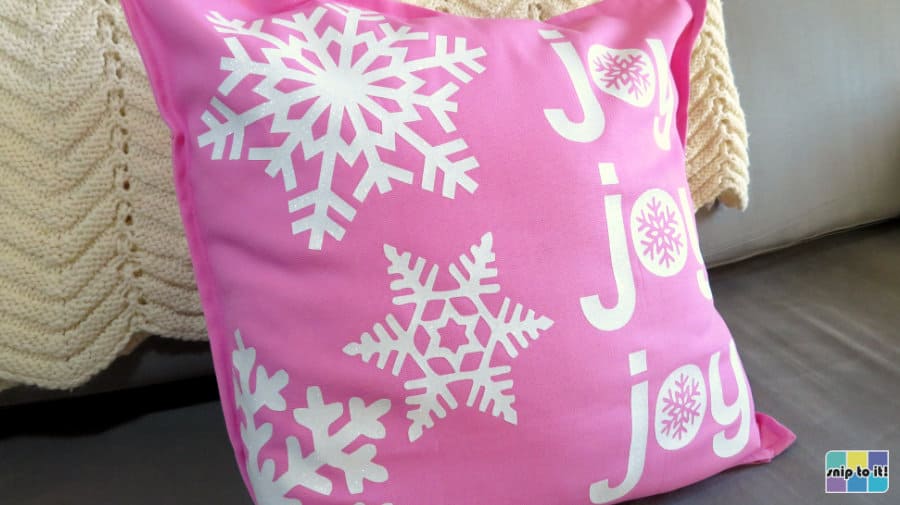
There are 2 versions of the “joy” pillow cover, I will be making the first version with a snowflake that is cut off (to be placed at a corner). There is also a version with a complete snowflake to make sizing and placement easier.


I can imagine these designs looking gorgeous in many different colors of glitter, on different colors of pillowcase. Choose whatever color base and glitter you love!
Upload your file to Design Space & resize your image
Open Design Space and start a new project.
- Click Upload in the lefthand sidebar and follow the prompts (Upload image>choose the file from your download folder>Upload)
- Add the image to the canvas and resize it to fit your pillow
Tip: choose a square from the Shapes menu and size it to the same size as your pillow cover, then change the Operation type to “Guide” instead of Cut. Then you can easily visualize exactly what size to make your design.

A few things about these files:
- for the joy pillow, “joy joy joy” will stay together as a single unit to cut, and the snowflakes are all independent
- to cut each “joy” separately, you will have to duplicate the design and Contour out everything but one “joy” which can then be duplicated.
- if you want to keep the snowflakes in the same arrangement, select them and click Attach
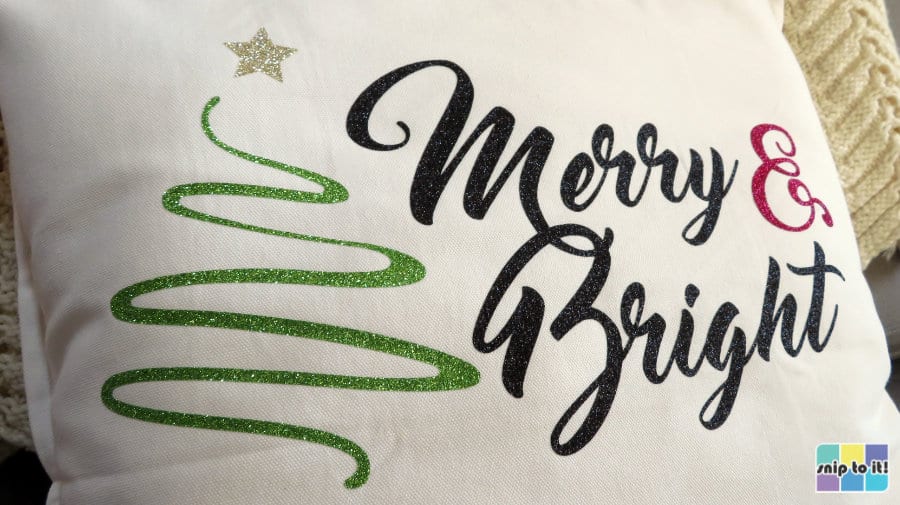
- for the merry & bright pillow, Merry and Bright are welded together, but the tree, star, and & are separate so they can be different colors
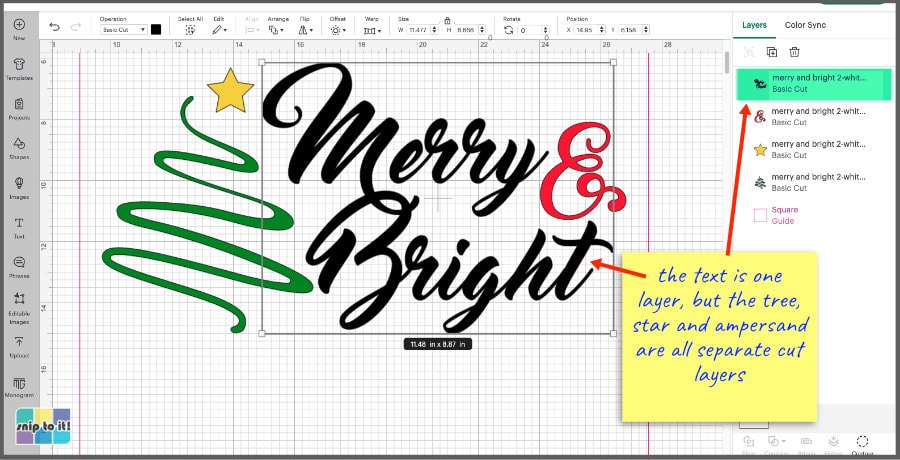
For my project, I sized the images to fit across 20×20″ pillowcases: joy joy joy is 7.25″ wide x 15″ tall and the snowflake group is 9.3″ wide x 17.5″ tall. The entire Merry & Bright design is 16″ wide x 8.5″ tall.
Choosing cut settings for Siser Glitter HTV
Glitter is one type of HTV where I always do a test cut before I cut my design. The following are the cut settings I use, but I encourage you to test them yourself and adjust as necessary.
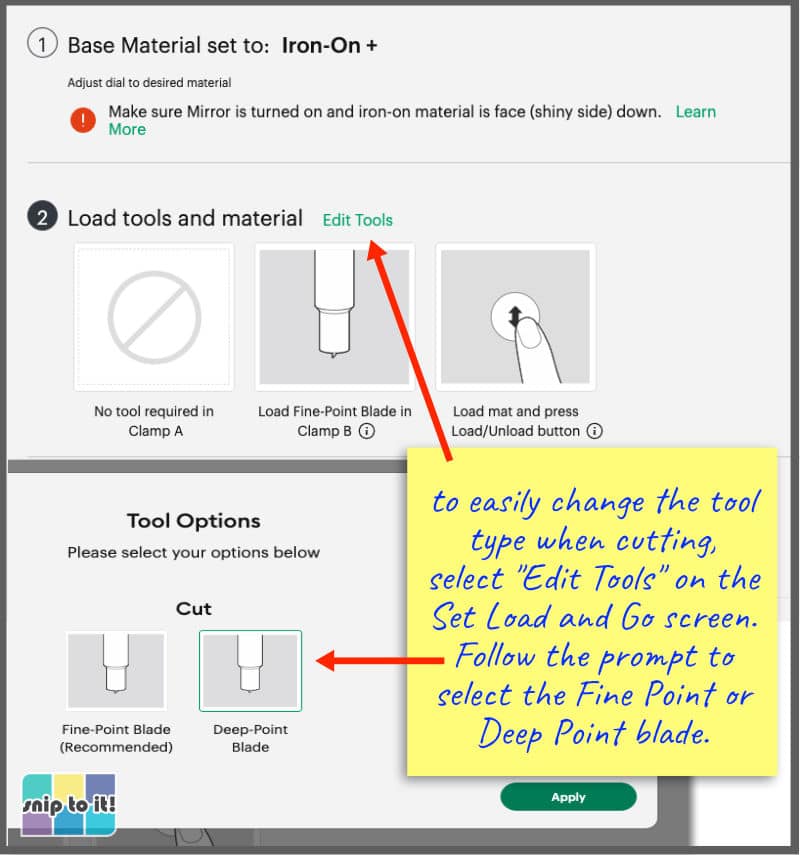
I have given 2 alternate cut settings for the Explore Air 2. I almost always use a Deep Point Blade when cutting certain types of vinyl on my EA2 because it handles details much better. You can really increase the precision of your EA2 by using the Deep Point Blade.
Cut settings for Explore Air 2: (I cut the joy design on this machine)
- Light Cardstock on Smart Set Dial with Fine Point Blade
- OR: Iron-On+ setting (Smart Set Dial) using the Deep Point Blade
- don’t use too much cut pressure or the Deep Point blade will cut through the carrier sheet
- to change from Fine Point to Deep Point Blade, click on “Edit Tools” next to “Load tools and material” on the Set, Load and Go screen:
Cut settings for Maker: (I cut the Merry&Bright design on a Maker 3)
- Glitter Iron-On
- I haven’t needed to adjust settings for this machine
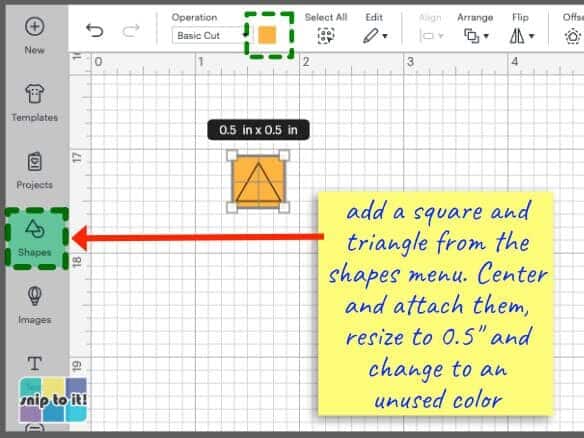
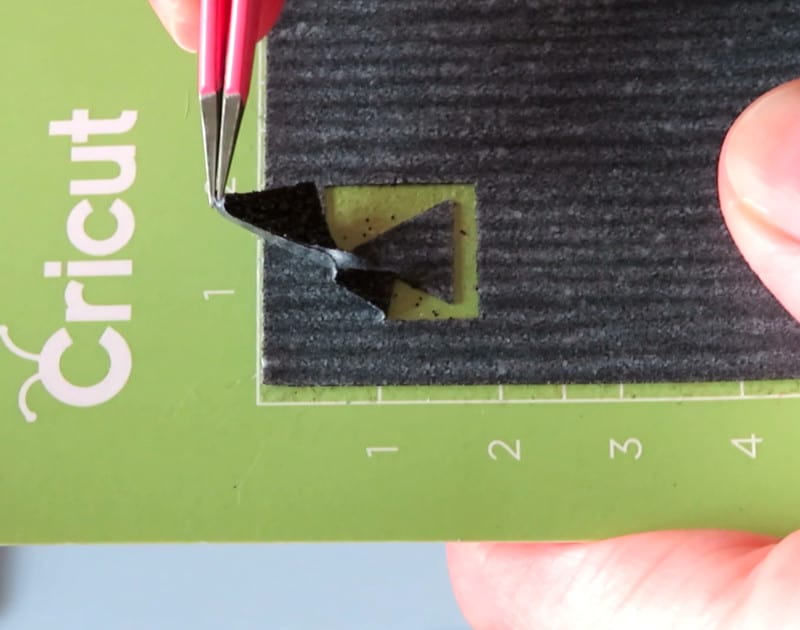
Do a test cut
To test cut, create a triangle inside a box and weed around the triangle. Sharp, easy to weed points on the triangle let you know your cuts are nice and clean.
- choose a square and a triangle from the Shapes menu, center the triangle inside the square
- Attach the 2 shapes together and resize to 0.5″
- make the test cut square a unique color so it will be on its own mat
Place your HTV with the pretty/shiny/carrier sheet side down on the cutting mat. Click Make to go to the Mat Preview screen and choose the test cut mat first. Choose your starting cut settings and check the test cut to make sure you’re good to go.
Mirror all of your mats in the Mat Preview window!
Cut & weed your design
The Merry & Bright design pieces were cut on a regular 12×12″ mat, but I had to cut the “joy joy joy” design in 3 parts due to how I sized the image:
- the corner snowflake and its neighboring snowflake were attached and cut together on a 12×12″ mat
- the large single snowflake was cut on its own 12×12″ mat
- the 3 “joy”s were all attached, so I cut them on a 12×24” mat
Glitter iron-on can be a bit tricky to weed. It is thick, clings tightly to the carrier, and tends to tear rather than feeling elastic like thinner HTV – you’ll have to tug on that stuff!
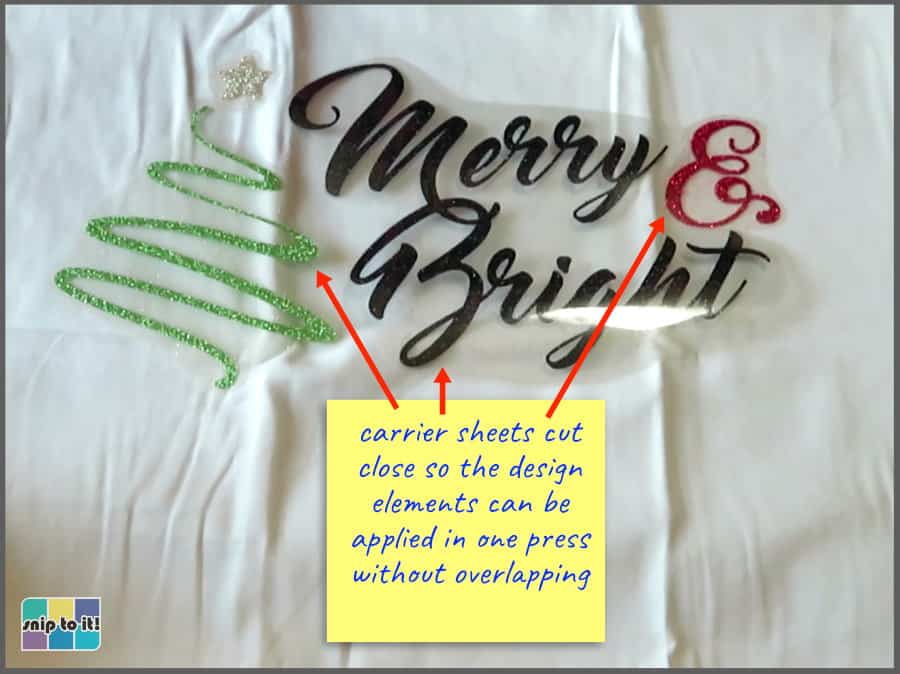
Cut your carrier sheets (if necessary)
I typically cut carrier sheets fairly close to a design, particularly if I’m going to press multiple pieces at once. In this case, I cut the carrier sheets for each of the pieces for each design so that there is no overlap between carrier sheets.
Prepare your pillowcase and press
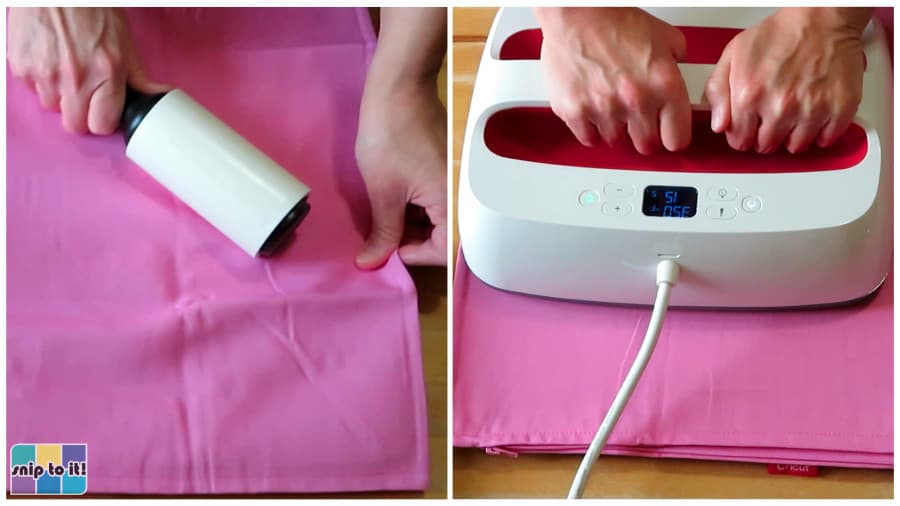
- use a lint roller to clean off fuzz and debris
- pre-press to get rid of all the wrinkles and moisture
I did my best to get rid of those wrinkles! If the pillowcase is for your own decor, you may want to wash it before you decorate it (don’t use fabric softener).
Press time/temp for Siser Glitter HTV
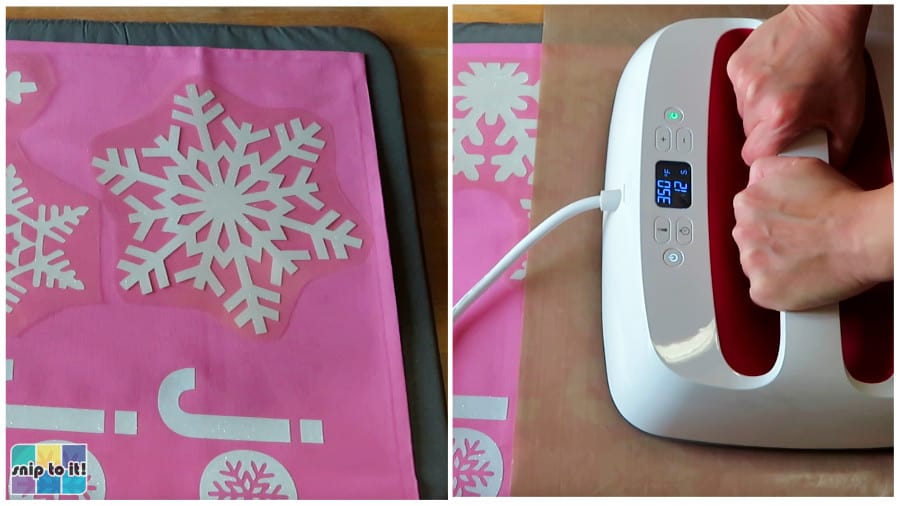
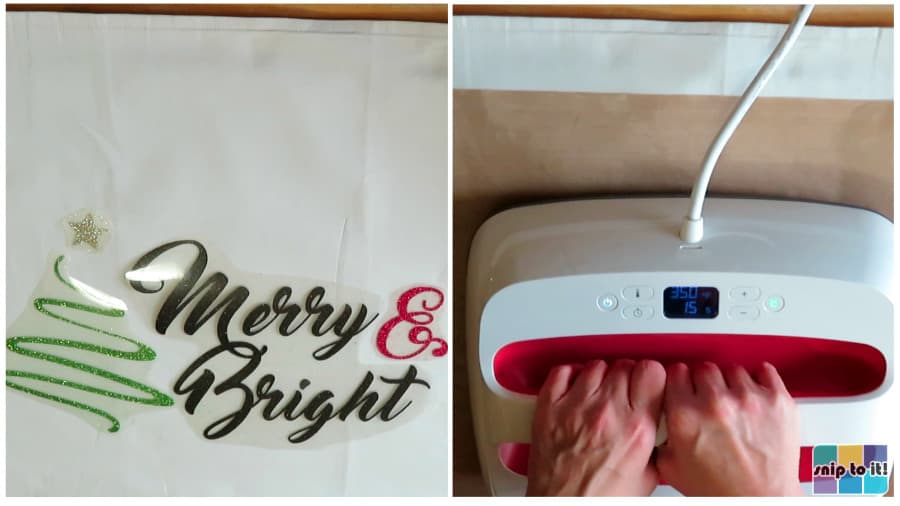
I’m using an EasyPress, so I’ll be adding 30ºF to my pressing temperature as per Siser’s directions. The press temperatures and time for Glitter is 350ºF for 15-20s. Only use firm pressure with the EasyPress.
If you are using a standard heat press:
- 320ºF, 15-20s
- medium pressure
Glitter gets a warm peel – cool the HTV and pillowcase for 15-20s after pressing to cool it down before peeling the carrier sheet.
Press your design
The key with pressing pillowcases is to avoid seams and the zipper. Even with the large joy design, I was able to keep a good margin between my press and the seams, and I moved the zipper pull to the opposite side of wherever I was working.
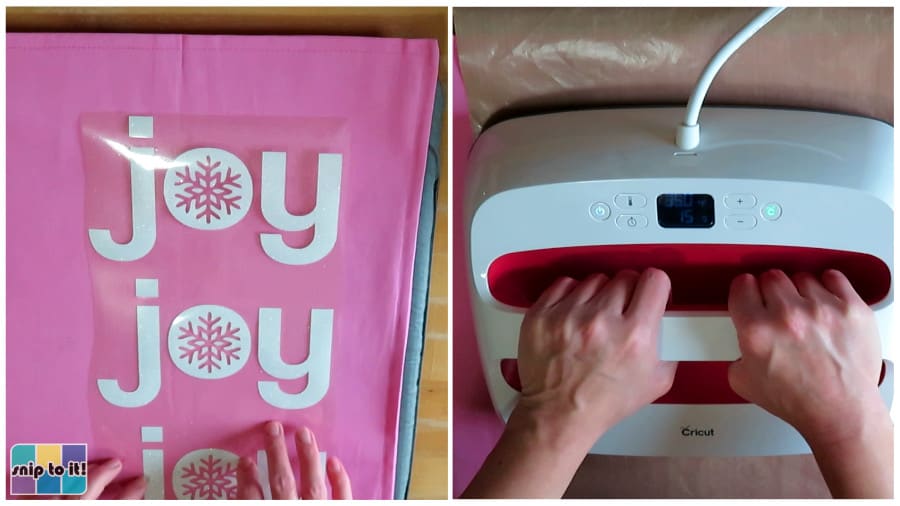
joy joy joy design:
- 350ºF, 15s per press
- warm peel of the carrier sheets (I cooled my pillowcase on the table top for 15-20s before peeling the carrier)
I had to press the joy design in 3 parts due to its large size. The first part I applied was the text, which I had to press in 2 sections (upper 2 joys, then the bottom joy):
Then I pressed the 2 snowflakes in the corner/center, moving the zipper pull to the opposite side while I worked:
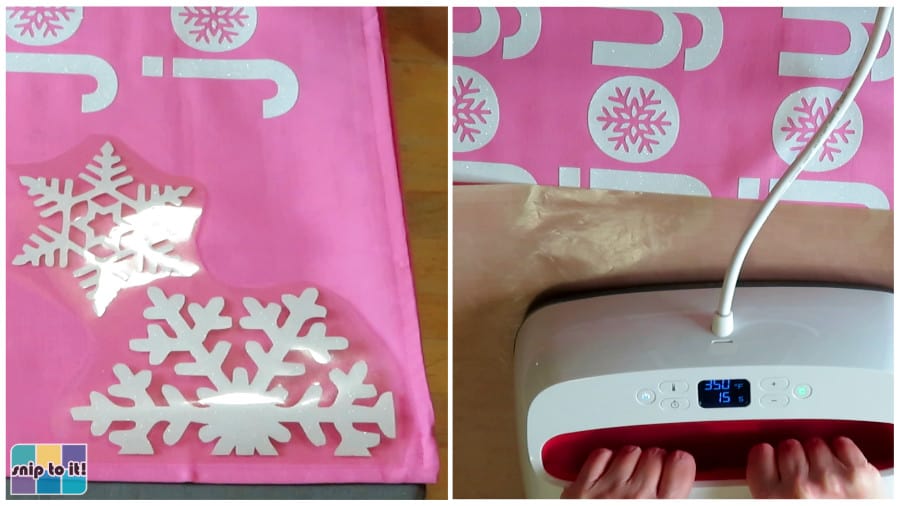
Last, I pressed the top snowflake:
Merry & Bright:
The Merry & Bright design was super simple and easy to make in just 2 presses (text pressed first, then the tree).
- 350ºF, 15s for each press
- warm peel of the carrier sheets after both presses finished
And now your project is complete!
Photos don’t do glitter iron-on justice – it is so beautiful and sparkly in person!
Before you go, you might like to check out our other holiday projects:

Let us know if you have any questions, or strong feelings about glitter, in the comment section below!