
Insert cards are the perfect solution when you want to send a nice little pick me up without spending a ton of time. Quick and easy, all you need to do is cut the design in one step and insert a piece of paper or cardstock behind it – no glue, no kits, no card mat, no nonsense!
Simple to cut and assemble, we have created 5 free bunny-crazy Easter and spring SVGs to make insert cards. You’ll spend more time picking out your cardstock than you will actually making these cute cards!
Materials and tools:
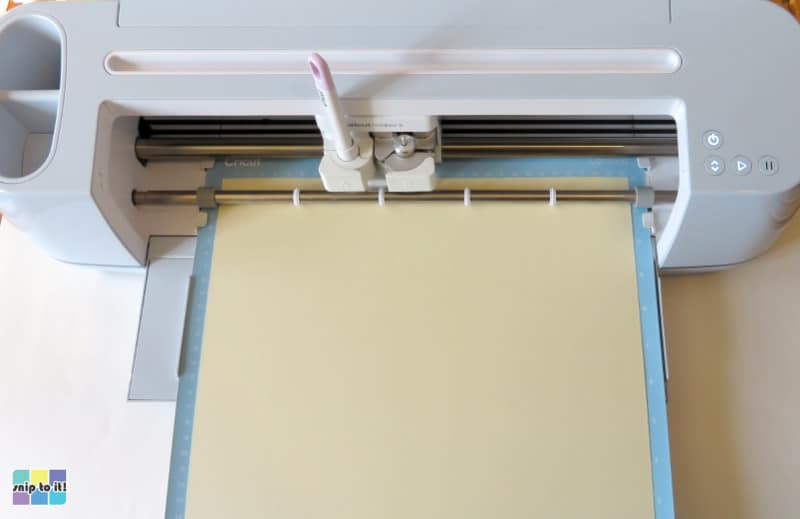
- Cutting machine – I’m using a Cricut Maker 3, but you can use a Silhouette or any other machine
- Scoring Stylus or Scoring Wheel (or you can fold the card in half/score by hand)
- Cut file – download the SVGs from our Resource Library
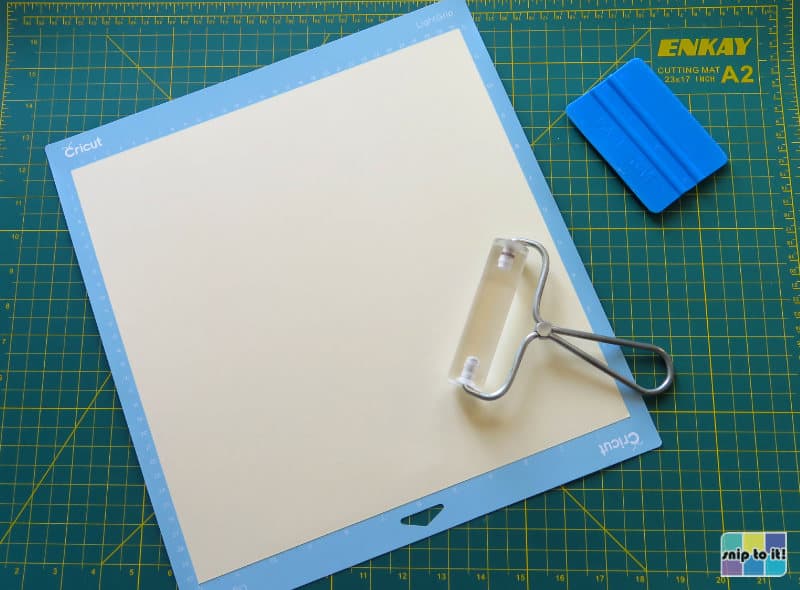
- Cutting mat – I’m using a blue Light Grip 12×12″ mat
- Brayer
- squeegee/scraper
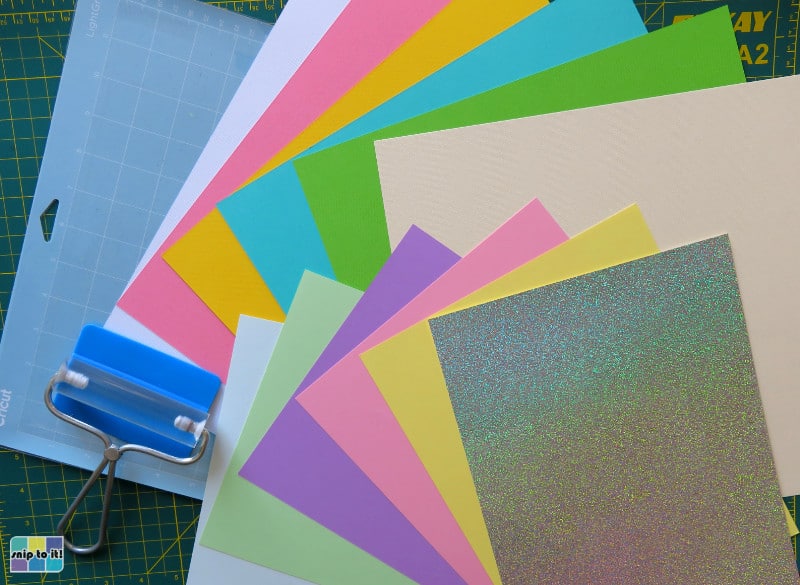
- cardstock for the card base – I’m using 80lb Cricut cardstock
- paper or cardstock for the insert – I’m using 65lb Recollections cardstock and various holographic papers
- optional: pen(s) for writing in the card, I’m using a Cricut Glitter Gel Pen in black
- instructions on how to write and cut the card all in one step follow the basic card tutorial: click here to go directly to this section
Download the SVGs
Our 5 Easter/spring card designs can be downloaded from our Resource Library.


Each file contains the design SVG (and PNG, JPG and DXF version) and 2 alternate insert panels (square corner and round corner options).
Upload your file to Design Space & create your card
Open Design Space and start a new project. These cards are 4×6″ finished size.
Upload your image
- Click the Upload icon in the lefthand sidebar
- Click the Upload Image button and follow the prompts (Upload image > choose the file from your download folder > Upload)

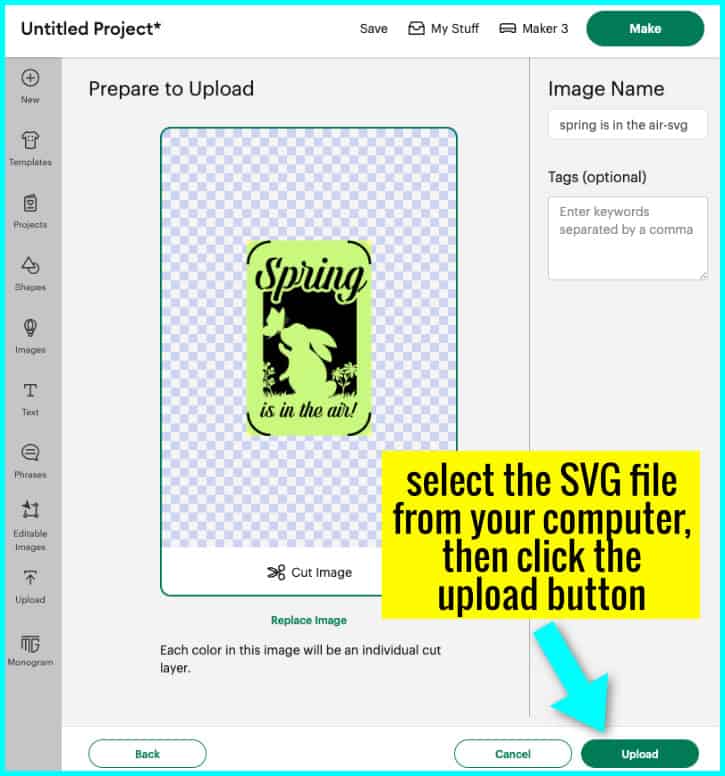
- Add your image to the canvas and ungroup the layers
- the image file has 3 parts: the design SVG and 2 optional insert panel templates (one with square corners, one with rounded corners)

Create your card base
- Open the Shapes menu and add a square and a score line to the canvas
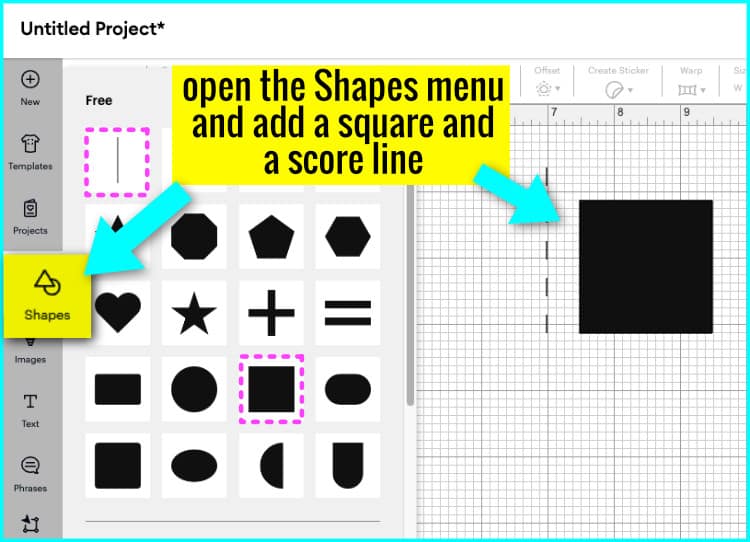
- Click on the square, click the padlock open in the Edit menu at the top of the canvas, and re-size the square to 8×6″
- Click the score line and re-size it to 6″
- Select both shapes, open the Align pulldown menu, and choose “Center”, then click Attach

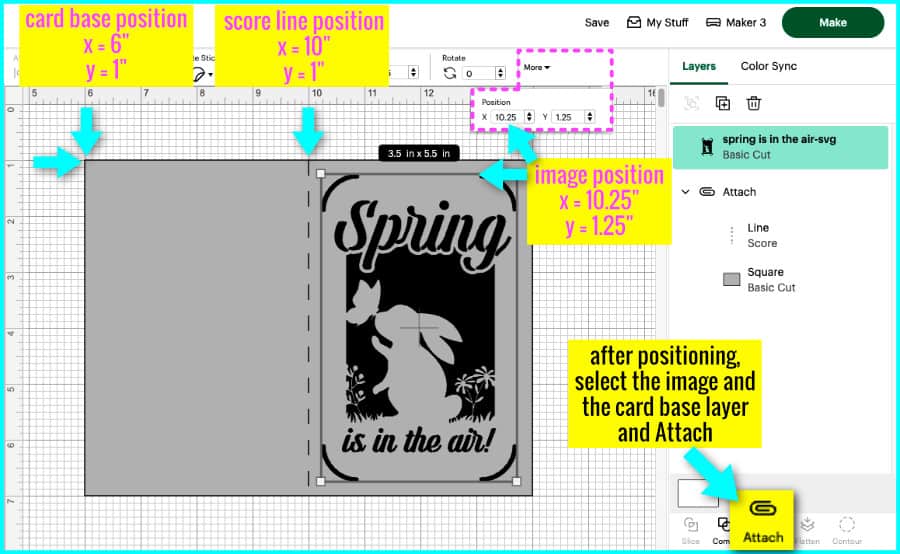
Attach your image to the card base
The Easter designs for these cards, including corner slots, are 3.5″ x 5.5″. This means that you will center the image on the front of the card, giving it a 1/4″ margin all the way around.
- Position the image on the card base, 0.25″ from the top and 0.25″ from the score line.

Here’s a tip for positioning your image the easy way, without clicking and dragging:
- Click on the card base and click “More” on the Edit bar at the top of the canvas. You will see boxes for X and Y coordinates; type in simple coordinates for your card base (I have positioned mine at X=6, Y=1)
- Design Space will automatically move your object to the coordinates you enter. Your base will be at X=6, Y=1 and the score line in the center will be at X=10, Y=1
- Click on your image and open the XY coordinates menu. Position your design 0.25″ from the score line and 0.25″ down from the top. In my example, I set it to X=10.25, Y=1.25
Prepare your mat & cut
Use your brayer (or a felted squeegee) to tack down your paper to the mat.
Cut your design using the “Cardstock (for intricate cuts)” setting.
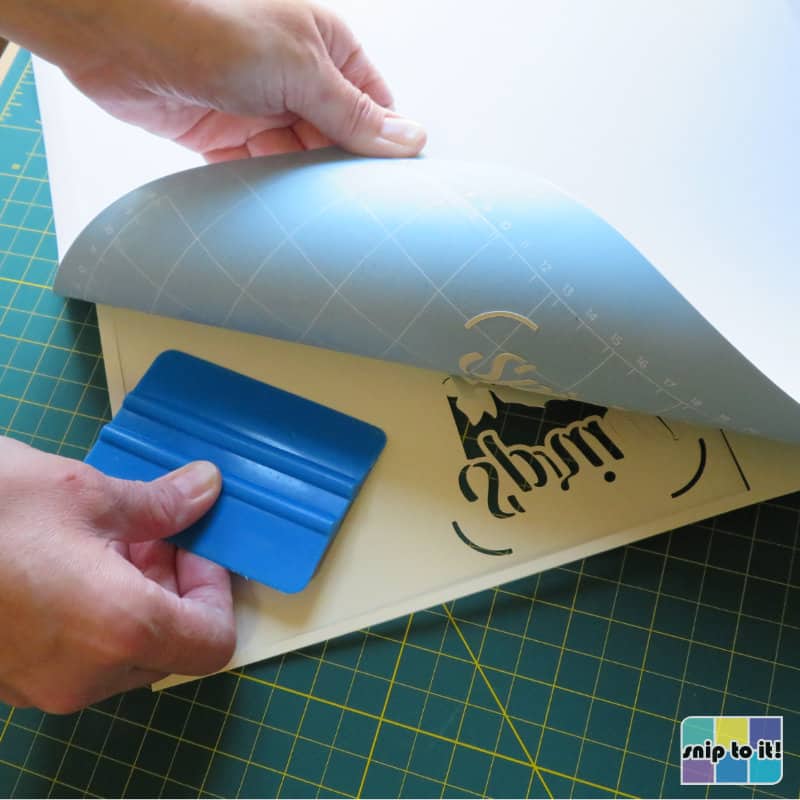
Flip your mat over and remove the cardstock from the mat using your squeegee. If your mat is pretty sticky, most of the pieces you don’t want will stay stuck on there.
Cut your insert sheet
Inserts for these 4×6″ cards are 3.5″ x 5.5″.
Using your cutting machine: I’ve included square corner and rounded corner insert panel templates with the SVG files. Choose a panel design and send it to cut out of whatever paper you’re using. OR
Cut your insert panels manually: for most of these cards I just cut my insert sheets to 3.5″x5.5″ with a paper trimmer.

Put in your insert, fold your card and you’re done!
Tuck the insert panel into the slots behind the cutout design.
Fold along the score line (or fold the card in half) and run your brayer or squeegee along the crease to flatten it.


How to write inside your card and cut your design in one step
If you want to write inside your card with your Cricut, you can do everything in one easy step just by mirroring your design.
- Select the image and open the Flip pulldown menu in the Edit bar. Choose Flip horizontal to mirror the image on the canvas
- Add your text to the canvas. The Easter SVG file in this example includes written text, but you can choose your own text and font if you like (check out our list of 117 free writing fonts for Cricut!). Position the text block over the right side of the card base and set the Operation to Draw > Pen
- Position the graphic in the center of the left side of the card base (0.25″ from the top, 0.25″ from the left edge)
- Select the graphic, text and card base and click the Attach icon at the bottom of the layers panel
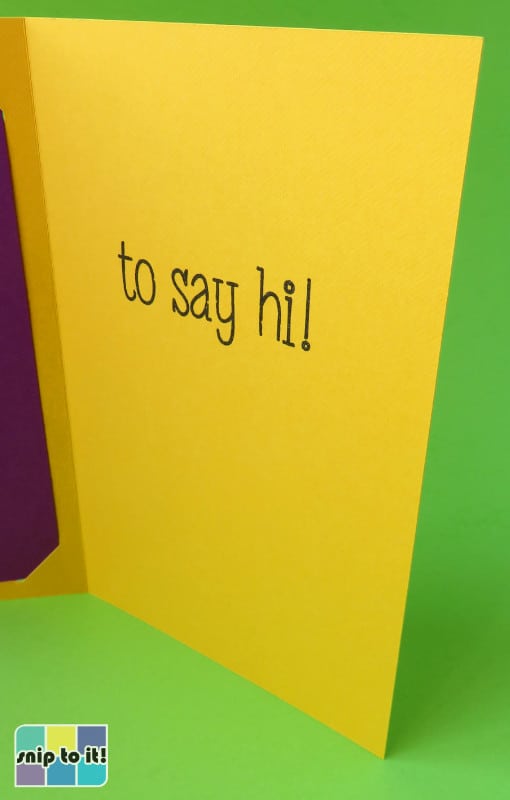
Your Cricut will now score, draw, and cut to complete your card in one step!


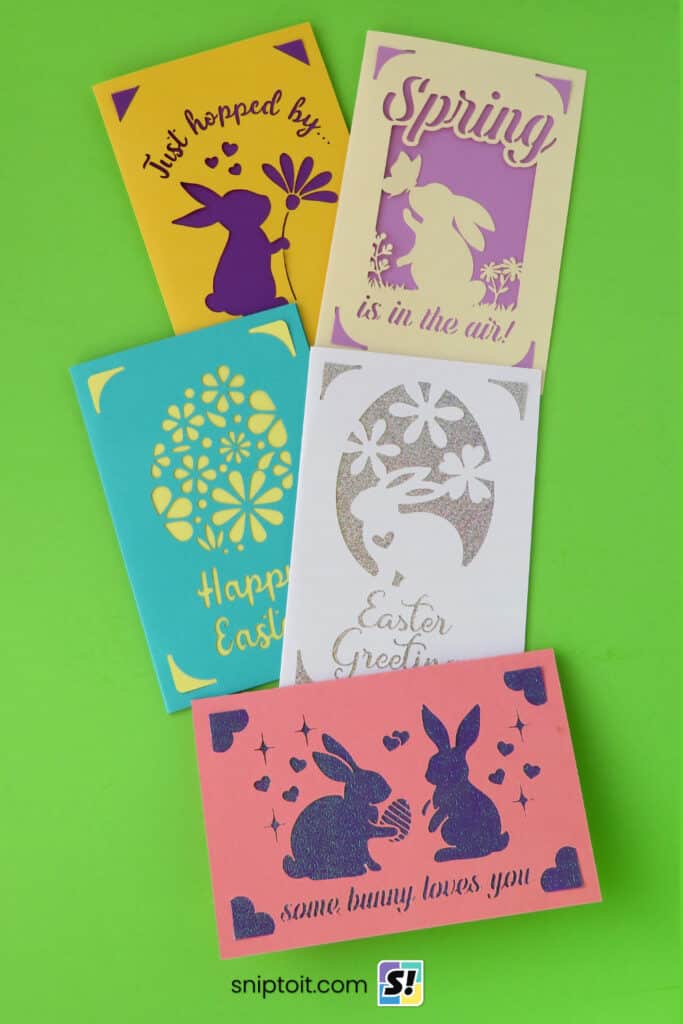
Here are all the finished cards!
I used a variety of cardstock, holographic, and sparkle paper for the insert panels, and you can see that the possibilities for paper choice with these cards is really endless. Still a lovely hand-made card, but each of these took me less than 15 minutes to make!


Before you go…
Thanks for reading! If you’ve made it this far and have made a few of our designs, you might be wondering about envelopes. We have tutorials you might like:
- How to address premade envelopes using your Cricut machine
- How to make foiled envelopes (with card templates)
Best of luck with your Easter celebrations, here’s another project you might like:

