This tutorial is part of the advanced techniques section of the Mastering Cricut Design Space learning hub.
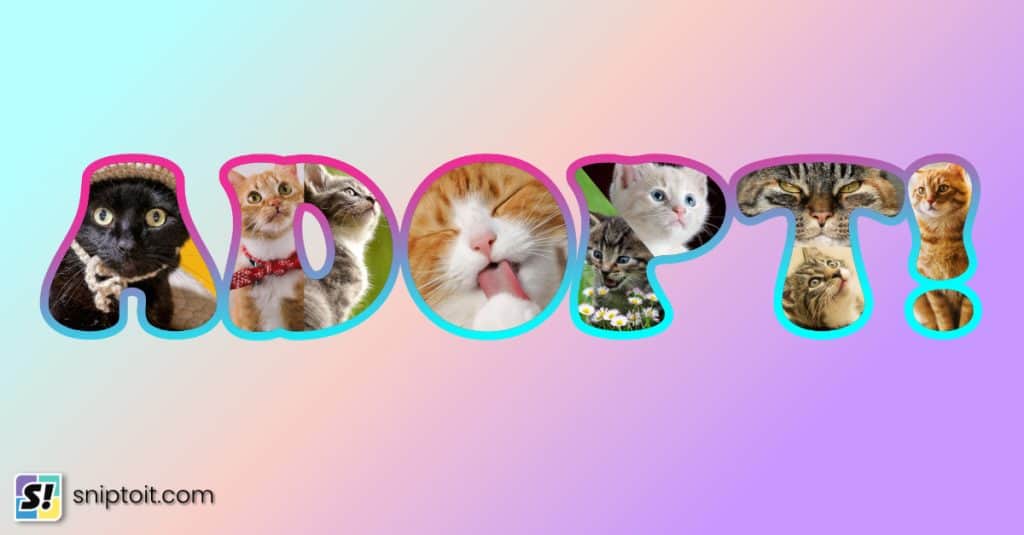
Using a photo to fill text is an easy way to create beautiful mementos. You use this design technique to create cards, gifts, or even just to fill your scrapbook. This tutorial walks you through 3 easy ways to fill text or shapes with photos right in Design Space.
Video: How to Fill Text with Photos
Method 1: Slice
The first method uses the Slice function to cut text out of your photo.
Upload your photo
Start by uploading your photo. If you need more detailed assistance, check out our guide to uploading images to Design Space.
Click Upload in the sidebar, then Click the Upload image button and either drag and drop the image file into Design Space or browse your computer. Click Continue at the confirmation screen.
Design Space will take you to the Background Remover tool. In this case, you want to keep the background of the image, so click the Apply & Continue button without making any changes.
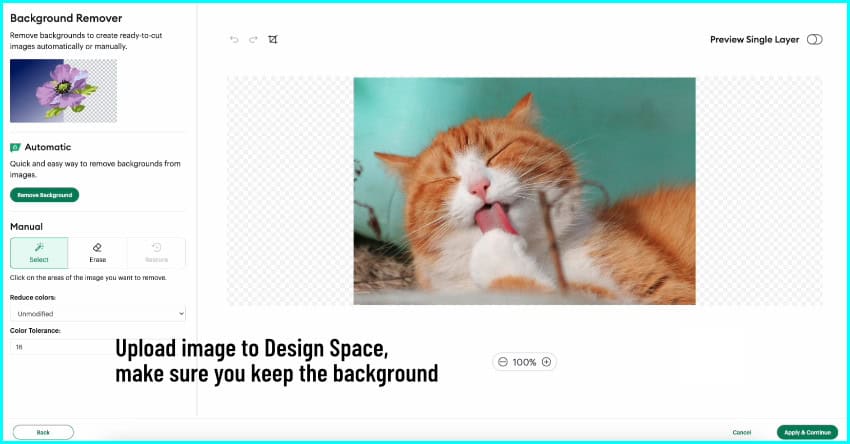
The next screen is going to ask you to select the image type you want to upload. Select Flat Graphic and click Continue. Now you can finally click Upload (you can also rename, tag, or categorize the image if you want).

Add your text and adjust the size/spacing
The next step is adding the text to the canvas. Click the text icon in the left hand sidebar and add whatever text you want. I’m going to change the font to Cooper Black – it’s a bold, chunky classic that I have as a system font, and it’s also available in Design Space.
This slicing technique works not only with text, but with shapes and single layer images as well. So, to make this design a little bit more interesting, I’m going to ungroup the text, delete the O from LOVE and replace it with a heart shape from the Design Space image library.
I’m going to position the text over the image and adjust the spacing, moving my letters closer together to make sure I feature the important parts of the photo.

You can change the Operation type for the text to Guide so you can position an outline of the text over the image and see exactly what’s going to be included and excluded from the final result. You don’t even have to change it back to cut before slicing.
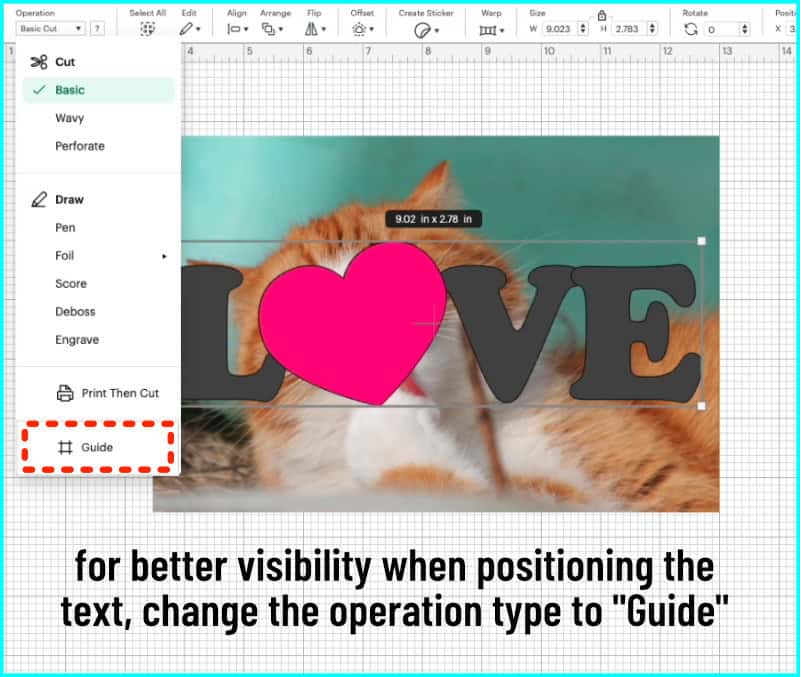
See how the photo is fully visible when I’ve set my Operation to Guide?
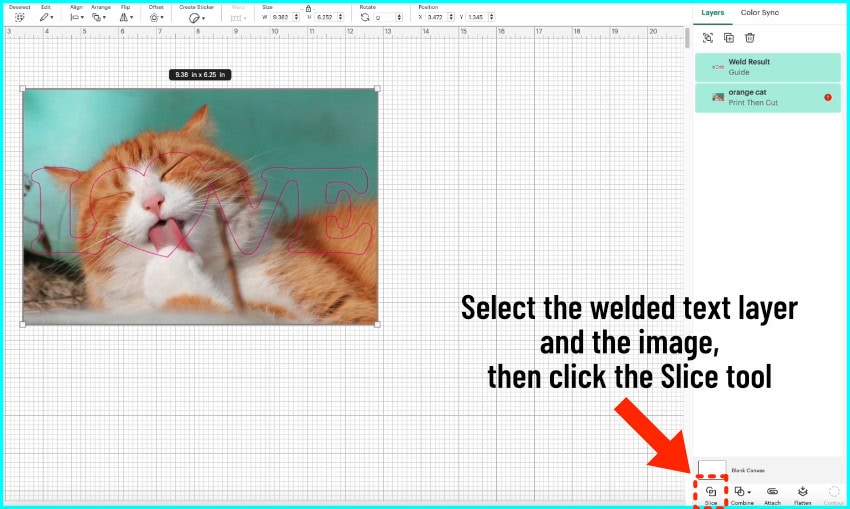
When you’re finished resizing and adjusting, select the text/shape/image sitting over the photo and click Weld to turn it into a single layer.

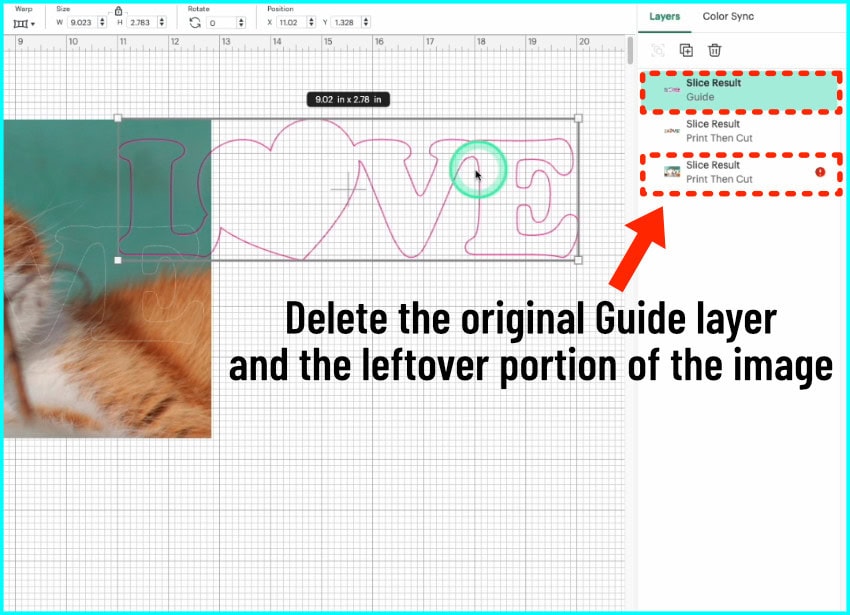
Slice
Once you’ve got your text ready and your image is the correct size, you’re ready to use the Slice tool.
Select the text layer and the photo layer and click the Slice icon in the lower right hand corner of the canvas. That’s it.
Design Space will cut this into 3 layers: Top layer is the original text layer and you can delete this. The bottom layer is the excluded portion of the photo layer, and you can delete that too. The remaining layer is the portion of the image inside the text and it turned out perfectly.
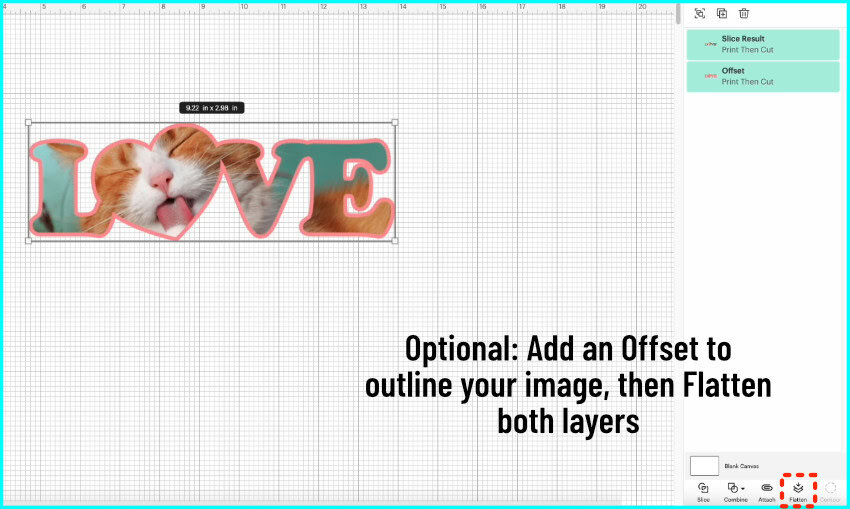
To make this stand out a little bit, I’m going to add an offset to the filled text layer and then flatten it to the offset before I send it to the printer.
And that’s the easiest way to fill text and shapes with a photo in Design Space.
Method 2: Attach
What if you have a photo or image with a transparent background? If you try the Slice method with an image that has a transparent background, you are going to be left with a result that has an irregular, incomplete outline.

In order to get a usable image for print then cut, you need to flatten the image to a background, but then you will not be able to use the slice function, because DS sees the flattened image as more then one layer.
So, how do we cut text out of this image? We just select the flattened image and the text, and click Attach. The most obvious and basic solution – we are just going to print the whole image and physically cut the text out of it.
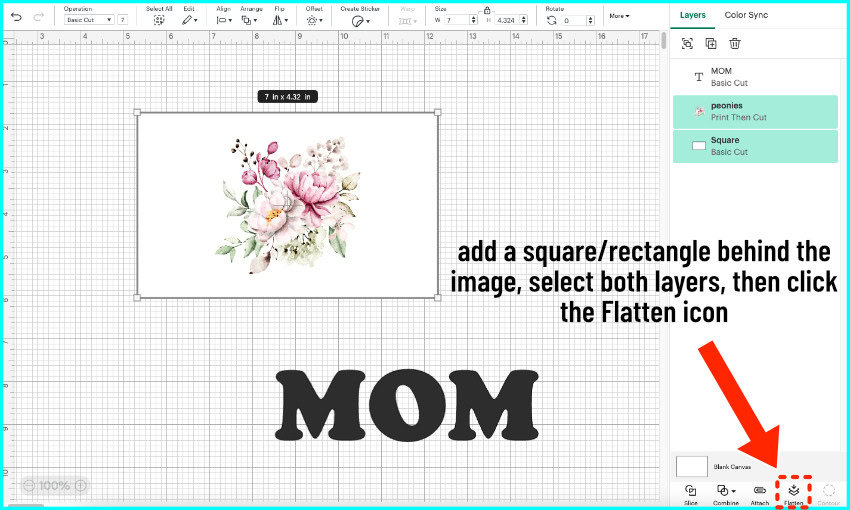
Steps: Flatten your image to a shape, then Attach the text
So, add a square or rectangle to the canvas and arrange the layer behind your image. This will give your image the background it needs before you cut the text. So select the shape and the image and click the Flatten icon at the bottom right hand corner of the screen. This combines the image and backing shape into one print and cut object.
Add a text block, change the font and resize it over the image. When you’ve got it lined up perfectly, select both layers and click Attach. Design Space will now print the image and when you put it on the mat to cut, it will cut the text layer out of the image.

The key thing to remember is that the text layer has to be set as a Basic Cut. Design Space won’t print this text layer but it will include it in the print and cut, so if you changed the text to Guide, you have to change it back to cut.
Method 3: Pattern Fill
Instead of cutting text or shapes out of a photo, you can also fill the text with a photo using Pattern Fill. This allows you to use the image in a lot of different ways, but it’s problematic if you want one large image across the text. I’ll show you how to do it anyway, because it can be fun.
So, first Upload your photo. This time, instead of choosing “Image”, choose the Pattern Fill tab and click the Upload Pattern button.
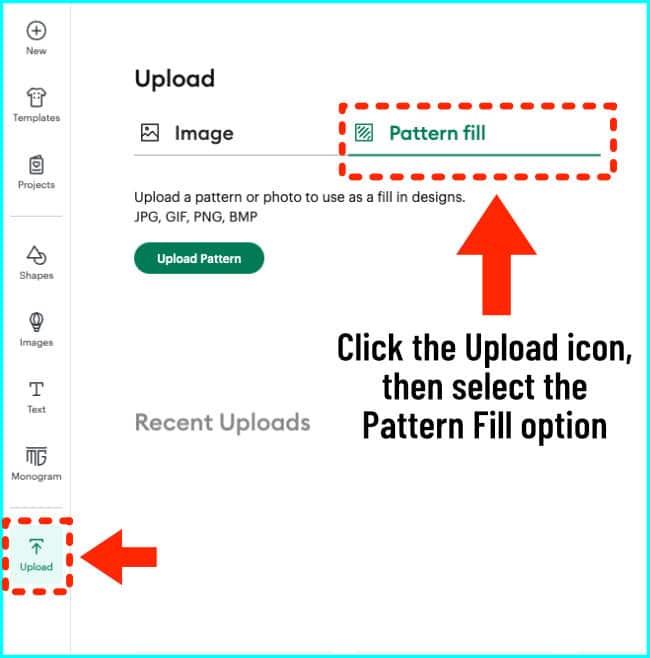
You will drag and drop or browse for the image, just like a regular image upload. Then click Upload.
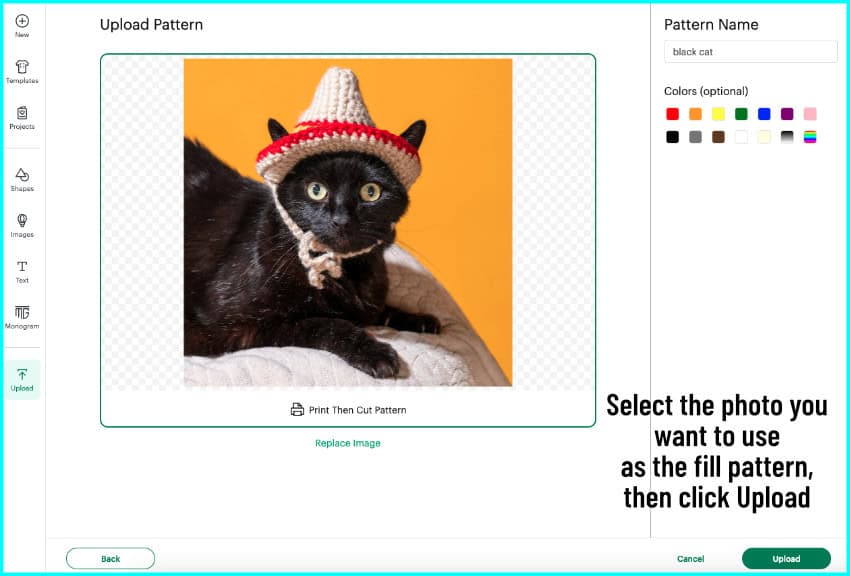
Instead of showing up on your canvas, the photo is now an option saved in your pattern library.
So, type out your text:
- If you want each letter to show a repeating pattern, leave your text as-is
- If you want the pattern to extend across the whole word, then Weld your text before you do the pattern fill.
I’m going to show you how both of these methods will turn out.
Non-welded text: each letter shows the pattern separately
Change the Operation for your text to Print Then Cut. I’m going to show you unwelded text first.
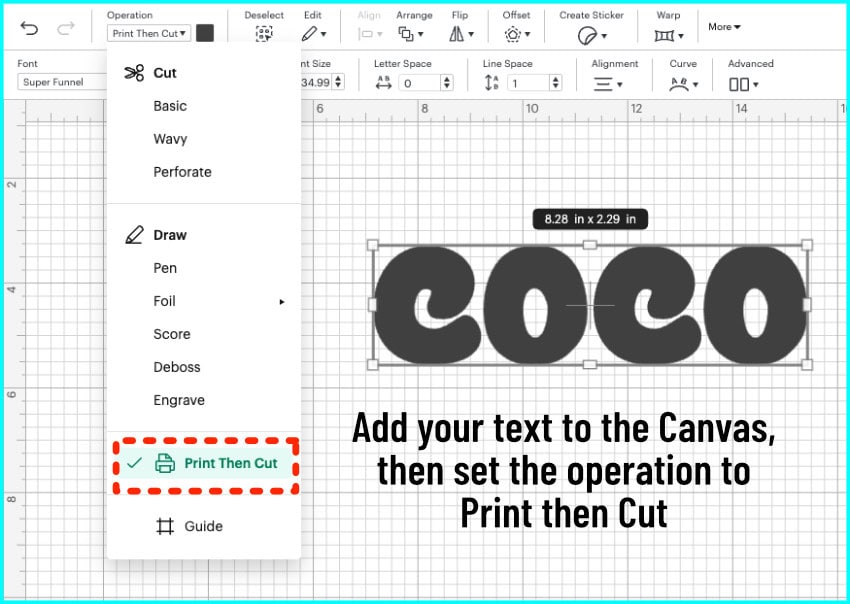
Go to the color selector (the box next to the Operation menu) and from the pulldown menu where it says Print type, select the option that says Pattern.
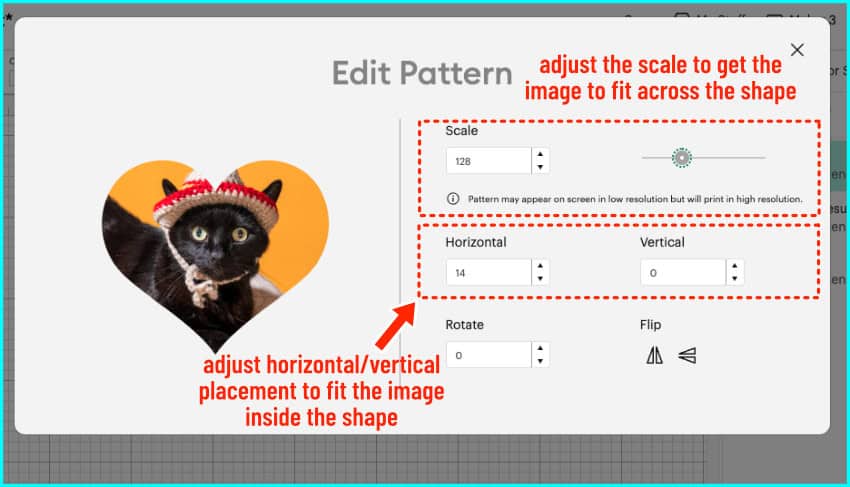
Click on the photo you want, then click Edit Pattern.

From here, the most important thing to do is scale the image. You can fill your text with a large image or you can scale it down and fill your text with a pattern of multiples of the photo. Pattern fill works best when you want a repeating pattern and not a single image.

Here is how unwelded text ends up looking using pattern fill, where each letter is filled independently:

Welded text: the pattern extends across the entire Weld result
I’ll show you how badly pattern fill works for filling text with a single large image using the Welded example. So, I select the pattern from the color selector, then choose my photo and Edit Pattern.
I adjust the scale to fill the whole word with just one photo instead of a repeating pattern. Then, I adjust the placement to center my image across the word (putting the cat’s eyes in the central O and C).
If you want to adjust the placement of the photo within your lettering, you’ll have to adjust it within the edit pattern fill tool by changing the horizontal, vertical, and rotation measurements rather than just clicking and dragging on the canvas.

I have yet to be able to actually fill a whole word with one image, and it never shows up on the canvas the way it looks in the preview:

But, if you have a single shape you want to fill, that will work better. It is very easy to fill this heart shape with a single, scaled-up photo that looks exactly as I adjusted it in the Edit Pattern window:
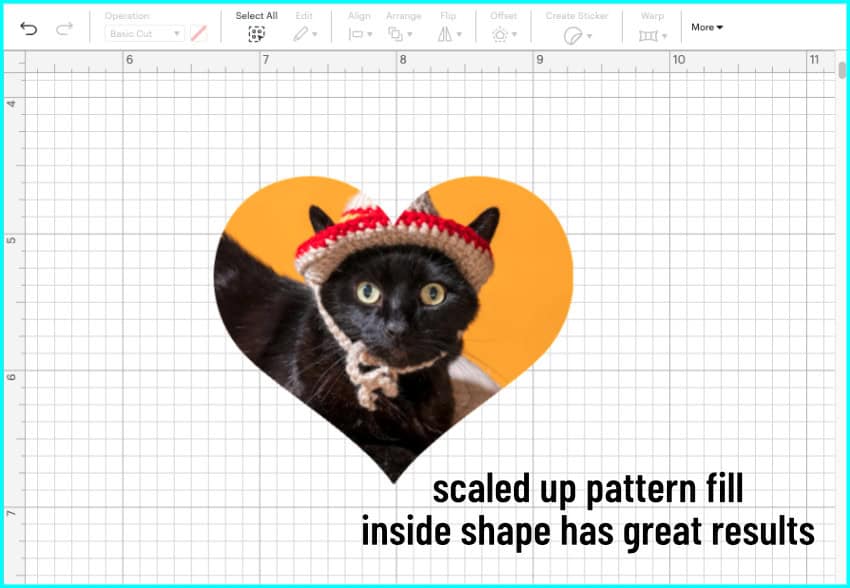
So, if you want a fun photo pattern or just have one shape to fill, pattern fill can work well. Once you adjust the pattern the way you want, it’s ready for Print Then Cut.
Before you go…
So now you know 3 different ways to fill text or shapes with an image in Cricut Design Space — using slice, attach, and pattern fill. Such easy ways to create beautiful keepsakes or fill your scrapbook, just using the tools in Design Space! If you’re looking for more creative ways to use your Cricut, here are a few more articles you might be interested in!