
This article is part of the Mastering Design Space learning series, focusing on Design Space tools and techniques.
The Flatten function is a key tool of Design Space Print Then Cut projects. Without it, things can quickly turn messy. Knowing how and when to use it will make your crafting time less frustrating and more fun, especially when you are creating sheets of stickers, labels, and customized cards.
This basic explainer outlines the Flatten tool and compares it to other Design Space functions. It helps clarify how to use it to get great printing results without frustrating mistakes and material waste.
What does Flatten do?
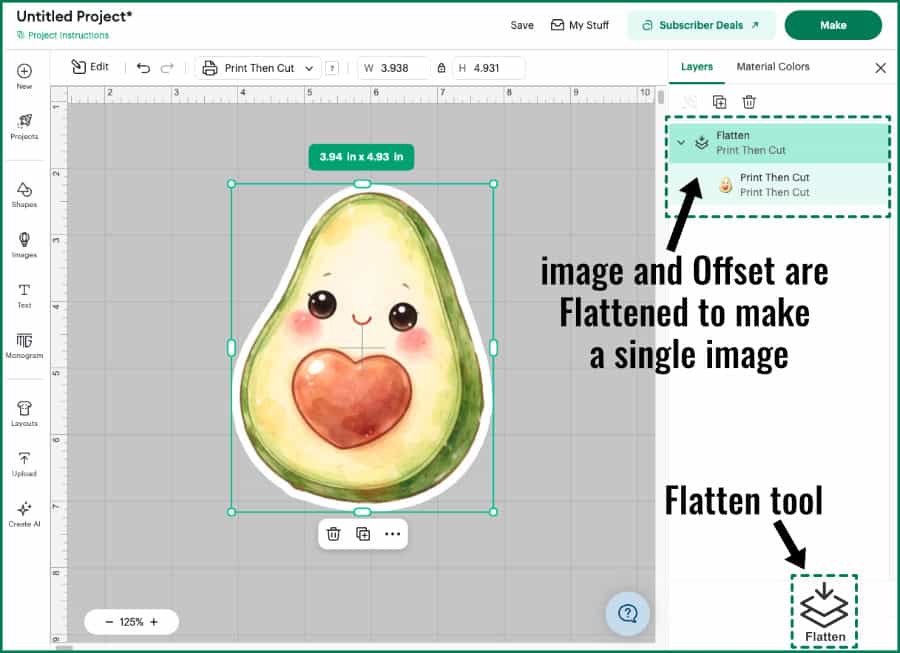
The Flatten tool combines multiple layers into a single printable image with one outer cut line. It automatically changes the Operation to Print Then Cut. It’s essential when you are converting other types of images for printing.
Simply put, Flatten tells Design Space to stop treating these layers as separate cut pieces and instead treat them as one printable image.
Although its function is unique, the way it behaves on the Canvas can often be confused with other tools like Group, Attach and Weld.
Flatten is most commonly used when you are creating an image of your own in Design Space – a combination of shapes, text and images. When multiple objects are involved, you must use the Flatten tool. Otherwise Design Space will try to print and/or cut each element separately.
Let’s look at a few examples that explain this…
If you are uploading a printable image to the Canvas, or using a Print Then Cut image from the library, Design Space sees this as a single object. There’s no need to Flatten it to get the correct result when you Make it.


If you take that image and add an Offset but do not Flatten, Design Space will treat the image and its offset as separate shapes when you hit the Make button, even if they looked perfectly aligned on the Canvas.

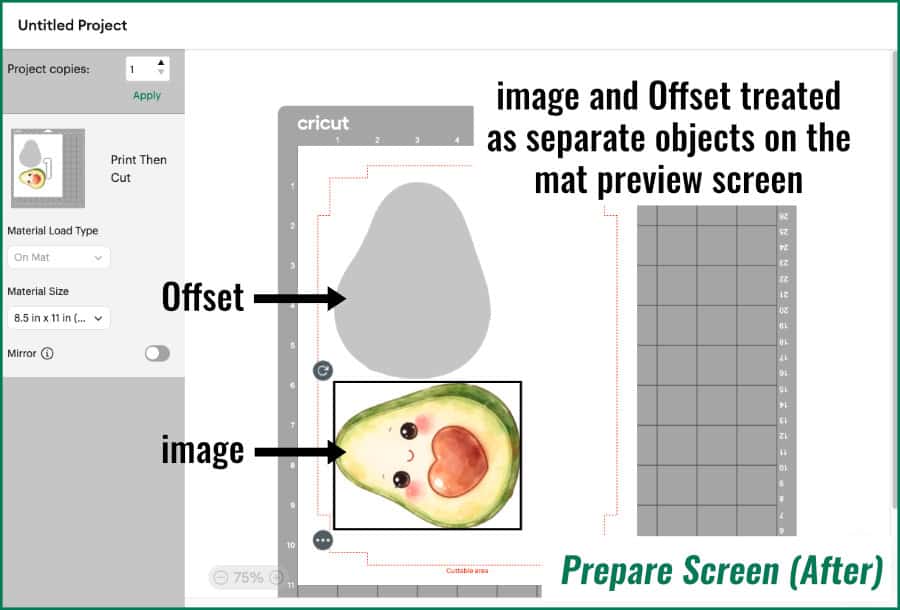
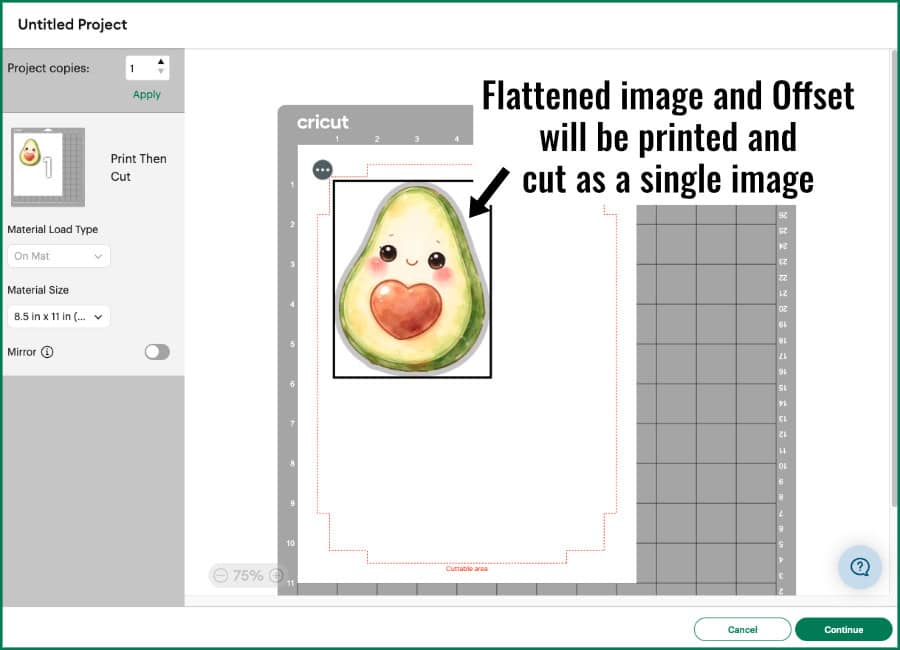
To create a single printable image with a border around it, you need to select both the image and the offset layer and click Flatten. Design Space will merge both objects into a single image for printing and cutting.
Like most Design Space tools, the Flatten tool can be undone, and your original layers will be restored (although they will now be assigned the Print Then Cut Operation).
How to Make the Flatten tool Work (when to use flatten)
If you select multiple objects then Flatten them, you are creating a single image with one outer cut line. When you click Make, your image will be shown on the Prepare screen as you have created it, and then when you go to cut the print, Design Space will recognize the outer perimeter.
Flatten is the key tool to make:
- stickers with a white border around the edge
- images with personalized text
- multi-layer vectors converted to prints
Flatten vs Group: why did each piece of my image print & cut separately?
If you add a multilayer SVG to the Canvas it will be Grouped and behave like one cohesive image on the Canvas. But if you select that Group and change the Operation to Print Then Cut, will you get a single Print Then Cut image? No!
Look at this example below:
The source image for this cartoon cat from the Design Space library is a multilayer cut file. The first copy has been Flattened, and the second is a Group that has been set to Print Then Cut. They look identical on the Canvas, but as soon as you go to the Prepare screen, you see that Design Space ignores the Group and splits the second cat into its component layers for printing and cutting.
(If the Prepare screen still feels confusing, you may want to read my full guide to the Prepare and Make screens first.)
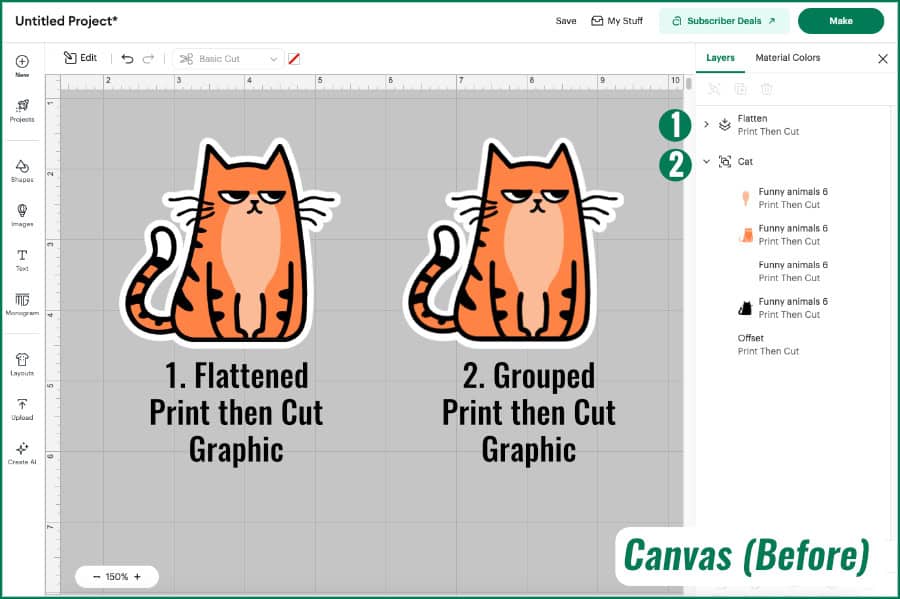
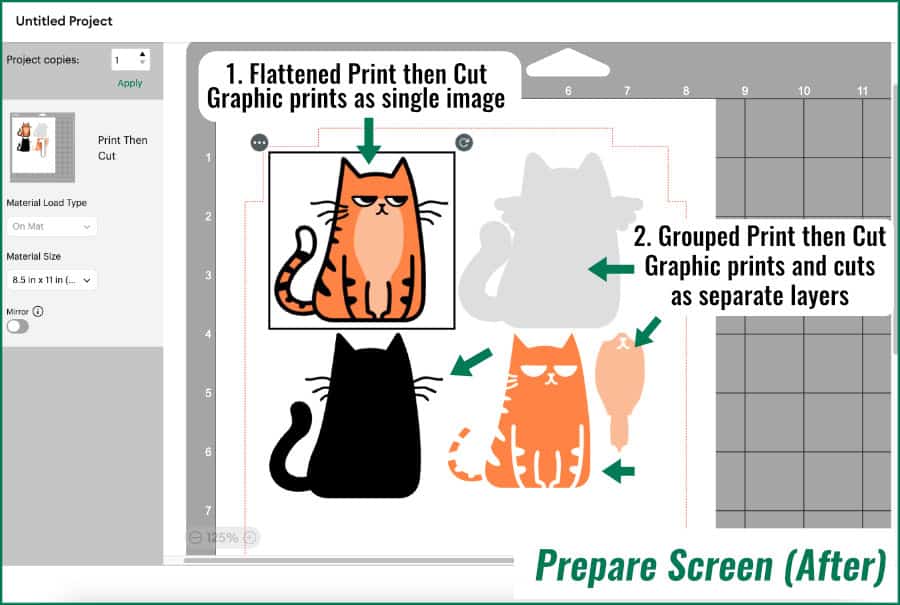
As I said before, when we Group, Design Space recognizes that on the Canvas, but then treats every layer separately on the mats. We need Flatten to override that default in order to treat our multilayer image like a single image with one outer cut line.
Rule of Thumb: Group organizes layers on the Canvas. Flatten combines layers into a single printable image.
Flatten vs Attach: why did my text get cut out separately from the rest of the image?
Attach and Flatten share the ability to take actions made on the Canvas and carry them forward to the Prepare and Make screens. Attach locks the position between layers both on the Canvas and on the Prepare screen.
Here’s a typical scenario that seems correct on the Canvas but leads to a bad result further along. I often see people trying to print and cut invitations with their Cricut. The print seems correct but Design Space ends up cutting all of the internal layers like text and graphics, ruining the project.
This example invitation is basic combination of shapes and text. I selected the first image and Flattened the layers to create a Print Then cut image.
The second image was selected and every layer’s Operation was changed to Print Then Cut, then all of the layers are Attached together. Will Attach create the same result as Flatten? No!
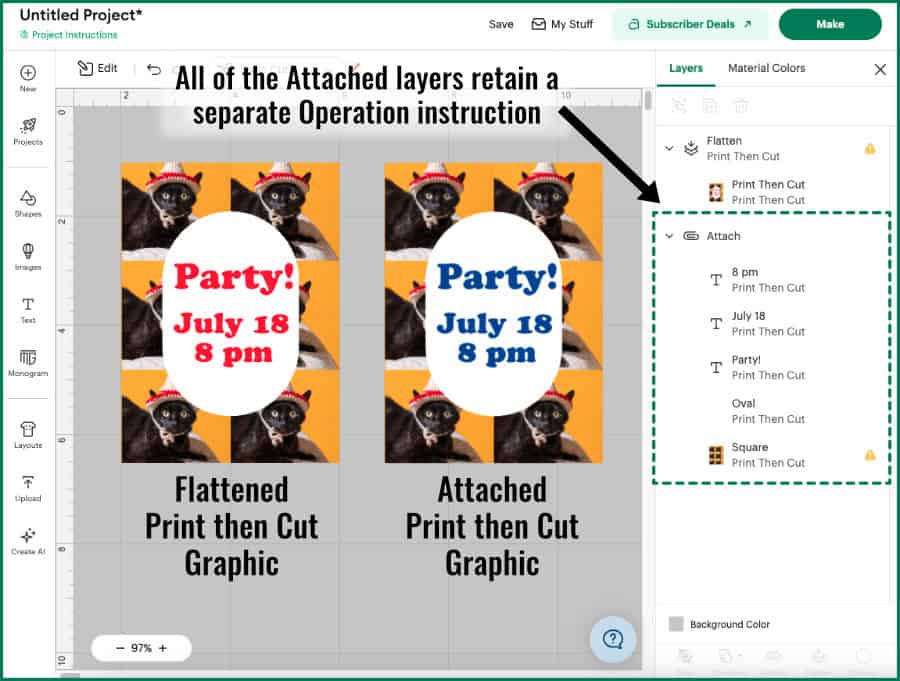
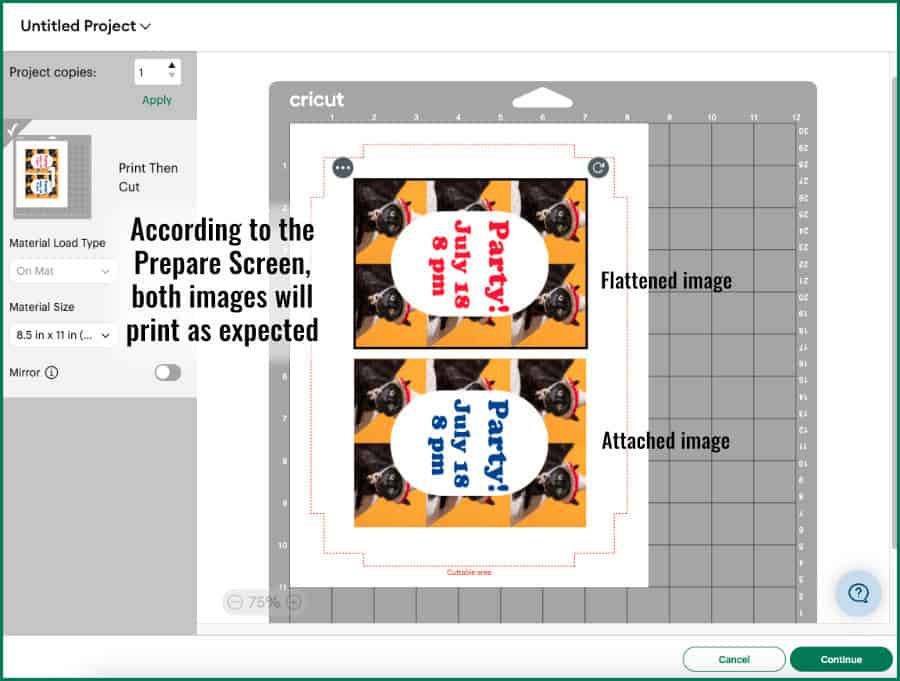
When you click Make, the preview looks correct. All of the layers of the second image will be printed together as intended. BUT, when we move on to cutting, all of the small internal pieces of the image will be cut out in addition to the overall shape. Attach keeps all the layers together, but those layers are still treated as separate.
Each layer of the image will be printed then cut – each letter and shape – instead of having a single outer cut line for the whole image.

Even though using the Attach tool looks correct on the Canvas and the Prepare screen, when you load the print on your mat to cut, Design Space still recognizes all of the internal cut lines and will proceed to cut out every internal element in the image.
Rule of Thumb: Attach preserves position between multiple layers. Flatten removes internal cut lines.
Why can’t I slice a flattened image?
Slice doesn’t work on Flattened images.
Flatten turns all the selected layers into a single printable image instead of separate cuttable shapes. After using Flatten, Design Space no longer sees the individual layers with editable cut paths, it just sees one printable image layer.
Slice can only work with 2 cuttable/vector layers. When vector layers overlap each other, Design Space can calculate where to redraw the cut shape of each layer according to where they intersect. Because a Flattened image has no vector cut paths, Design Space cannot make this calculation.
Interestingly, this does not apply to unflattened Print then Cut images, both from the DS Library and images you upload. Design Space traces a vector cut path based on the outline of these images and keeps it as a hidden layer. If you select a PNG and a shape or text, you can use the Slice tool because of this hidden vector layer. (You can even Slice 2 PNGs!)
If you want to see this in action, check out our eclipse card tutorial using Attach and Flatten when Slice won’t work.
What to read next…
Now that you’ve deepened your understanding of the Flatten tool, keep up the momentum by learning all about other key tools in Design Space. You’ll find your skills improving and your projects getting more complex and easier to complete!
- Cricut Weld vs Attach: How to use the new Design Space Weld and Unweld Functions
- Weld, Slice, And Beyond: Creating With The Cricut Combine Tool Suite
- From Simple to Stunning: 11+ Ways to Use the Offset Tool for Next-Level Crafting (Updated!)
- Stop Ignoring this Design Space Hidden Gem! 6 Smart Ways to Use the Contour Tool