
This article is part of our Mastering Cricut Design Space learning hub. It is part of our series on the tools and techniques of the Canvas.
The Offset tool in Cricut Design Space allows you to create layers that are larger or smaller outlines of images or text.
Offset is so versatile, it is the secret Swiss Army knife of Design Space! Most of you will have already used Offset to create layers behind text or images, but there are so many ways you can use it to elevate your designs. This is a list of all the ways I use Offset – did you know you can even use it to create free images?
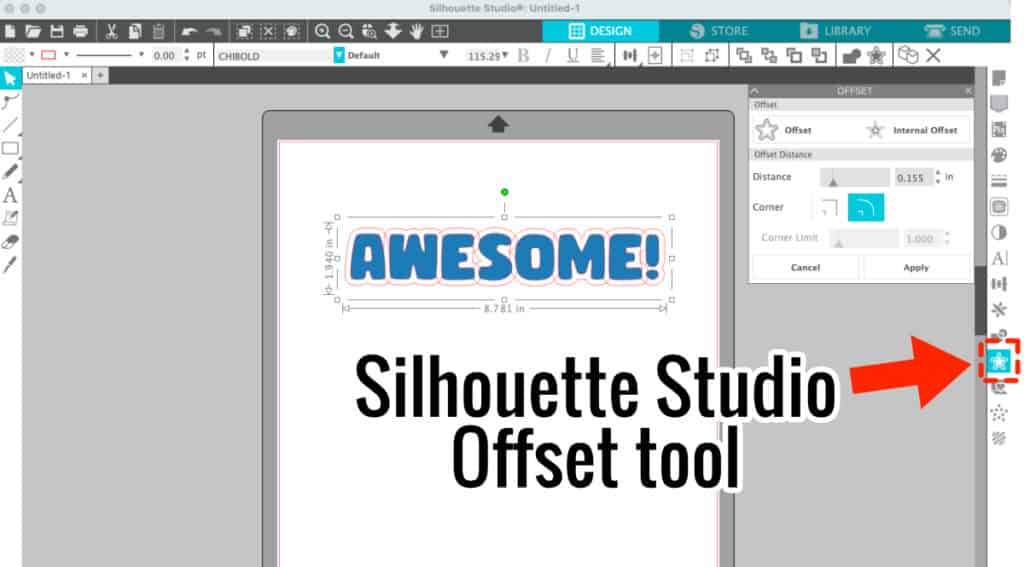
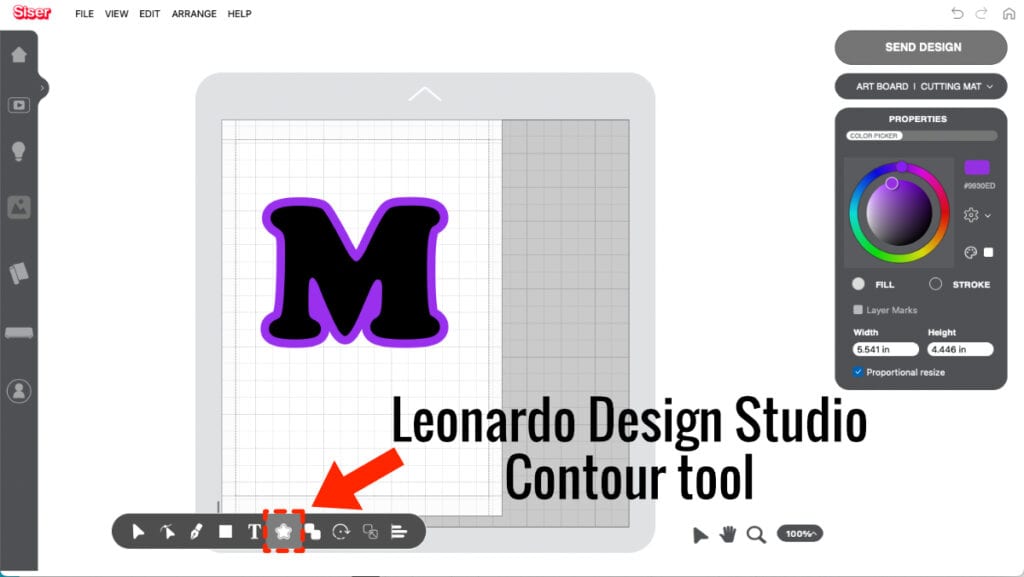
Not using a Cricut? No problem! Silhouette Studio and Siser’s Leonardo Design Studio also have this application-rich feature.
Where to find Offset for Cricut, Silhouette, or Siser machines (slideshow)
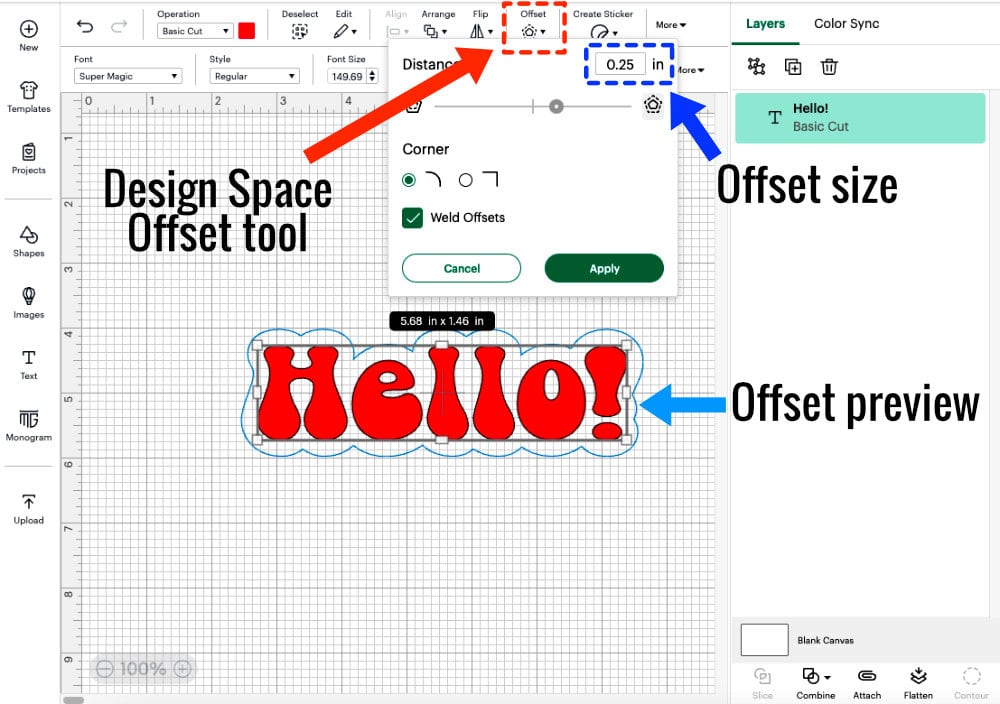
Offset is available in Cricut Design Space for Mac, Windows, and iOS (but NOT for Android devices). Find Offset in the Edit toolbar, and when you click it, a box opens to allow you add and adjust an offset for any selected text or image. You can adjust offset size using the slider or typing in the box at the top.
Let’s see what we can do with this awesome tool!
#1 Make elements pop with contrasting layers
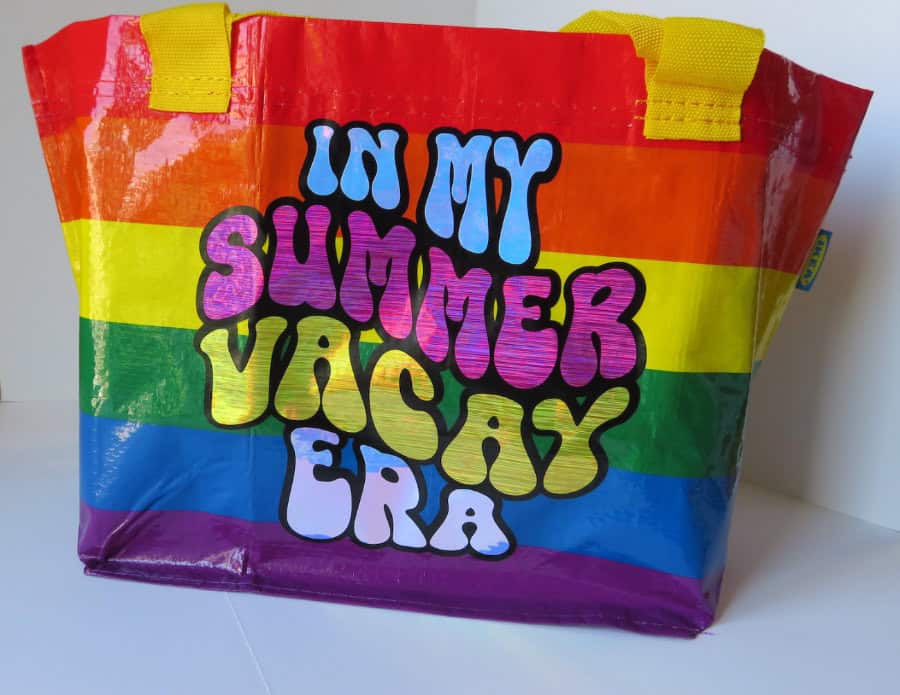
The most common use of the Offset tool is simply to create layers. Whether for vinyl, HTV, or paper crafting, adding an offset to your design is a great way to add layers and help design elements really stand out.
This beach bag has such a bold rainbow pattern, a dark offset was a must for under the the holographic vinyl text:
If you’re using a patterned base, an offset helps your top design elements stand out. This card also illustrates how useful Offset is to create a shaped base for text:
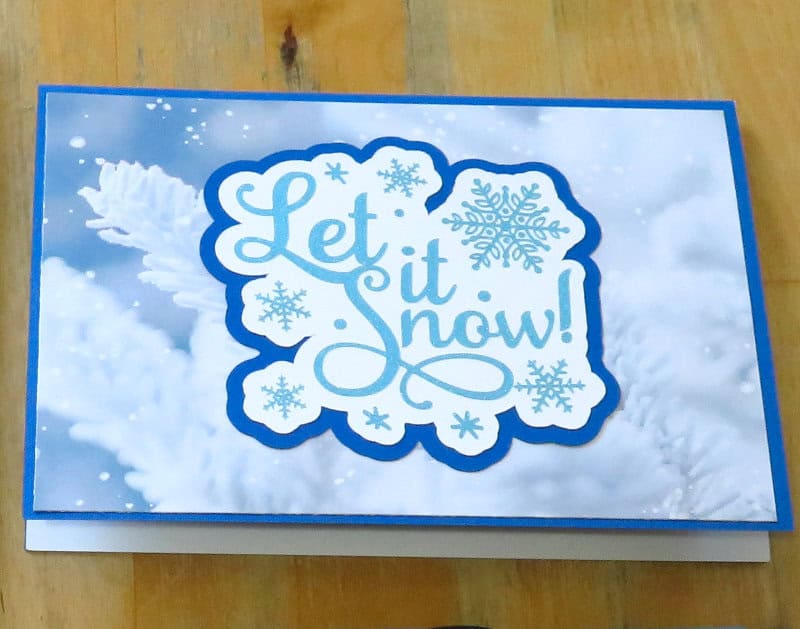
Another reason to use an offset for text on cards? Just in case you tear your cardstock with the transfer tape or otherwise make a mistake! I almost always transfer lettering to its own offset before I glue it to the card base.
#2 Make delicate fonts and images easy to cut
Especially if you’re using very tiny lettering, thin fonts or delicate images can be impossible to cut and weed. Make any spindly form easier to cut by adding a small offset!
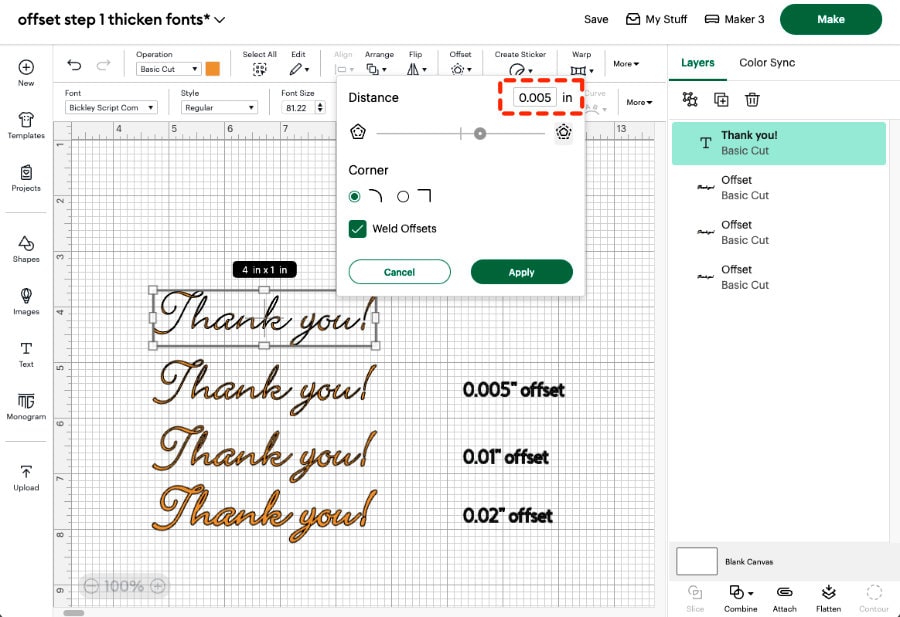
In this example, I’ve added small offsets of various sizes to “Thank You” (written in Bickley Script at 4″ wide, 81pt font size). Choose whatever size offset you prefer to thicken your text without distorting it.
You can see from my cut vinyl samples how much easier a thicker font can be to cut, weed, and read.
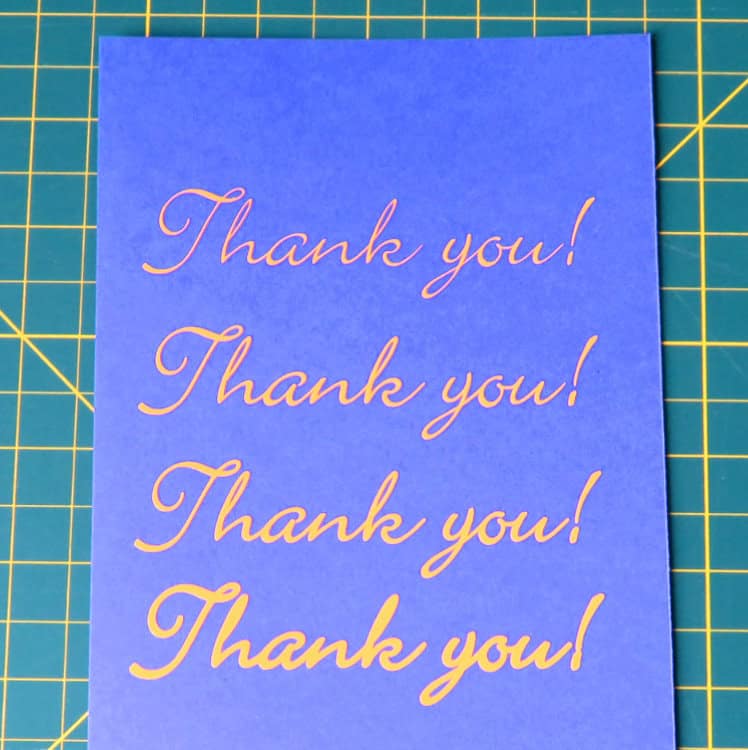
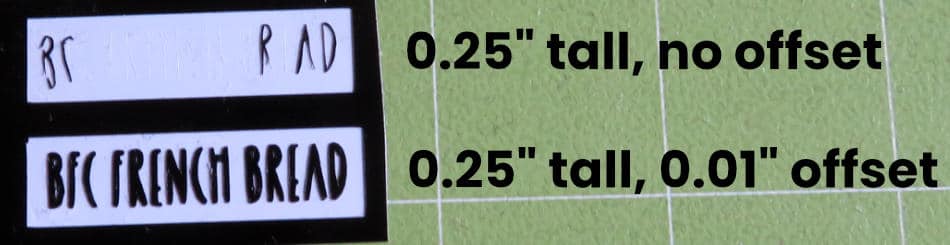
The smaller and spindlier a font or image is, the more important it is to thicken it for cutting:
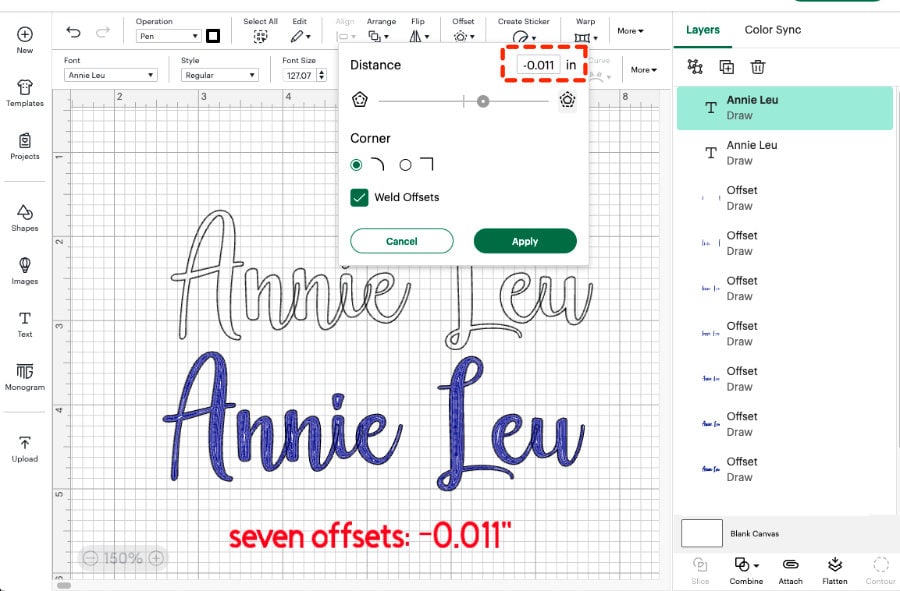
#3 Make any font a writing font by filling in bubble letters
Do you want your Cricut machine to fill in your outlined letters in pen? One of our most popular articles is all about filling in fonts using tiny, negative offsets. You can fill any font using your Cricut!
Here is an example of filling a calligraphy font (Annie Leu) that has both thick and thin strokes. The key is to use smaller offsets to get into all the narrow parts of the letters. We filled this text (5″ wide x 1.65″ tall) using 7 offsets of -0.011″. Because the offsets are automatically welded, the internal pen strokes don’t go into the parts of the tails that overlap other letters (e.g. n-n, n-i, i-e):
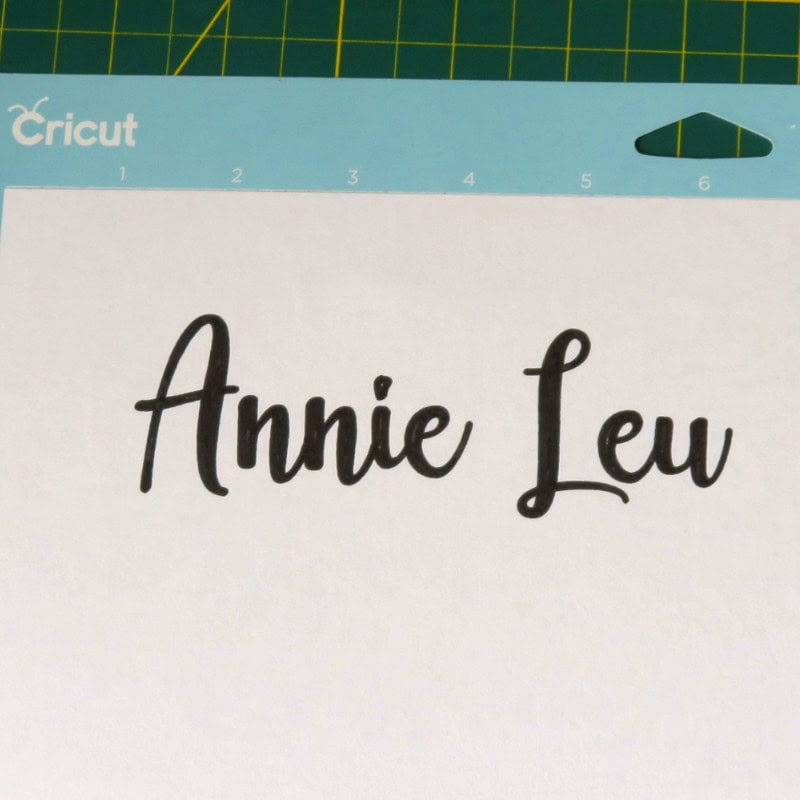
Here’s the finished filled text:
Want a full tutorial? Check it out here:

#4 Sticker making like a pro
There are 2 main ways Offset can be of assistance in sticker making.
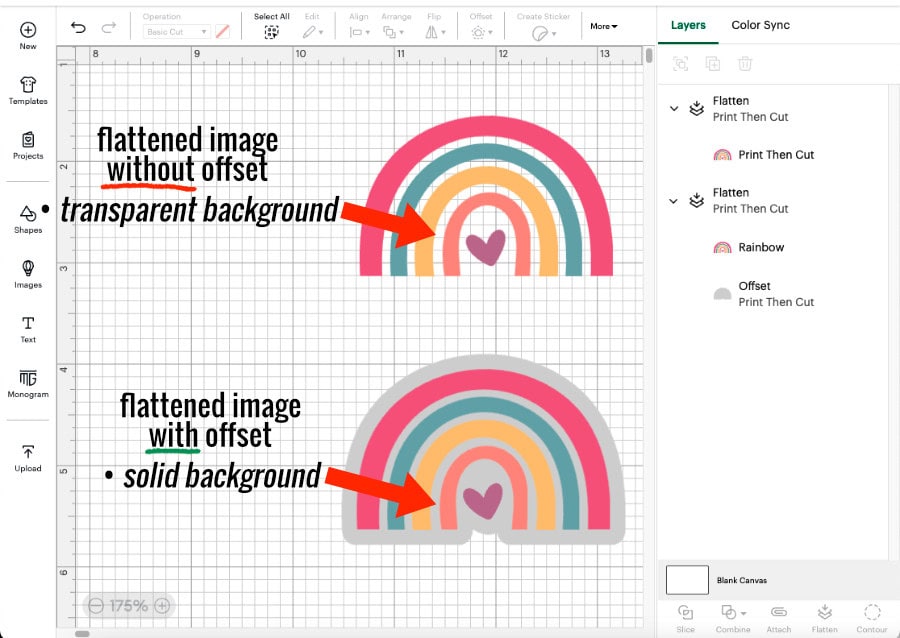
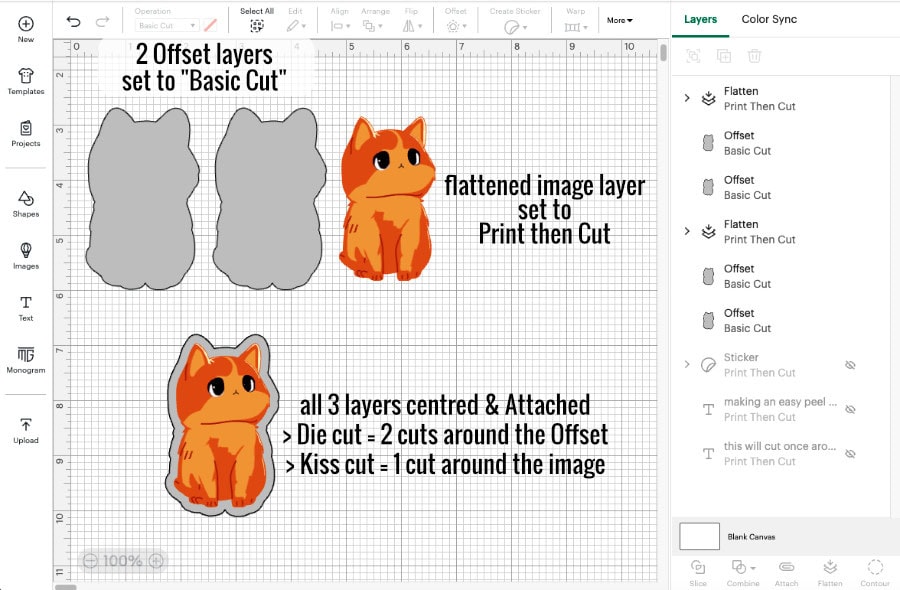
Flatten images to an offset background
Simply converting an image to Print Then Cut will result in Design Space sending each layer of the image to be print & cut separately – no good!
If you Flatten the image first, then Design Space will merge all the layers into one printable layer, but without a background you will have each non-overlapping piece cut separately – also no good!
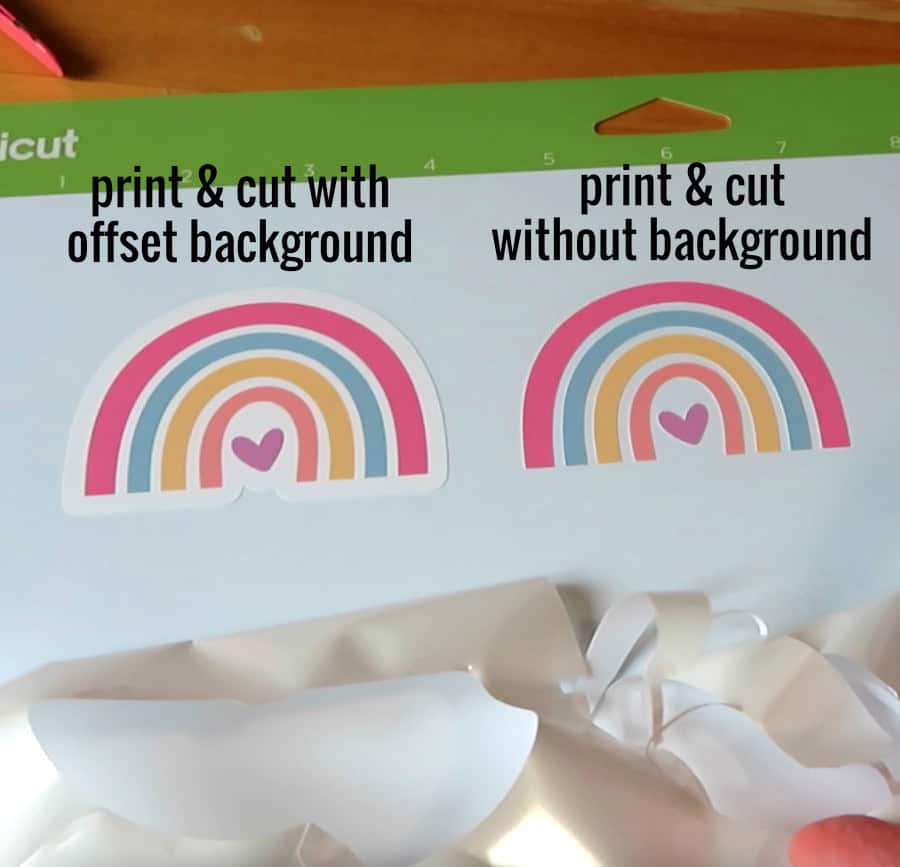
Use Offset so you can flatten the image to a background shape, and your sticker will print and cut exactly as you expect. Perfect! (NOTE: make sure you hide all contours if your offset has any holes in it!)
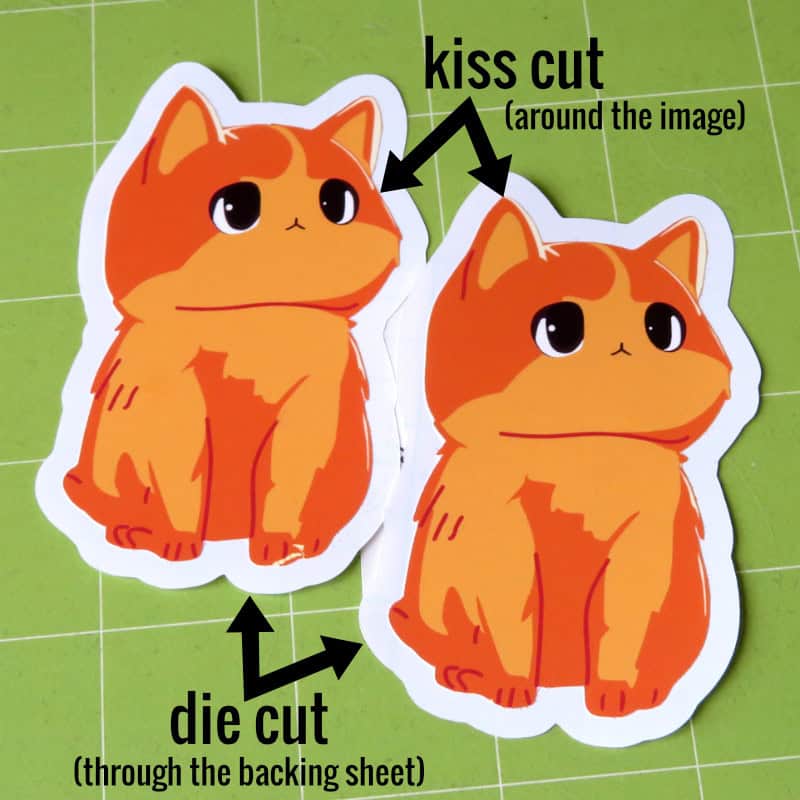
Create an easy peel or die cut sticker
Cricut Access members can use the Create Sticker function to easily make die cut or easy peel (kiss cut + a die cut border) stickers. If you don’t have Access, you can still create your own die cut or easy peel stickers using Offset!
You can use multiple (2 or more) identical offsets attached together to create a multi-cut around your image which will cut through both the sticker material and the backing sheet (a die cut border). Your machine will cut once around your image (kiss cut), then do a multi-cut around the offset border.
Bonus use of Offset: not just for creating die cuts, you can Attach an offset to any image or text you want to cut in order to make a weeding box! Just create a small offset, use Contour to get rid of any holes in the offset layer (Hide all contours), and Attach to the text/image you want to cut.
#5 Create knockout designs
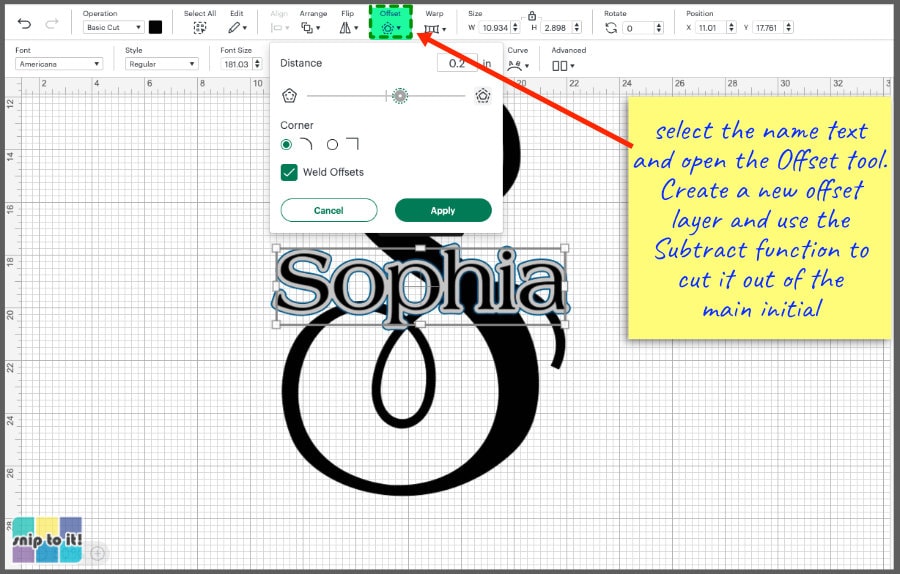
Another great way to use offset is to create visual space between different elements of a design. Instead of adding a layer under text or an image, you can subtract an offset layer from text or an image, making a knockout.
In this example, I added a 0.075″ offset to “happy happy happy” and subtracted it from BIRTHDAY. You can see that the offset can be applied to plain, warped, or curved text.

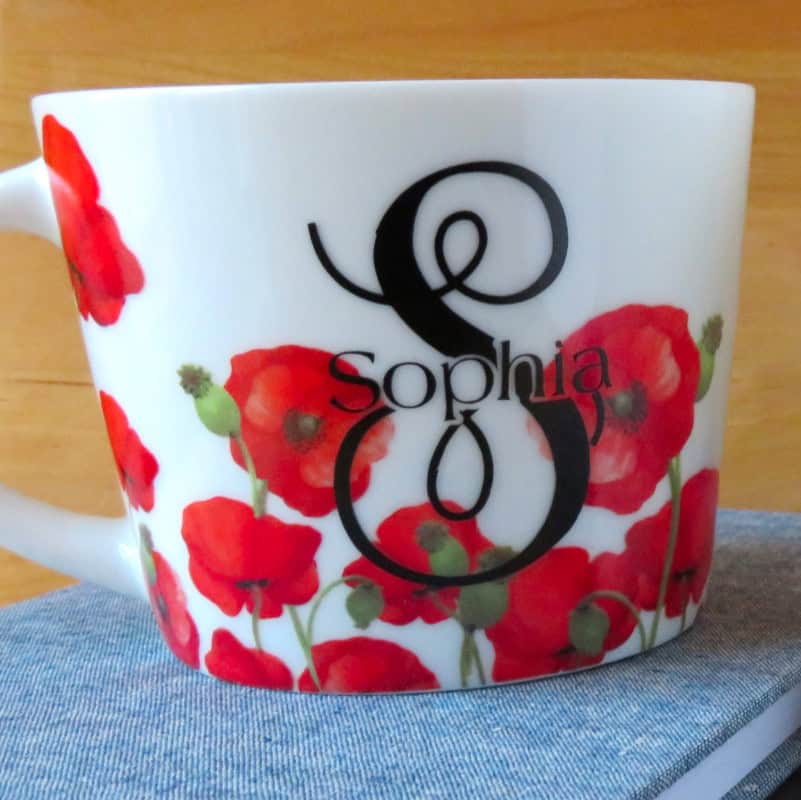
You can use this technique to make a split monogram that uses a contour around the interior name instead of a frame, creating a softer, less rigid design:

And you can also use this to create different kinds of eclipse cards, like this anniversary card where we subtracted offsets of “anniversary” out of the top white layer and middle blue layer of cardstock:

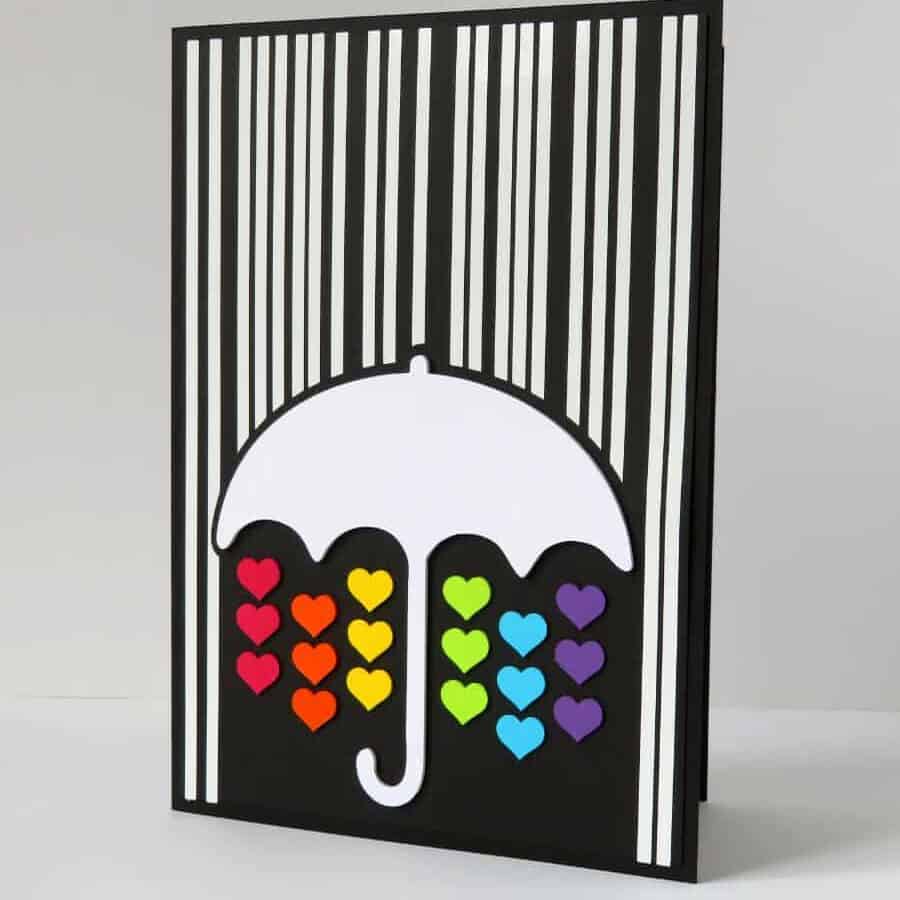
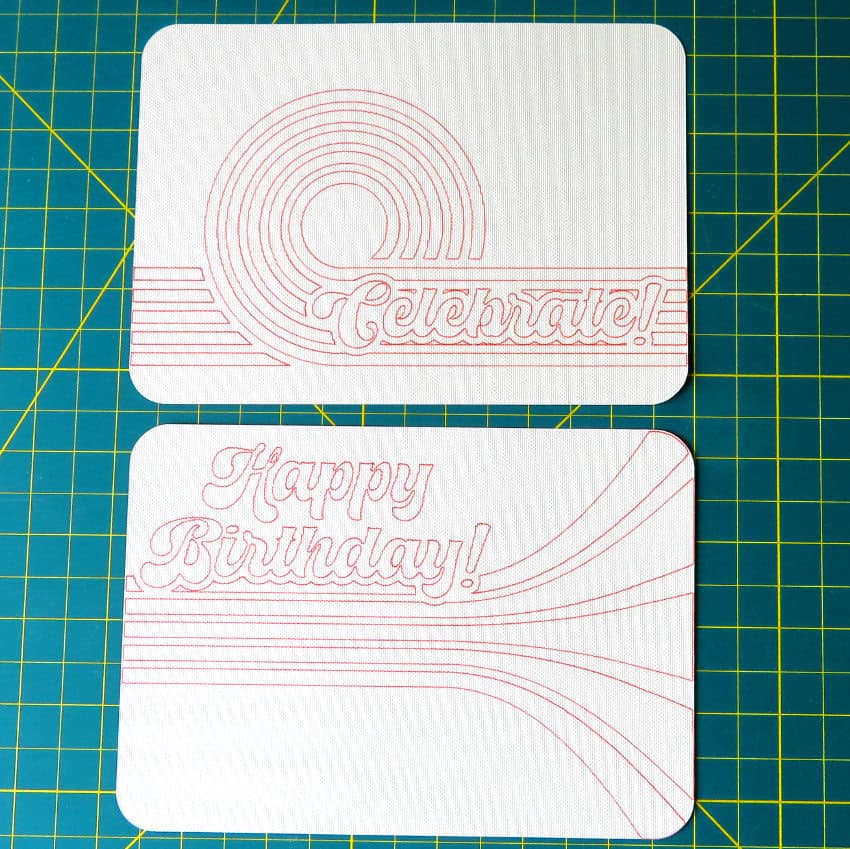
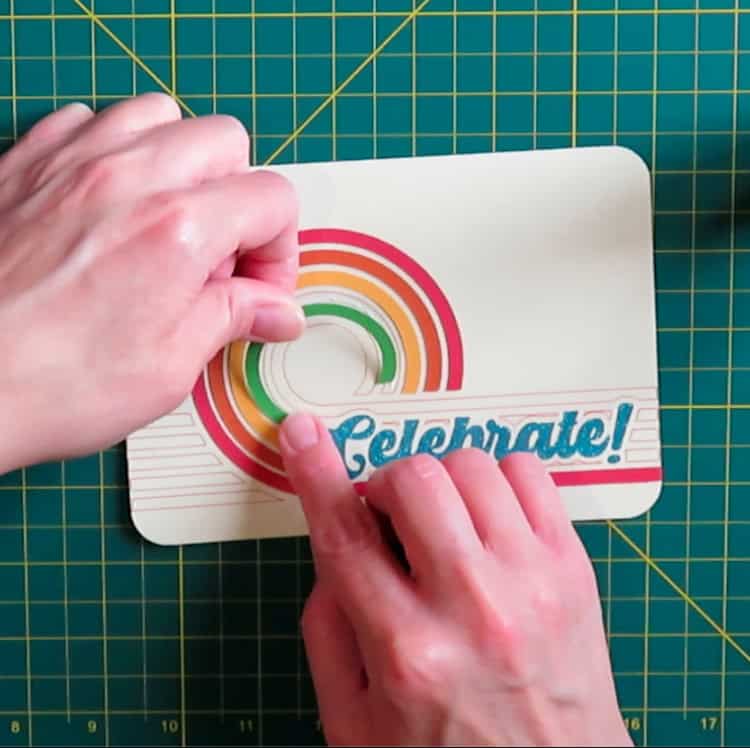
These are 2 more examples of cards we’ve made where an offset was subtracted from a base image to create space between the rainbow and text, and the umbrella and rain:
(Bonus: an offset was used to thicken “Happy Mother’s Day” so that all the text would be connected)

For a full tutorial on making split monograms, click here:

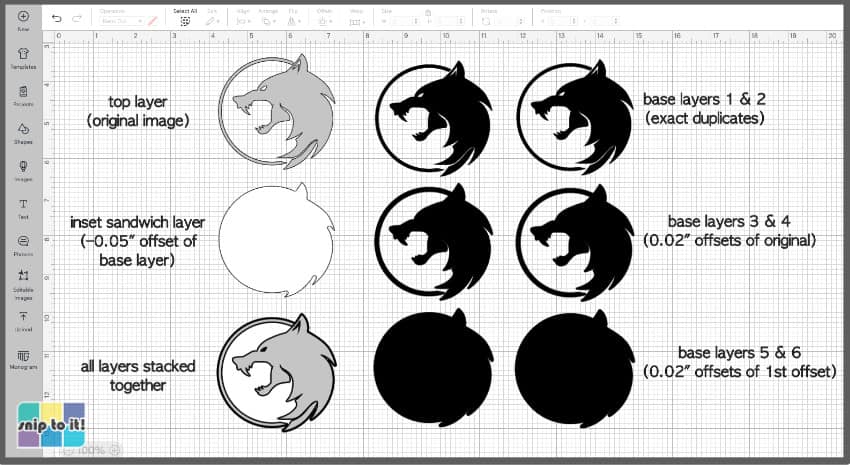
#6 Create your own free images!
When you add an offset to text, you’ll notice that the offset is now a shape, not text. This allows you to use all of the editing tools in Design Space, including Contour. Using Offset and Contour together now gives you the power to create your own FREE clip art from dingbat fonts!
Dingbat fonts are mini image sets that get installed like a regular font, meaning that they are always available as System Fonts in Design Space. To use an image, just click on the Text tool (and choose your dingbat font) and type in a letter, number or symbol and the image will appear on the Canvas.

In order to turn a dingbat character into an image, just add a 0″ Offset and you now have an exact copy that is a shape. You can now create multiple layers using the Contour tool!
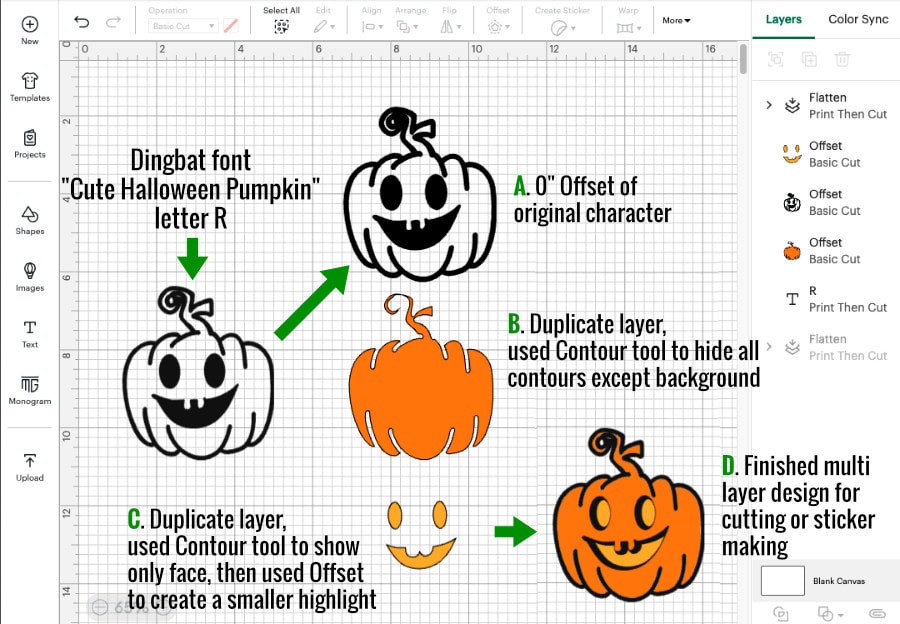
Here is an example using the font “Cute Halloween Pumpkin”:
- I type a capital R which corresponds to this goofy little pumpkin, then create a 0″ offset. This is my first layer (A)
- I duplicate the offset, and use the Contour tool to hide all contours except the base shape, which I make orange (B)
- I duplicate my first layer again, and use Contour to hide everything but the eyes and mouth. I create a small negative offset of the eyes and mouth, and make the offset yellow (C)
Now I have a complete 3 layer image that I can cut or use for print & cut!
All of these were made in minutes using this technique – there are so many cut files you can make!:
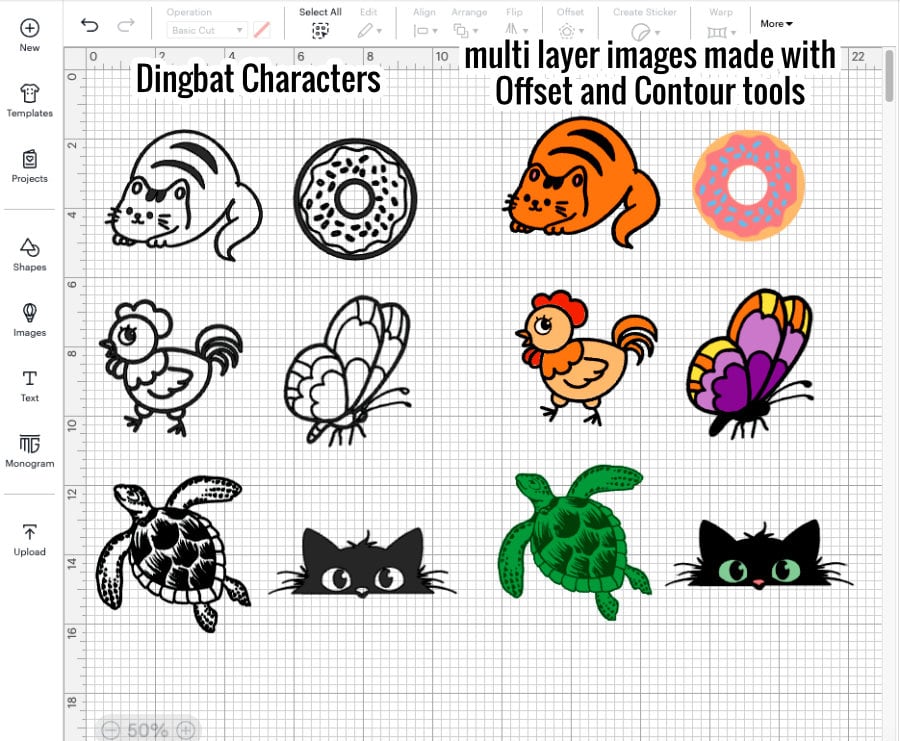
If you need detailed step by step instructions, please see our full tutorial on how to create multi-layer designs from single layer images or our spotlight on the Contour tool:

#7 Make 3D projects with tons of offsets
If 2 layers are good, then a ton of layers is a party! You can build fabulous 3D projects easily using offset layers. The most common multi-layering projects are cardstock cake toppers, but you can create all kinds of dimensional projects using offset layers.
I particularly love projects made using multiple offset layers of specialty HTV. We made these faux-embroidered varsity letter patches for throw pillows using nothing but multiple offsets cut out of Siser glitter and Stripflock Pro HTV:

You can even go a little crazy and make really thick 3D badges out of tons of layers of Siser Stripflock Pro:
Find the full tutorials here:


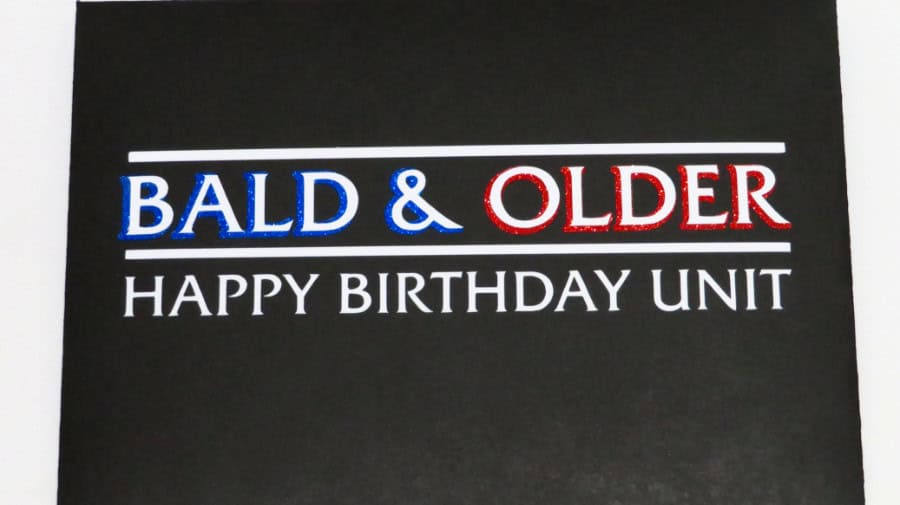
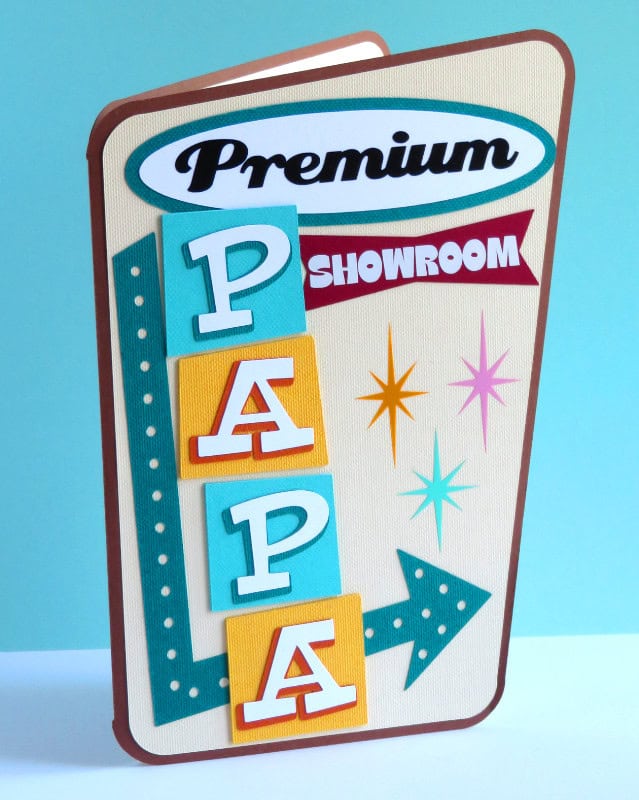
#8 Create a drop shadow
It’s easy to create a drop shadow for text or images using offset: simply make a small offset and arrange below your image/text. You can either create whole layers or subtract to create a knockout version of the shadow.
This envelope for a birthday card we made for my brother uses 0.03″ offsets to create the red and blue drop shadows from the Law & Order SVU title:
The drop shadow on the text for this Father’s Day Card was easy to make, but it has an amazing, eye-catching effect. Using the Offset tool to make a simple shadow creates a lot of visual depth, and turns a card made of simple shapes and text into a project that looks professional.
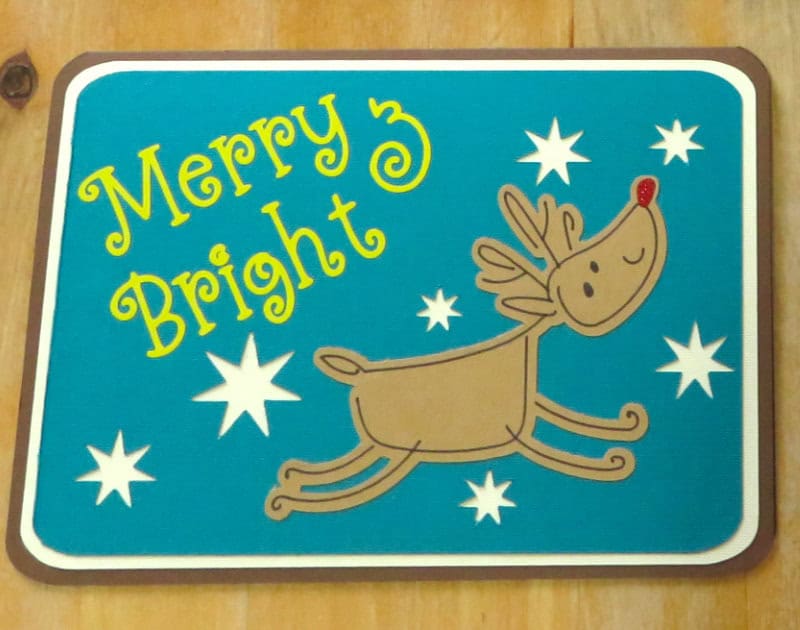
#9 Create a base for drawing
You don’t need to restrict yourself to just cut layers! An offset can be a perfect base for drawn text or images, like this cute reindeer card we made a few years ago, inspired by a Cricut Design Space community project:
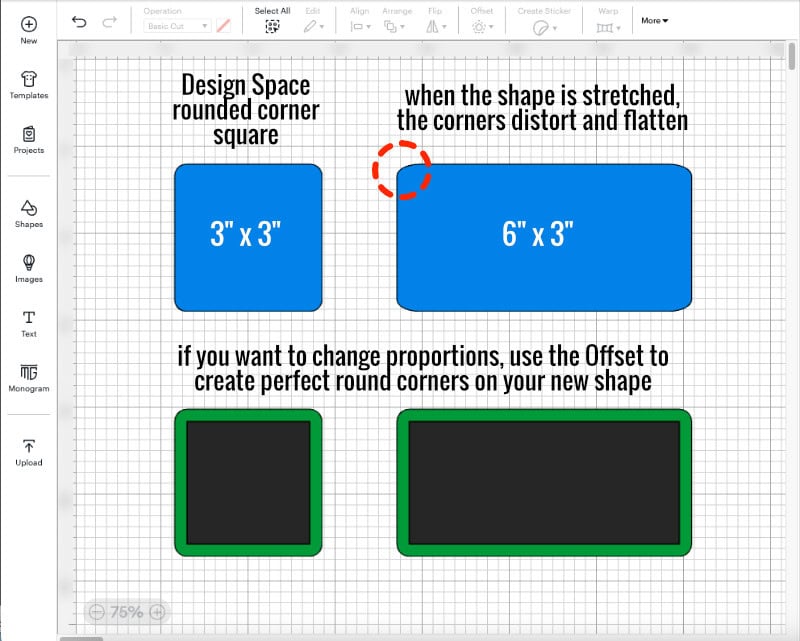
#10 Make perfect rounded corners on any shape
Design Space now has rounded-corner options for squares and rectangles in the Shapes menu, but if you want to change the proportions of those shapes, the radius of the corner gets messed up, leaving you with flat spots.
Instead, use Offset to instantly create modern, rounded corners on any shape, and you won’t have to worry about weird flat spots at the edges:
Want a tutorial? Check it out here:

#11 Create side edge and shaped cards
Making shaped cards that follow the contours of an image or text is a snap with Offset!
These side edge cards were made by creating an offset of the image, slicing it with the card base, deleting the remnants of the righthand (straight) edge, then welding the remaining pieces together:
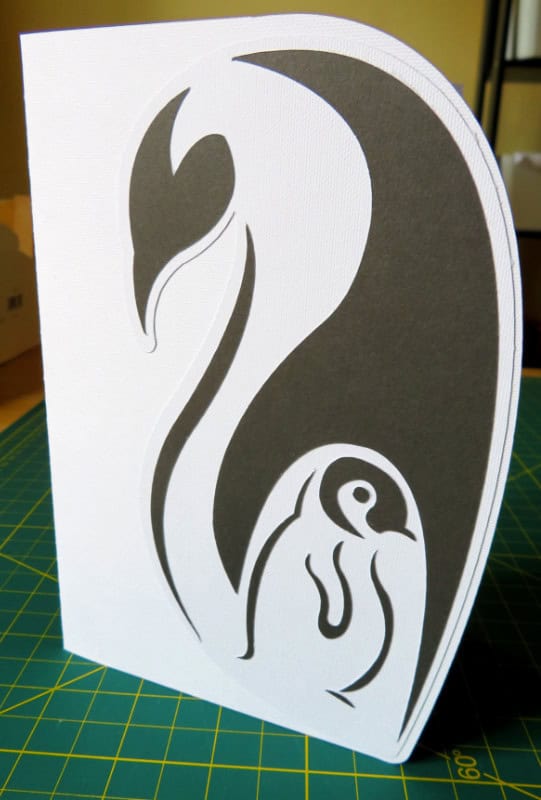

This shaped Mother’s Day card was made by creating offsets of the text, then welding the largest offsets together along the top edge:

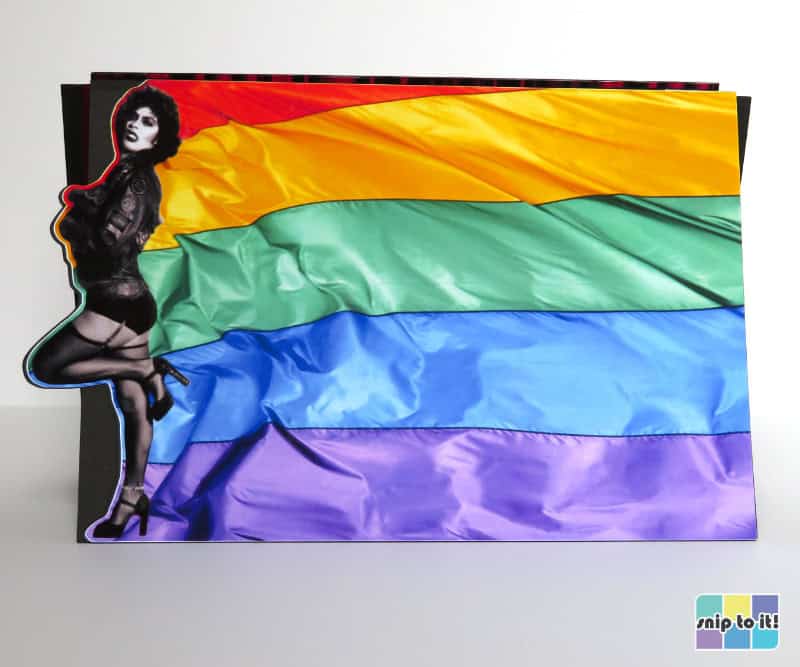
A more complex print & cut example of this technique is the front of this theater birthday card for my Rocky Horror-loving mom. An offset around Tim Curry was welded to a rectangle, and that shape was used to slice a flag photo which was then combined with the Frankenfurter photo for print & cut:
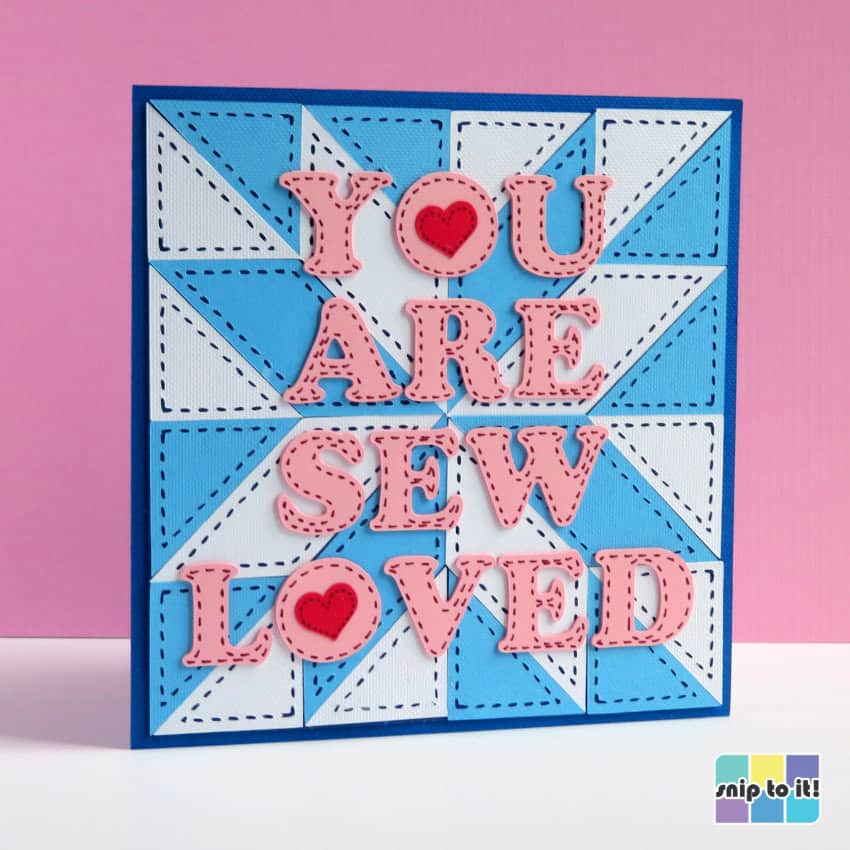
#12 Create a faux-stitch effect in Design Space
One of the questions that I see getting asked over and over in Cricut Facebook groups is “How do I create a stitch effect around the edge of my card panels?” The answers usually involve a complicated workaround that give so-so results at best. But, thanks to the Offset tool, you can achieve a perfect faux stitch inside or outside of any shape, image or text right in Design Space!
Read the step-by-step tutorial to creating this amazing stitch effect using just Design Space.
#13 Make card assembly super easy with guidelines!
This tutorial started as a request for help from a reader who was having trouble assembling her card layers because of a hand tremor. We did a bit of experimenting, and it turns out you can use the Offset tool to draw guidelines for yourself to give you a visual target that will help your card assembly.
Whether you have a hand tremor or low vision, having a drawn outline of where to place your cardstock layers on a card base makes a world of difference. You can see exactly where to apply your glue, and every layer can be perfectly aligned! Here’s an example of how we did it:
Read the step by step guide to using drawn guidelines (or the Score tool) to make cardmaking so much easier!
Continue your Cricut learning journey…
Now that you’ve got tons of ways to use the Offset tool, what’s next? Do you need a refresher on the Flatten tool? Or get better acquainted with the Attach or Combine tools? Check out our tutorials!
What Does Flatten Do in Cricut Design Space? (And When Should You Use It?)
How to Use the Cricut Attach Tool (and When Not To)
Weld, Slice, And Beyond: Creating With The Cricut Combine Tool Suite
Have we missed any other applications for the endlessly useful tool? We’d love to know how you’re using Offset, or if something in the list surprised you – let us know in the comments below!