
This tutorial is part of the advanced techniques section of the Mastering Cricut Design Space learning hub.
Adding a monogram is an easy way to create something personal and special out of an everyday item. How about a lovely monogrammed mug for the coffee lover in your life? Creating a split monogram in Design Space is a simple project for beginners to create cherished keepsakes or just jazz up your own stuff.
There are a lot of older tutorials on this subject in Cricutland, but there have been a lot of changes to Design Space since then. Splitting text and images is now easier than ever using the Subtract tool. I am going to show you how to make a variety of custom split monograms for everyone in your life, and it will take you just a few minutes!
VIDEO: How to make a split monogram the easy way in Design Space
Split monogram styles
In this tutorial, I’m going to show you how to make 4 different types of split monogram, all using the same Subtract tool technique:


Subtract, don’t Slice!
Older tutorials show you how to create a split monogram using the Slice tool. I am going to show you an easier, improved method using Cricut’s Subtract function.
- The Subtract tool deletes a portion of a letter or image without separating it into multiple layers
- Combine tool functions like Subtract, Unite and Intersect can be undone if you need to make edits
- The Slice tool does not always work on text
(I wrote a deep dive into Cricut’s new Combine tool vs older tools like Weld, Slice and Attach. You might find it helpful if you have questions about the difference between all of these tools.)
Step-by-step split letter monogram
Step 1: Select your font for the initial
Open a blank canvas in Cricut Design Space. Click the text icon in the left side toolbar to add type to the canvas and then type your initial. (It will be in Cricut Sans by default)
Open the font selection menu in the top toolbar and select your font. You can use a font from your computer (a System font, browsable by clicking the second tab), or you can browse Cricut fonts.

If you haven’t picked out a specific font, you can click Cricut’s font category buttons at the top of the menu. Cricut breaks their fonts into groups like “Fashion,” “Vintage,” “Decorative” etc. to help you find the typeface that matches your project.
If you’re making something posh and upscale for home décor, you can browse categories like Classic, Calligraphic, or Fashion. If you’re making a monogram for your child’s water bottle, you might like a more informal, youthful font (e.g. Playful, Comic, Sports).
For my example, I chose Caslon Graphique.
Step 2: Select a font for the name
Once you have the font for your main initial selected, resize the letter to fit the screen. Go ahead and make it big, it helps to be able to see as many small details as possible. Once we’re finished, you can resize the design to fit whatever you plan on decorating: a keychain, tote bag or even a beach towel.
The next step I do is to create the name text for the monogram. I like to select a font style that compliments the main initial and make sure it’s sized properly for the overall design.

Here’s a few quick suggestions on font pairings for a project like this. If the main initial of your monogram is cursive or has a lot of flourishes, choose a classic serif font. A formal serif initial can be paired with a cursive or sans serif font for the main name. If you are going for an informal feel, try pairing thick and thin fonts.
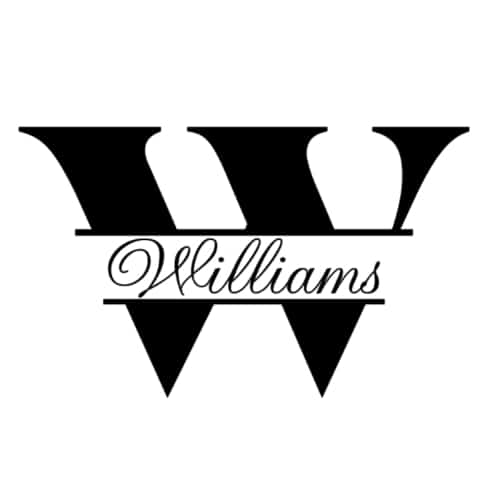
I chose Gravura Com, an elegant script, for “Williams”.
Step 3: Add a rectangle and Subtract to create the split
Select a square from the shapes menu in the left hand sidebar. Unlock (click) the padlock in the top toolbar to allow changes to height and width. Click and drag the edges to resize it so the name text fits inside (vertical sizing is most important.)
Once the rectangle is tall enough to fit the name, position it over the center of the main initial. You can use the Align tool from the main toolbar, or you can just eyeball it based on the specifics of the font. Most of the time, I position the rectangle over the center or the lower third of the main letter.

Select the main letter and the rectangle, and open the Combine tool in the lower right hand corner of the Layers menu. Choose the Subtract option. This will remove the covered portion of the main letter, but it can be undone and changed if needed.
Step 4: Create a frame inside the split
To finish the design, most monograms have a frame across the cut portions of the main initial. Select a square from the shapes menu and click the padlock icon in the top menu bar. Stretch it by the corner anchor until it’s long and skinny, about 1/8th to 1/4 inch tall. Set the width to the same as the main initial. When you have the bar sized to your liking, duplicate it. (There is a duplicate button at the top of the Right-hand layers menu.)

Align each bar over the cut edge of the main initial. Select the letter and both bars and use the Align tool to center all three shapes. When everything is aligned, open the Combine menu and choose the Unite option. This is the same result as welding the design, but this step can be undone if you change your mind.
Step 5: Align the name inside the split initial and Attach
Finally, position the name text inside the main initial. Center both elements and select the Attach option in the lower right hand corner of Design Space. If you want the name to be cut out of a different color vinyl than the initial, leave it unattached. Resize the graphic to whatever your project needs. Click the Make It button to go to the preview screen and set up your cuts.

Split image monogram
If you want to incorporate an image into a monogram, you can use the same method as described above (Subtract a rectangle from your image). Creating a frame for the split is optional.
Subtracting the midsection of an image to create space for a name preserves the proportionality of the image without distortion. Using the Slice tool to cut an image in half will not give you the monogram you want!

Being able to undo and make adjustments until you’ve got the split just right is another huge advantage of using Subtract instead of the Slice tool.
Other options like font selection are up to you. The example above has a very masculine font, but you can pair images and fonts that suit the person you’re creating for. Having the Cricut Access image library is a huge plus because you can find images in so many styles that will suit the tone of your monogram project.
Contour cut monogram using the Offset tool
Making an offset to create a contoured cutout of the main initial is one of my favorite ways to create a monogram.
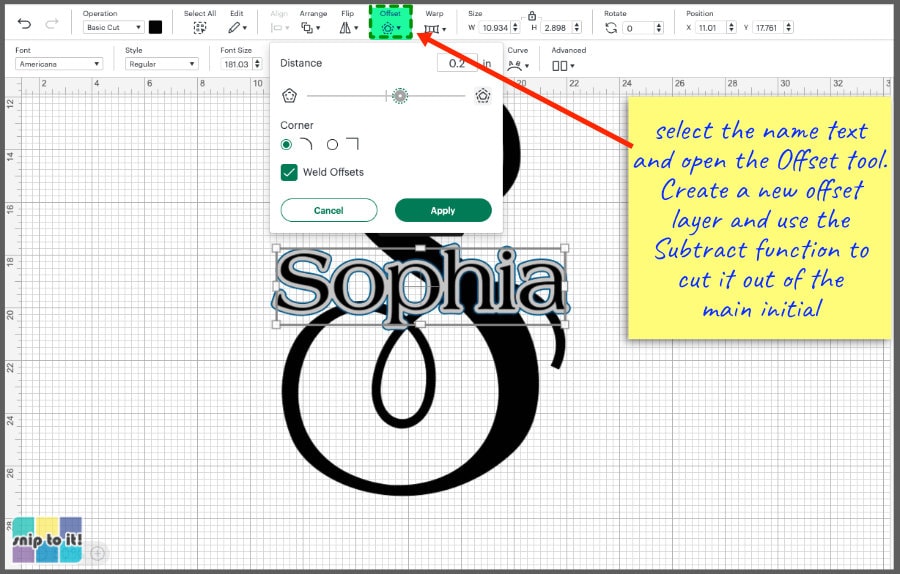
To make this style of monogram, set your main initial and name on the canvas. Here, the capital S font is Elizabeth and the name font is Americana. Resize and position both layers until you’re happy with the placement.
Select the name and open the Offset tool in the top toolbar. Adjust the thickness of the offset and click the Apply button when you’re satisfied. Then select the offset layer and the main initial, open the Combine tool and select Subtract. Your name will now fit perfectly inside the main initial.
You can use this for very luxe monograms or you can use it for informal or whimsical styles as well. Experiment with fonts and find what you like!
Split letter monogram + banner
Instead of just creating a space in a letter or image, you can use one of the hundreds of decorative frames, banners or labels in the Design Space image library.
For this example (letter and name font = Dreamland), I found a banner in the image library (#M4C5F4D4E) and added it to the canvas.
Step 1: duplicate the banner, then use the Contour tool from the lower corner of the the Layers menu. Hide all of the cuts inside the banner graphic until you are left with just the main outer shape.

Step 2: line up the original banner and the contoured banner over the main initial. Select the contoured banner and the letter then open the Combine tool in the lower corner of the Layers menu on the right side of the screen. In the Combine Tool menu, select Subtract to delete the solid banner from the initial letter.

Step 3: Select the newly subtracted letter and the original banner image. Open the Combine tool and select Unite from the popup menu to join both layers into a single shape.

I added the name inside the banner (curved using the Warp tool) and the result is a fun kid’s monogram.
Project ideas for split monograms
The list of items you can monogram with this technique is almost endless. You can capture any style, mood or personality with the right font and material choices, and you can create monograms for every holiday, season or special event.
Monograms are really popular for Christmas, both for making personalized gifts and for making beautiful home decor. You can monogram napkins, mugs, ornaments, tree skirts, pillows, gift tags, welcome signs, and more!
Using HTV to personalize stockings or matching pajamas for the family is a great way to either create a themed backdrop for a family photo or to let everyone’s unique style show during the holidays.
Try this technique for Father’s Day to personalize something for the hard to buy for guy in your life, for graduation or even to decorate and identify your kid’s back-to-school supplies.
Like I said, the opportunities are limitless!
This blog is my go-to for a boost of inspiration. Love the uplifting content!
WOW Kerri you are not only super creative but very tech savvy, I need to get spun up on all the cool stuff you can do with a Cricut someday 🙂 Hugs xx Tanya
Thank you so much for the kind words, Tanya, I am so happy you decided to check out my site! Yes, Cricuts are a lot of fun, they’re a great tool for re-imagining everyday stuff. Thank you again for the visit! 😊 Kerri