
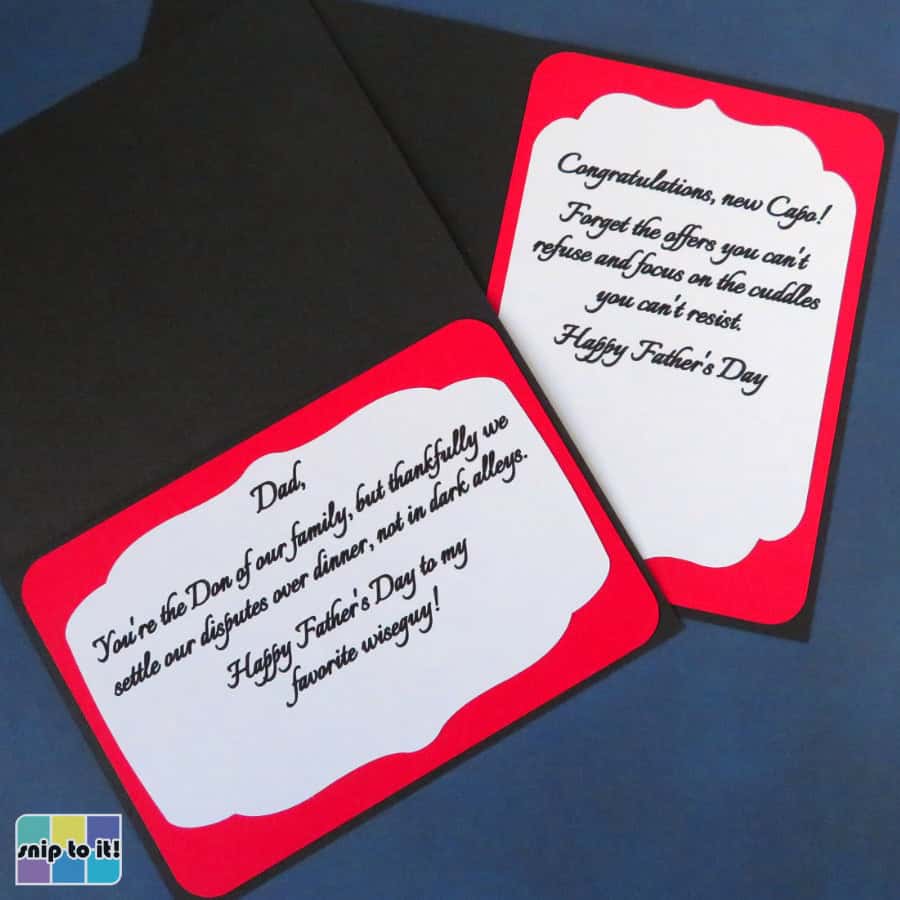
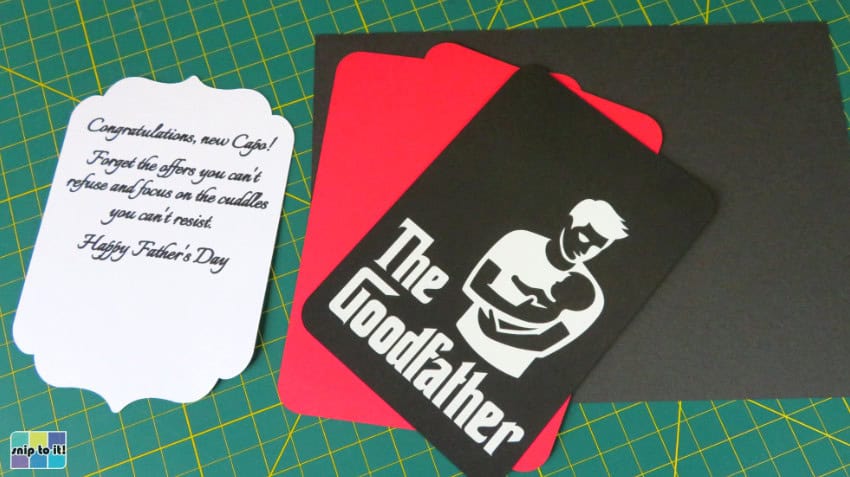
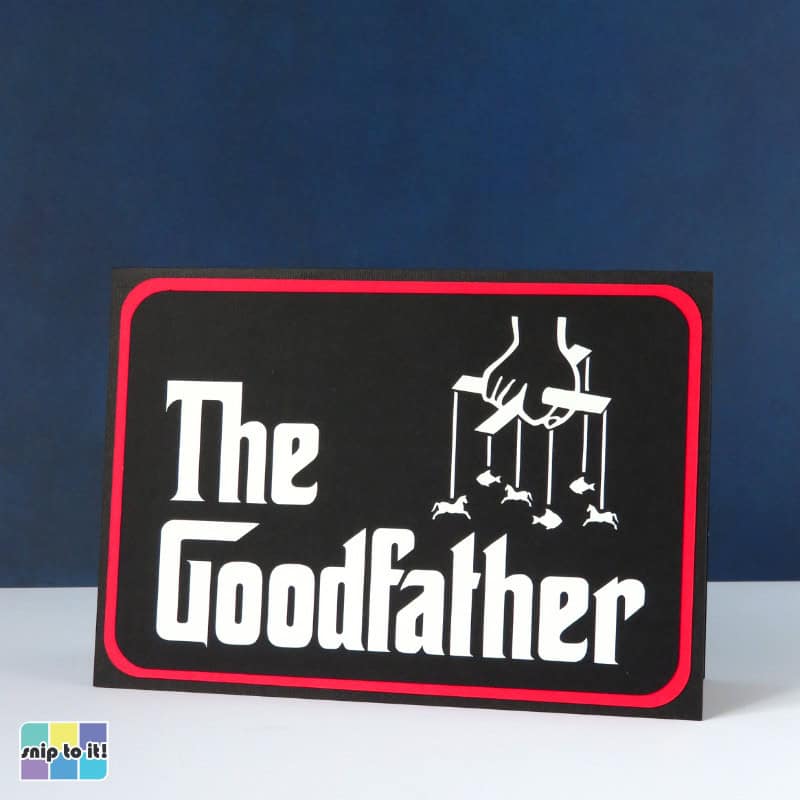
Vito Corleone isn’t exactly father of the year, but as a fan of pop culture and epic style, I couldn’t resist making a Godfather-themed card for Father’s Day. I made two different designs: one for new dads, and one for any other dad. You can download our SVGs, and this tutorial will walk you through making a Father’s Day card your padre can’t refuse!
The finished cards are 4.75″ x 6.75″ so they will fit in standard 5×7″ envelopes, but you might want to make our tuxedo envelope fit for a Don.
Pin for later!
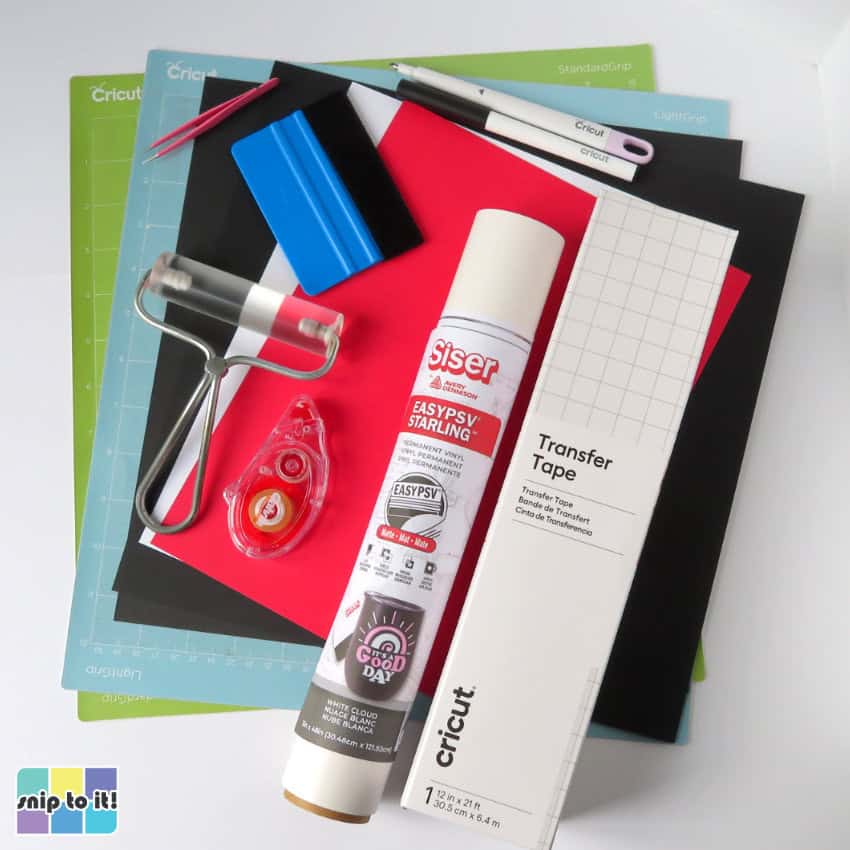
Materials and tools:
- Cutting machine – I’m using a Cricut
- Scoring Stylus or Scoring Wheel
- Cut file – download the SVGs from our Resource Library
- Cutting mat – I’m using 12×12″ mats: blue Light Grip for cardstock and green Standard grip for vinyl
- Brayer or felted squeegee
- squeegee/scraper
- weeding tool – I’m using Tweezerman pointed tweezers
- cardstock – I’m using black Cricut 80lb cardstock for the base, and Recollections 65lb cardstock in black, white, and red for the panels (8.5″ x 11″ sheets are OK for everything)
- adhesive vinyl – any white permanent vinyl; I’m using Siser EasyPSV Starling matte white (a ~4×6″ piece will be sufficient for either design)
- transfer tape – I’m using Cricut brand
- pen – I am using a Cricut 0.4mm (Fine Point) black pen
- adhesive – I used a dollar store tape runner, you can use glue if you prefer (I like Art Glitter glue)
Download the SVGs
You can find the SVGs for each card in the Father’s Day section of our Resource Library. Download whichever design you want to make.


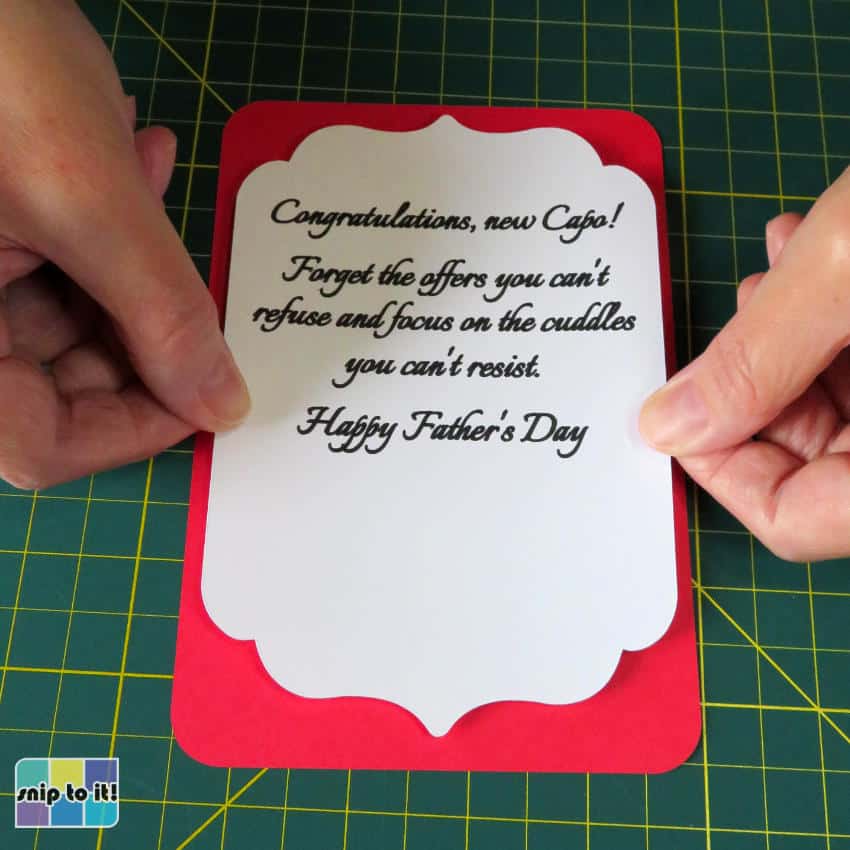
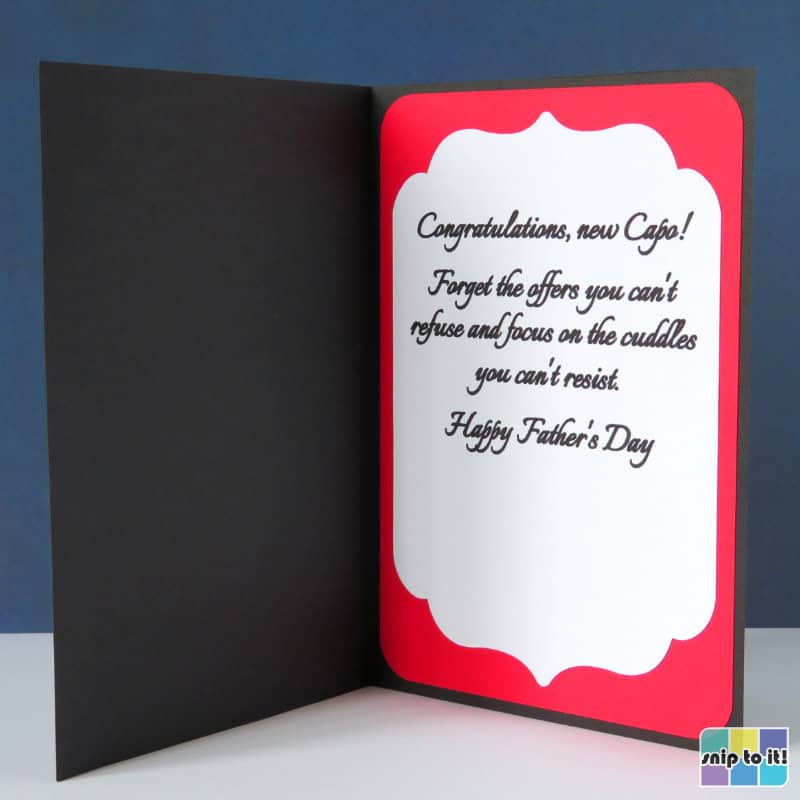
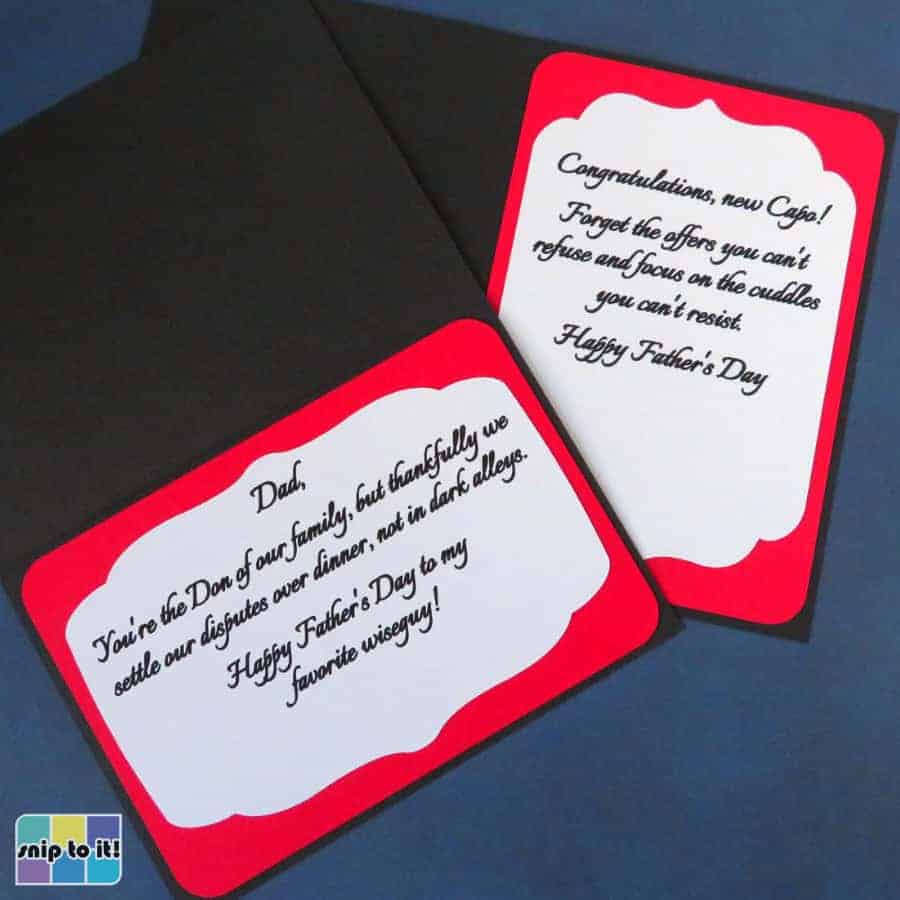
The sentiments inside the cards are:
Upload & prepare your file in Design Space
Open Design Space and start a new project.
1. Upload the SVG (if you have trouble with this step, you can check out our full guide to uploading images)
- Click the Upload icon (lefthand sidebar)
- Click the Upload Image button and follow the prompts (Upload image > choose the file from your download folder > Upload)
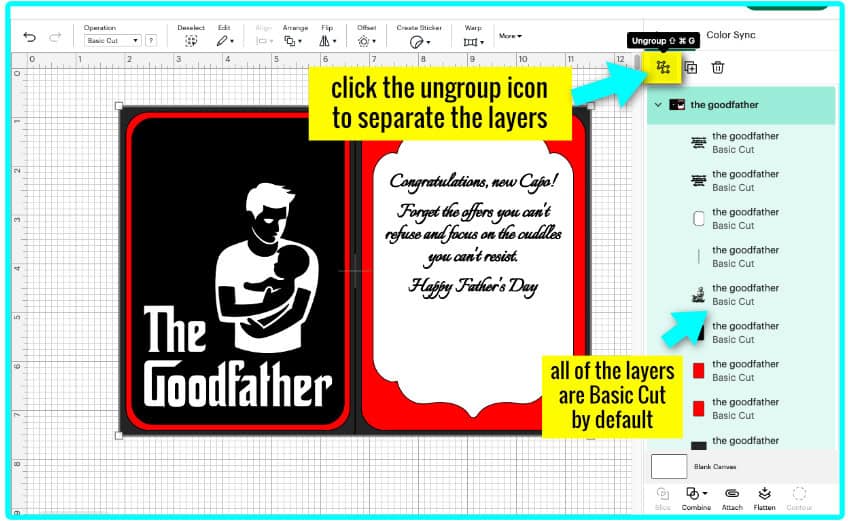
2. Select the image and Ungroup (top of Layers panel, righthand side of the canvas)
The text in these designs is in SVG format, so you can’t edit it. The sentiment text already has an inset added (-0.003″ offset) to fill in the font so it appears as a solid line. For instructions on how to customize the text for the front or inside of the card, you can jump to the Customization section at the bottom of this article.
3. The first two layers are the text layers (this is the original text plus an inset layer to fill it in)
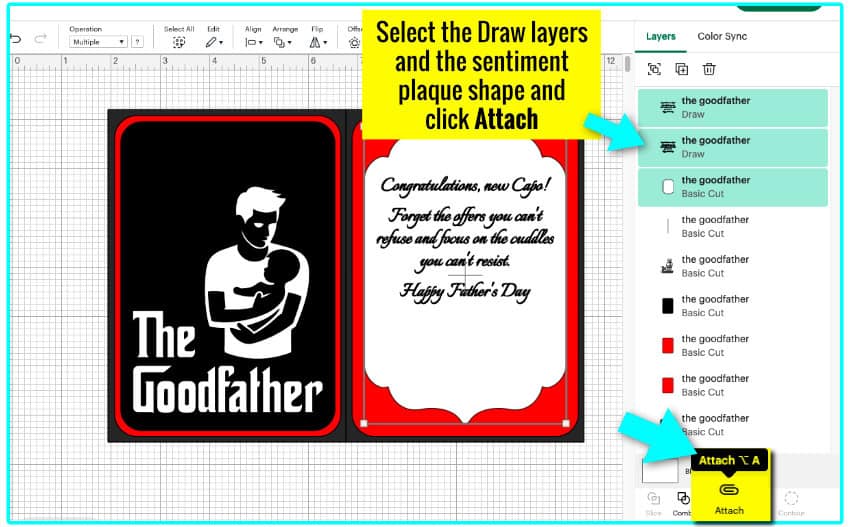
Select both layers and change the operation to Draw > Pen. Select your pen type and color from the color menu next to the operation pulldown menu. Mine is Fine Point (0.4mm) in Black.

4. Select both pen layers and the first (white) cut layer. Click the Attach icon at the bottom of the Layers panel. This will ensure your text is written on the shaped white inside panel.
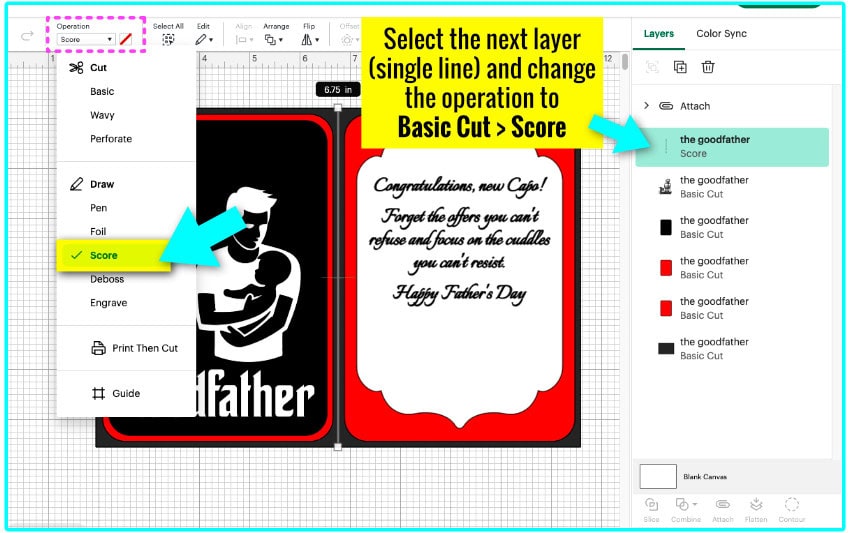
5. Select the next layer (a single vertical line) and change the operation from Basic cut to Score
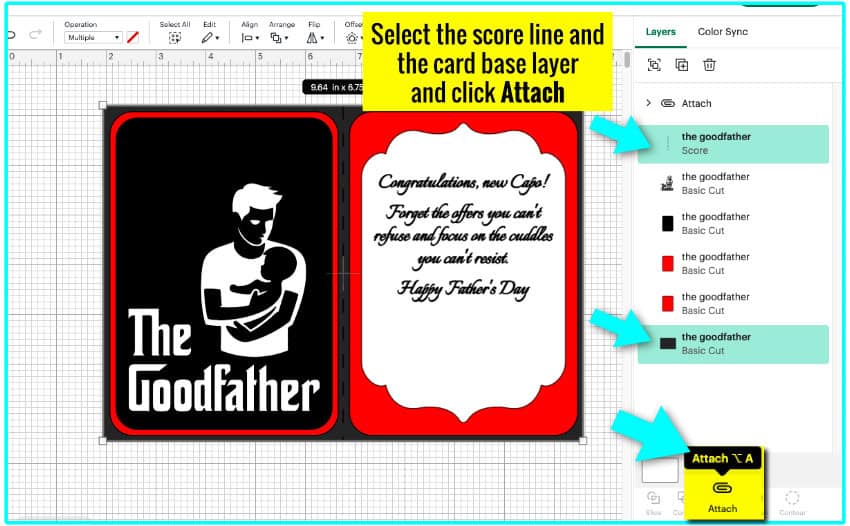
6. Select the score line and the card base layer (bottom layer in the Layers panel) and Attach them together.
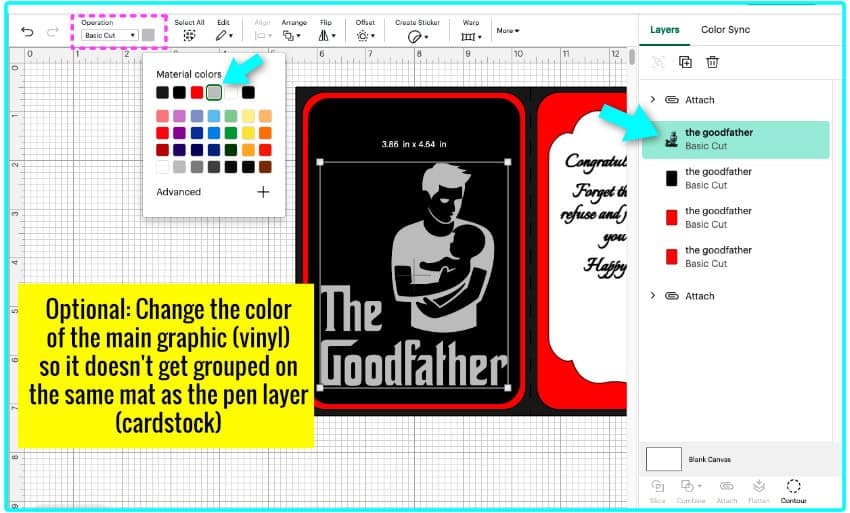
7. Change the color of The Goodfather text and graphic (man & baby) from white to another color so it will cut on its own mat.
Now you’re ready to click Make and go to the Mat Preview and Set, Load, and Go screens!
Cut settings
Cardstock settings:
- I’m using a Maker 3 and cut all my cardstock on Medium Cardstock, default pressure
- if using my Explore Air 2, I’d use Medium Cardstock, more pressure
Vinyl settings:
- depends on your machine and brand/type of vinyl – I recommend doing a test cut if you aren’t sure
- for Siser Easy PSV matte white permanent vinyl with a Maker 3 I use Cricut Premium vinyl, default pressure
- if using my Explore Air 2, I prefer to cut tiny details like the horses and fish using the Washi Sheet setting, default pressure with a Deep Point blade – do a test cut if you want to try this
Matte vinyl (including removable vinyl) has a very different texture than regular glossy, and can be a bit tricky for cutting small details (which tend to lift). Cricut Premium permanent vinyl would be fine for this card if you need an easier choice to cut and weed.
Cut your cardstock layers
You will be cutting 4 mats of cardstock:
- black base (includes a score line)
- black front panel
- 2 red panels (front and inside)
- white panel (includes drawn text)
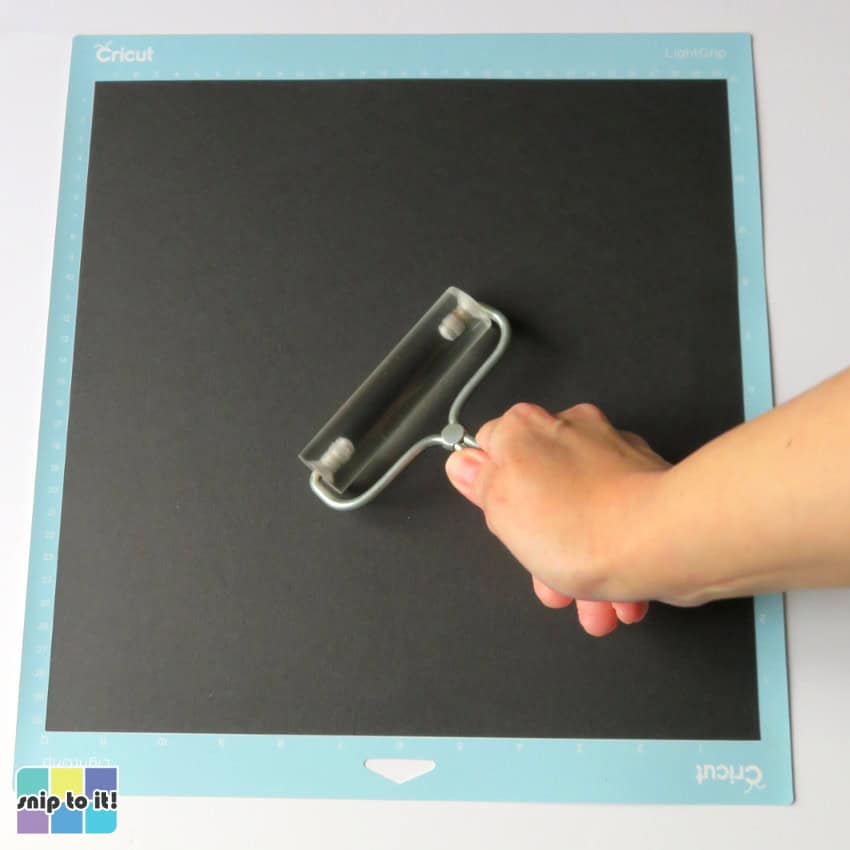
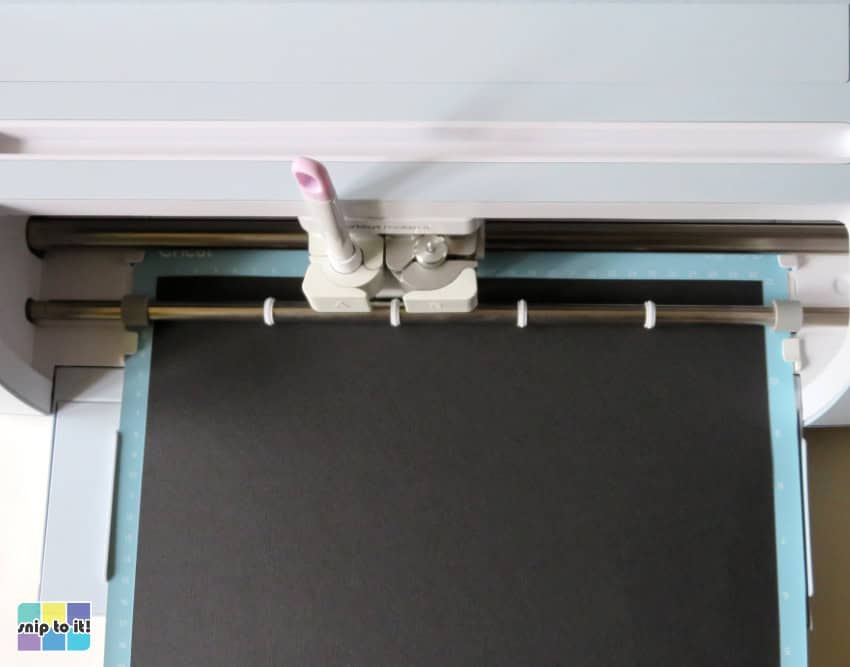
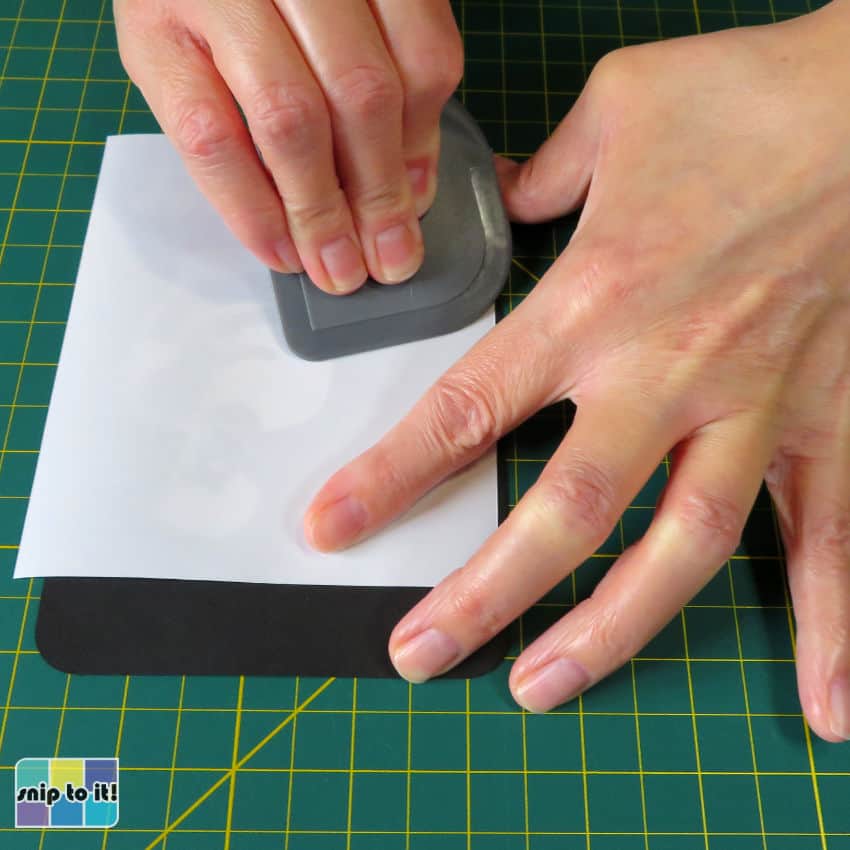
Use your brayer (or felted squeegee, or your hands) to attach your first layer of cardstock to the mat. I’m using black Cricut 80lb cardstock for my card base.
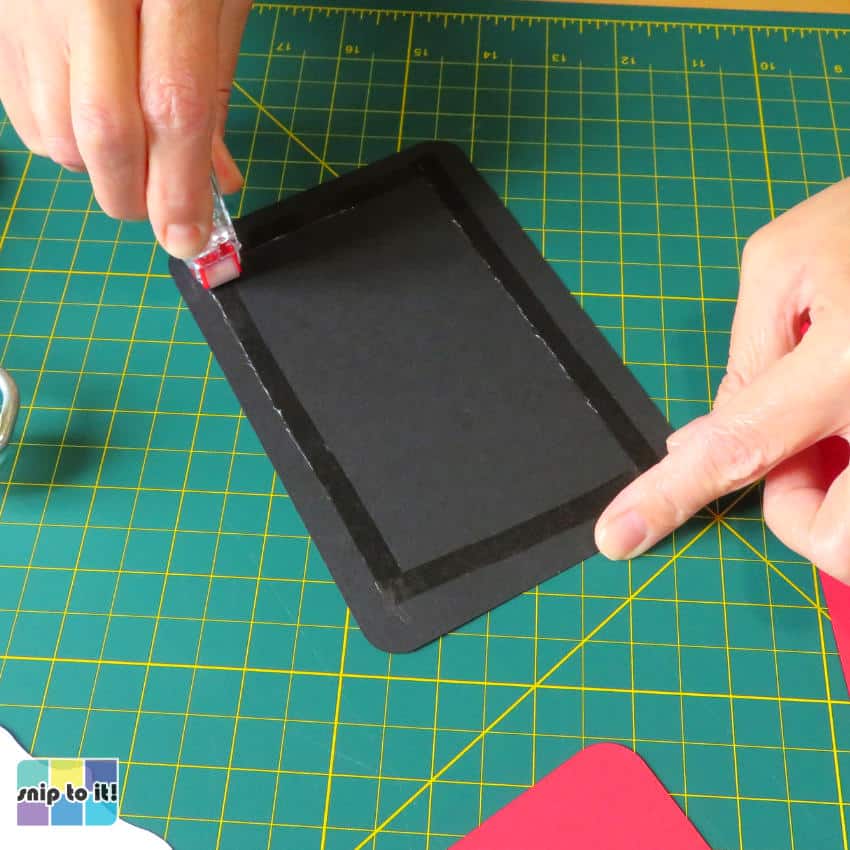
The card base will require a scoring tool and your Fine Point blade. I’m using the Scoring Stylus.
Once your cut is complete, flip your mat over and remove the cardstock from the mat using your squeegee (scraper), starting from the corner.

Repeat this for all your cardstock layers.
Cut the vinyl design for the front
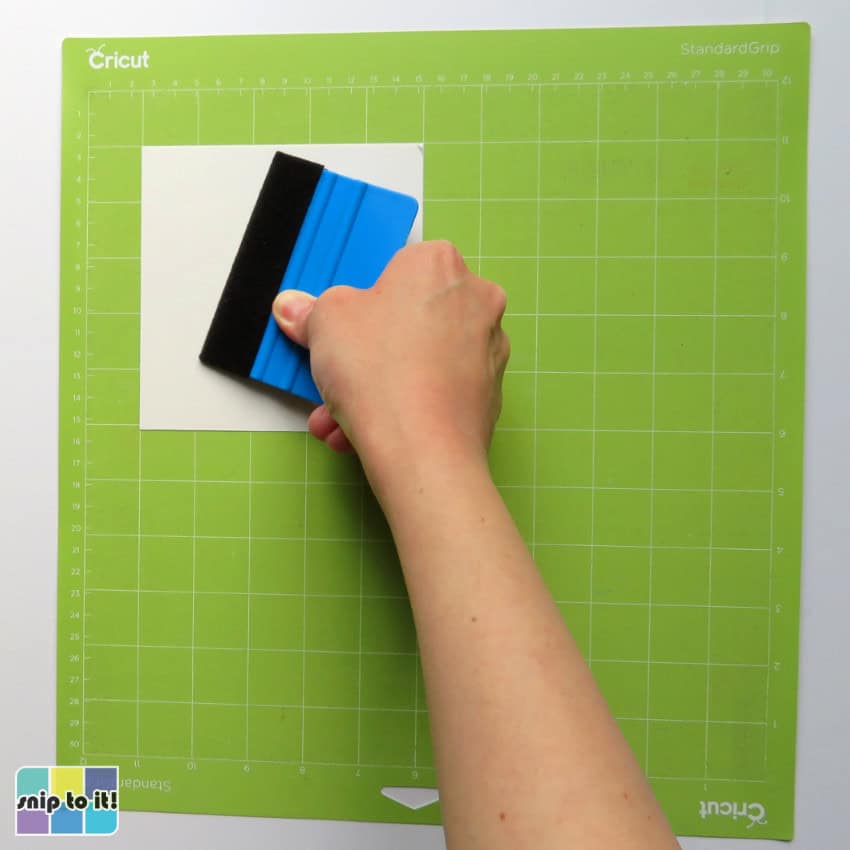
I cut a 5×5″ square of my vinyl for the father & baby design. The vinyl is loaded face-up on the mat and smoothed down with a brayer or felted squeegee.
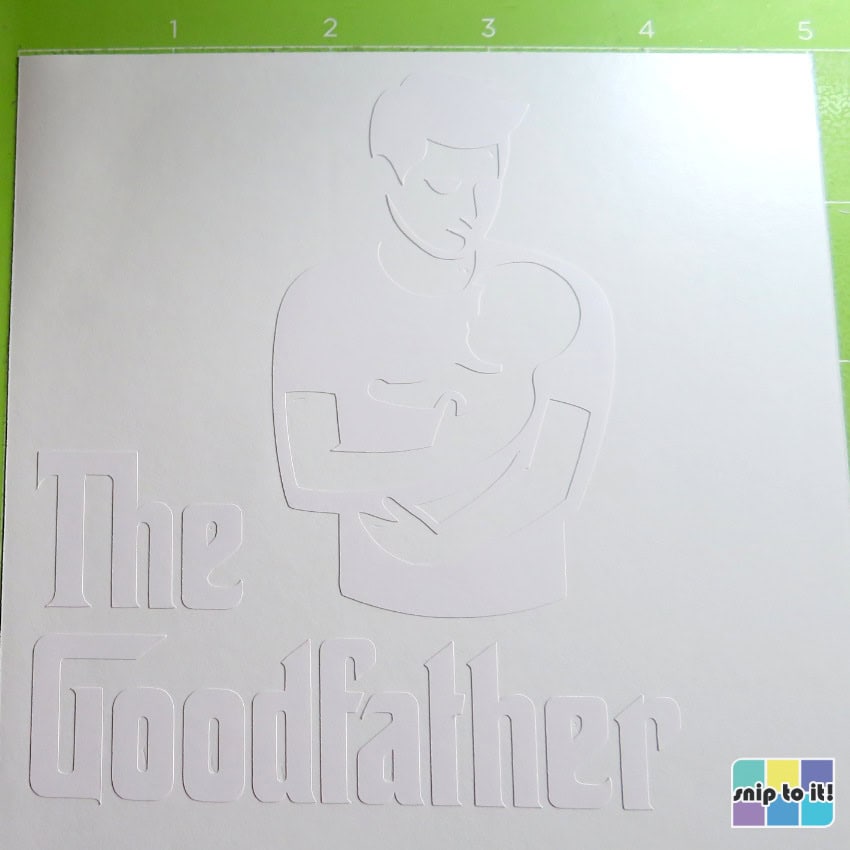
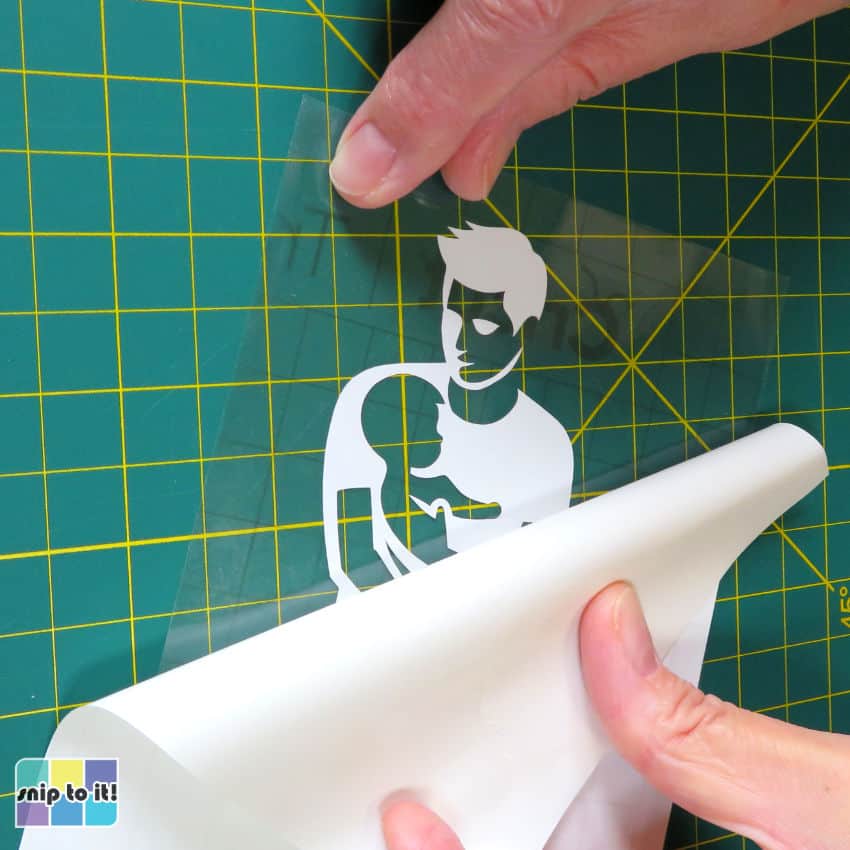
Cut your vinyl and then weed the excess using whatever weeding tool you like.
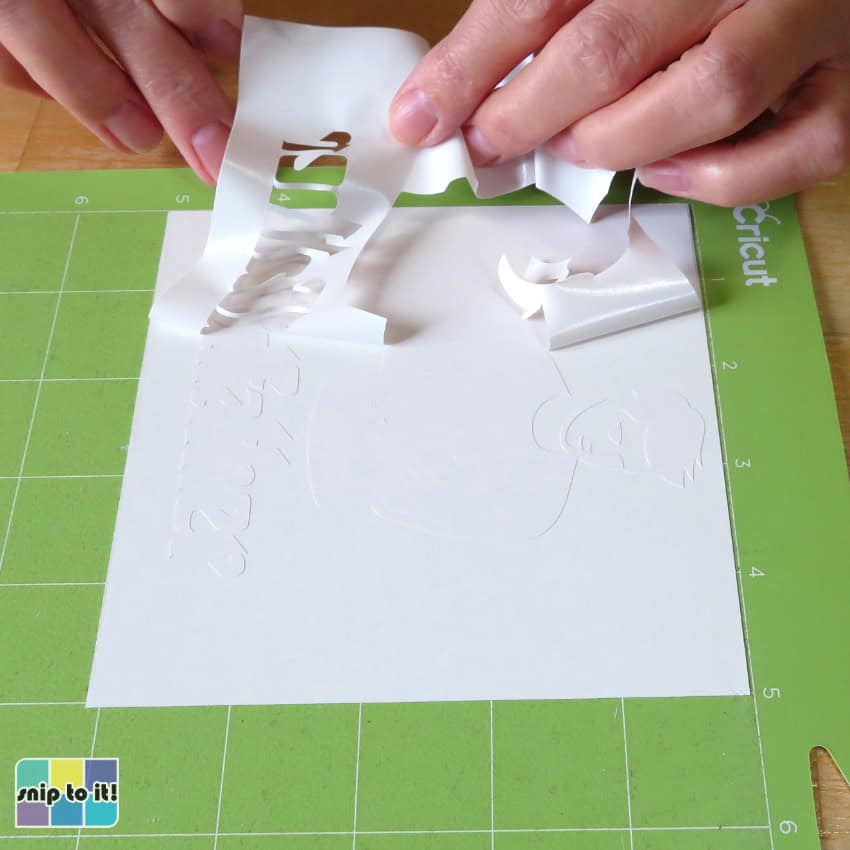
Your weeded design will look like this:
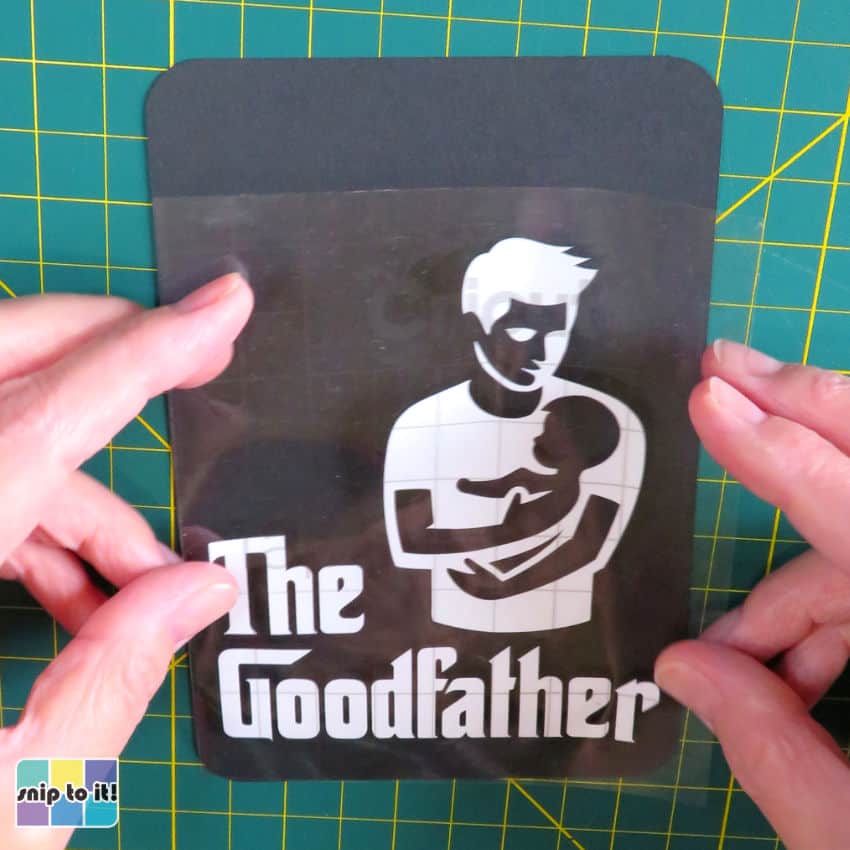
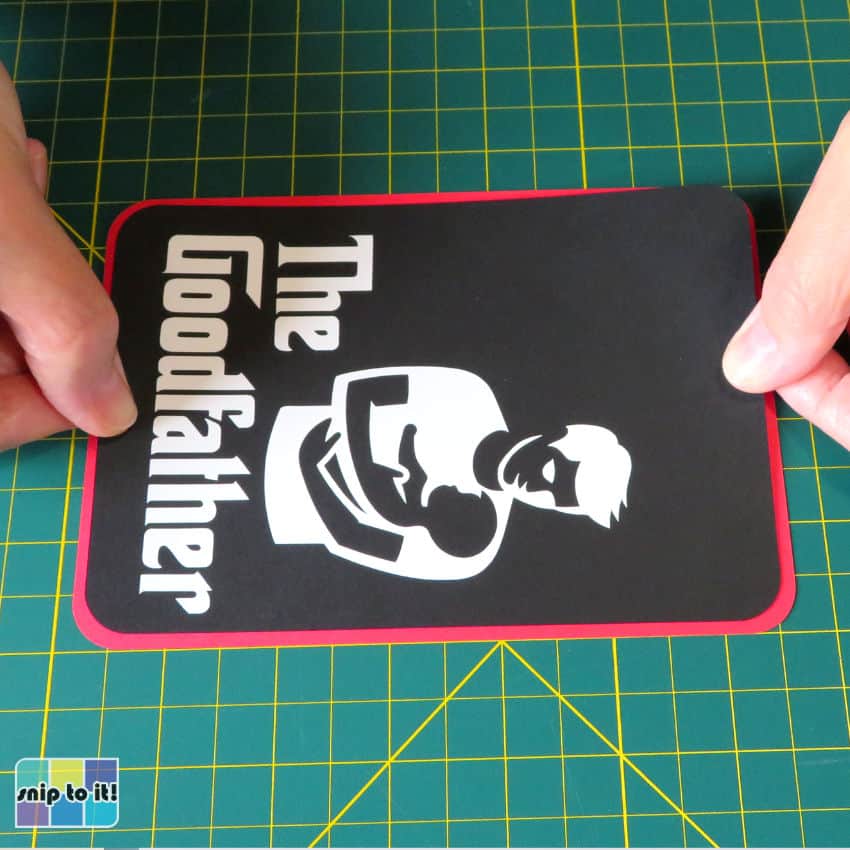
Apply your vinyl design to the black cardstock panel
Cut a piece of transfer tape big enough to cover the design, peel from the backing sheet and stick it to your shirt a couple times to make it less sticky. Place the transfer tape over the design and burnish it (press down and rub with your squeegee/scraper), then flip and burnish from the back. Carefully peel the vinyl backing sheet away, leaving your design on the transfer tape.
Holding each side of the transfer tape, position your design. I am positioning my design looking at the Goodfather portion of the text, making sure it is straight across the bottom and approximately centered.
Gently let the transfer tape go, letting it rest on the cardstock piece without smoothing it down. Using the corner of your squeegee or a burnishing tool, burnish over ONLY the vinyl, taking care not to stick transfer tape directly to the cardstock. I often use an embossing stylus for this.
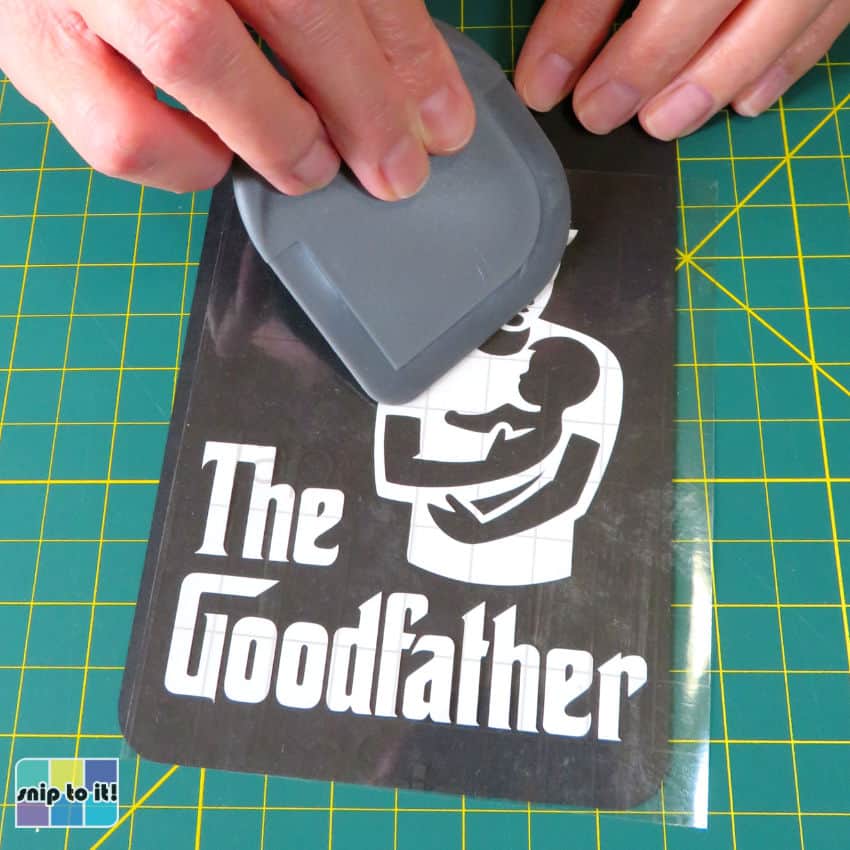
Slowly peel the transfer tape away from the design at a very low angle, and you should be able to remove it without tearing your cardstock.
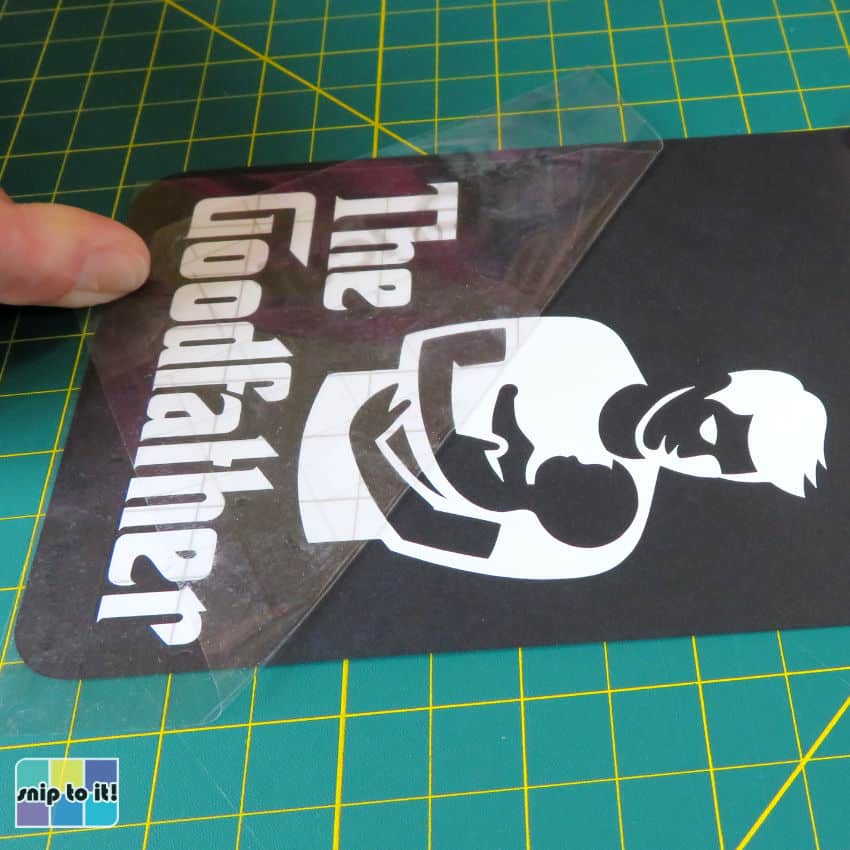
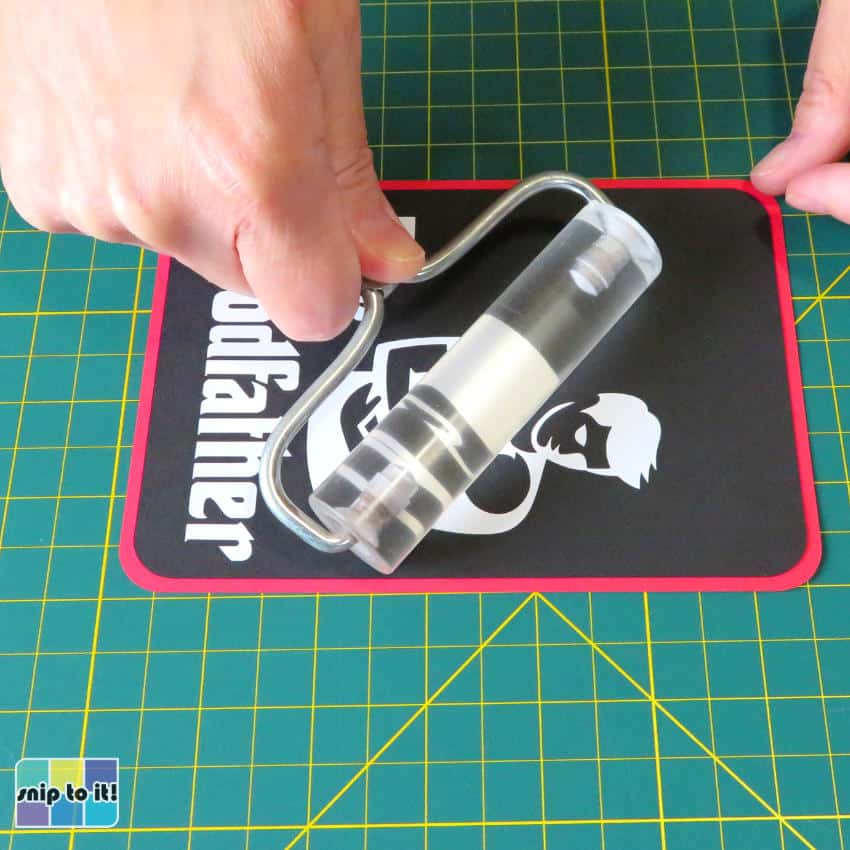
Cover the design (I use the backer sheet from the transfer tape) and burnish to fully stick it down. Now you’re done with the trickiest part!
Assemble your layers to finish the card
Here are all your layers:
- black card base
- black front panel with vinyl design
- 2 red panels
- white panel with text
To assemble, use glue or tape runner to stick your layers together. I like to flatten/press the layers with my brayer as I assemble them.
- Fold the card base along the score line and flatten with a squeegee or brayer
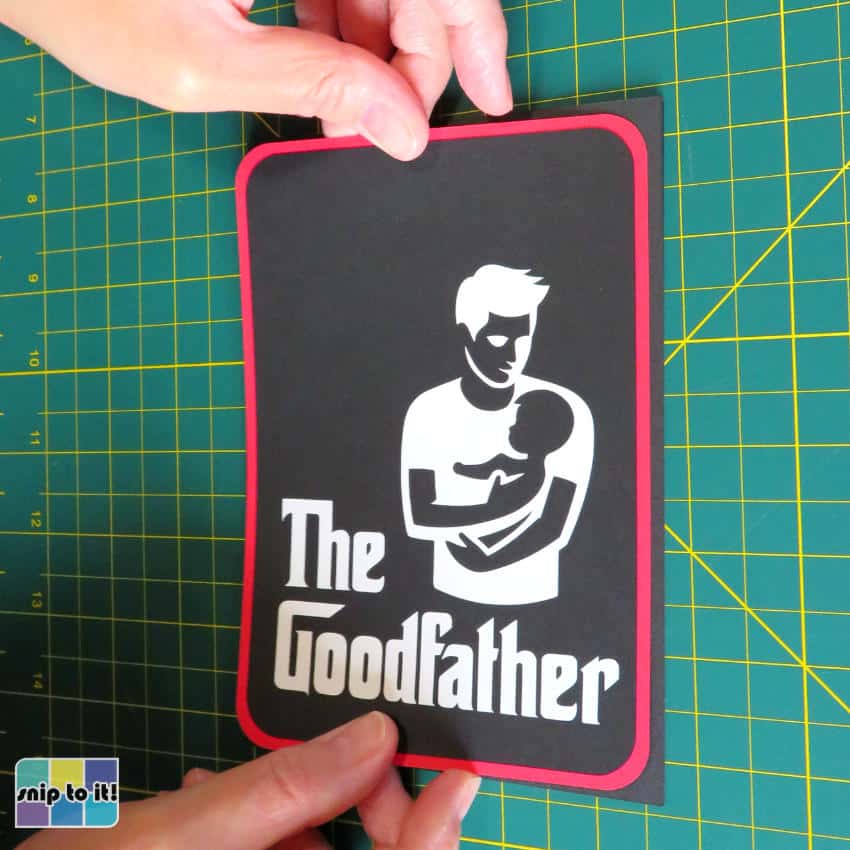
- Attach the black Goodfather panel to one of the red panels & attach that to the front of the card base
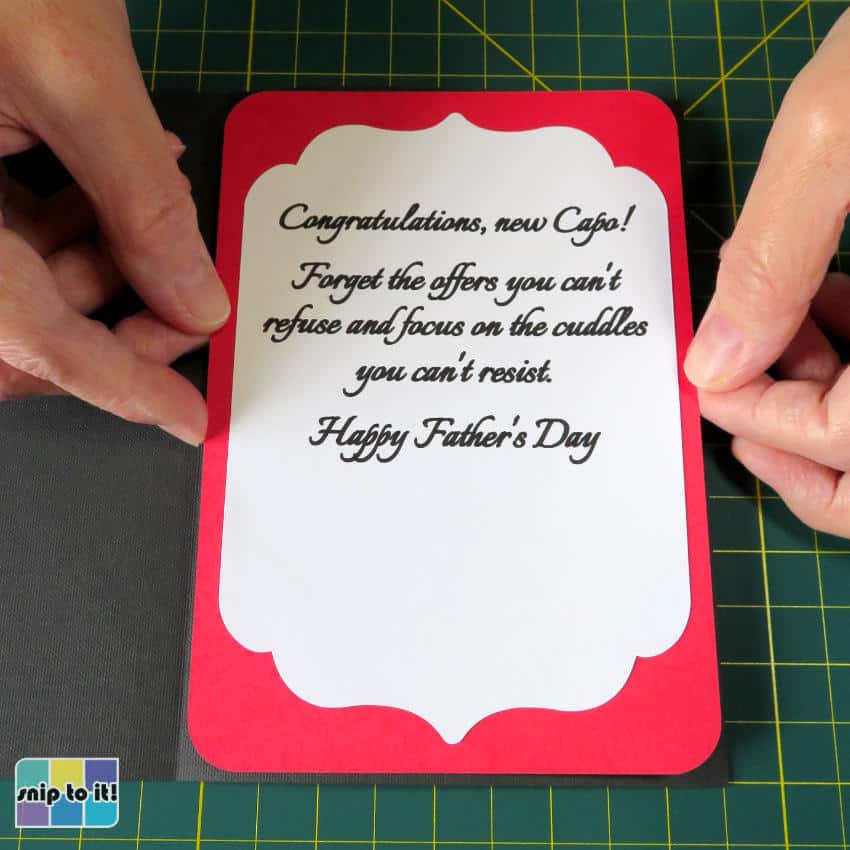
- Attach the white plaque with the sentiment to the other red panel & attach to the inside of the card
Finito!
Customization of the card text
You can easily customize the front and inside of the cards using the free fonts I chose.
Front text
The famous Godfather-style font is Corleone, and you can easily customize your text for the front:
- The Goodfathers, if you’ve got 2 dads and want to give one card to both of them
- The Grandfather
- The Dogfather
- or, dare I say, The Godfather, if you’ve got one to celebrate on Father’s Day
Inside/sentiment text
The font I chose for the sentiment is Italianno, and it is not a single line font. If you want to use the same font for your own text, I recommend a 33 point font size with an offset of -0.003″. You can use our filling in letters tutorial to guide you through using Offset to create solid text.
If you would prefer a single line writing font, you might like to choose one from our list of masculine fonts. (I almost chose Josefin for this project)
Here are the finished cards!

Before you go, you might like these other projects for Father’s Day and other occasions:


