This article is part of our Print Then Cut section of the Mastering Cricut Design Space learning hub.
If you caught my tutorial on how to do double-sided Print Then Cut in Design Space, you’ve already seen how handy it can be. In this tutorial, I’m doing a full project: a Christmas card that combines double-sided Print Then Cut, a side edge, a score line, and personalization with pen writing.
These cards look polished, but are super easy to make! It’s perfect if you want to design your own personalized holiday cards but don’t have the time to spend hours on each one. I’ll show you how to create your design, set up the double-sided print, and finish your card with scoring and writing.
I’m making a 4″ x 6″ card, which is a standard size that fits store-bought envelopes, and is about the biggest card you can make using this technique.
Get the free Max Print then Cut Area SVG from our Resource Library.
Create your card base with a side edge
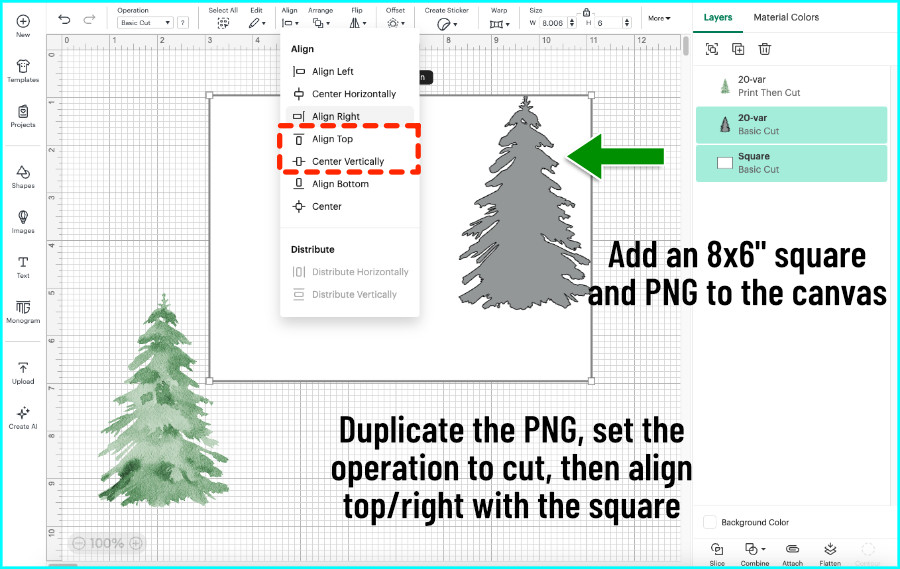
Start by adding a square to the canvas and size it to 6″ tall and 8″ wide. Next, I’m adding a PNG of a watercolor tree and resizing it to 4.5″ tall. I want the right-hand edge of the tree to form the side edge of my card, so I’ll slice the base using a duplicate of this graphic.
Duplicate the tree and change its operation to Basic Cut. Then select both the tree and the rectangle and Align Top and Align Right.
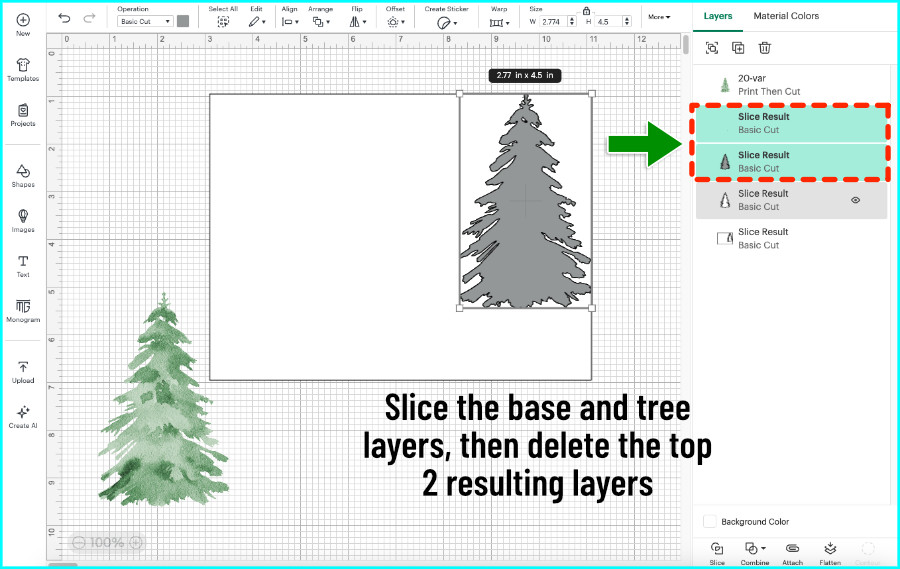
I’m going to select just the tree now and use my arrow keys to move it up one click and right one click. This will ensure that no tiny sliver is left at the top or side, allowing the top corner to be cut away completely from the body of the card. Select the tree and the rectangle and click Slice.
You’ll be left with 4 layers. Delete the top 2 layers, which are the tiny pieces of tree that overhang the card base, and the original tree shape. You’ll be left with the 2 sliced base pieces.
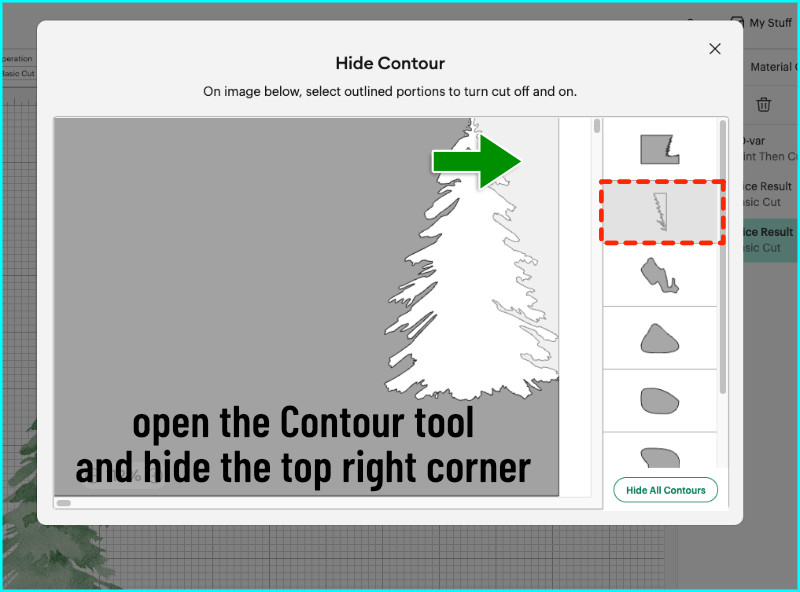
Select the very bottom layer and open the Contour tool. Hide the top right corner.
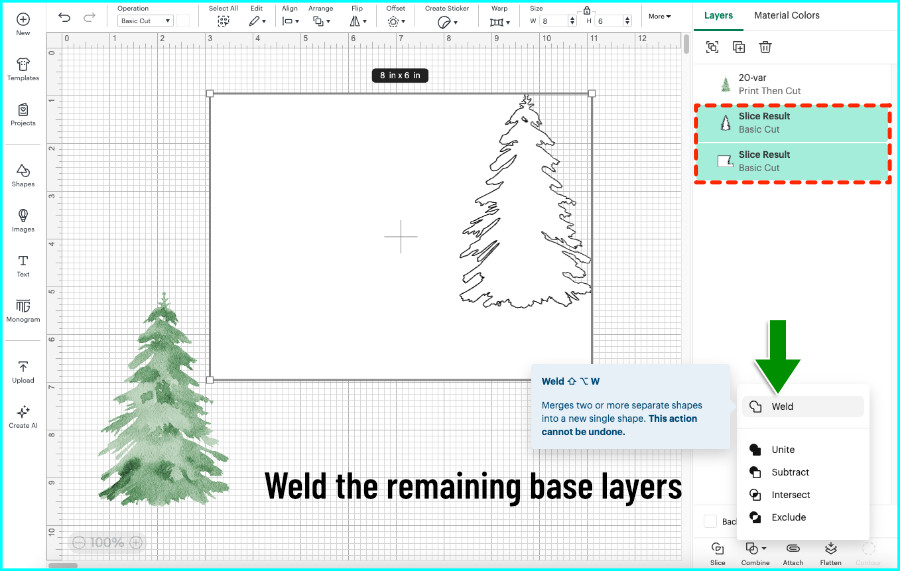
Then select both bottom layers and click Weld from the Combine tools menu.
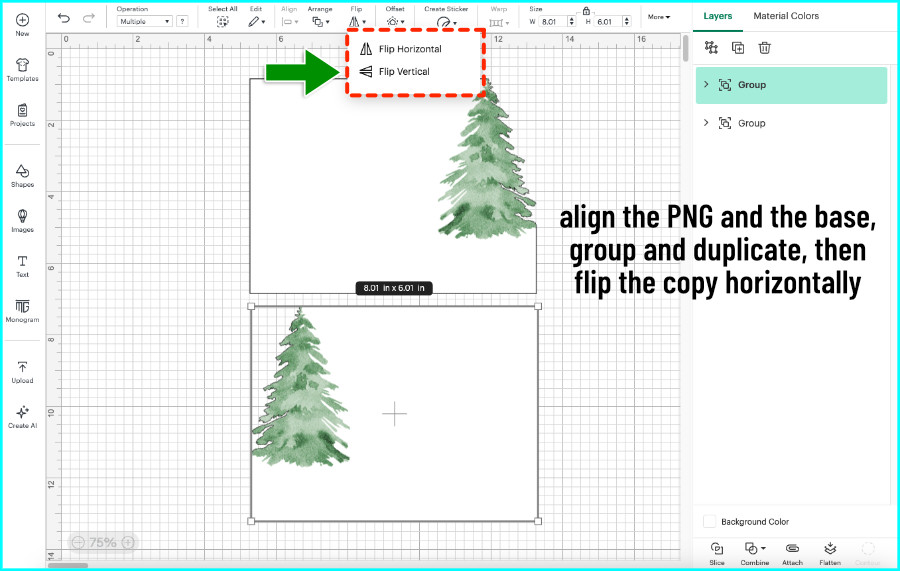
Bring the tree image to the front, Align Top and Align Right with the base, and Group them. Now duplicate the group and Flip Horizontally — that’s going to be the inside of the card.
Add score lines and finish the designs
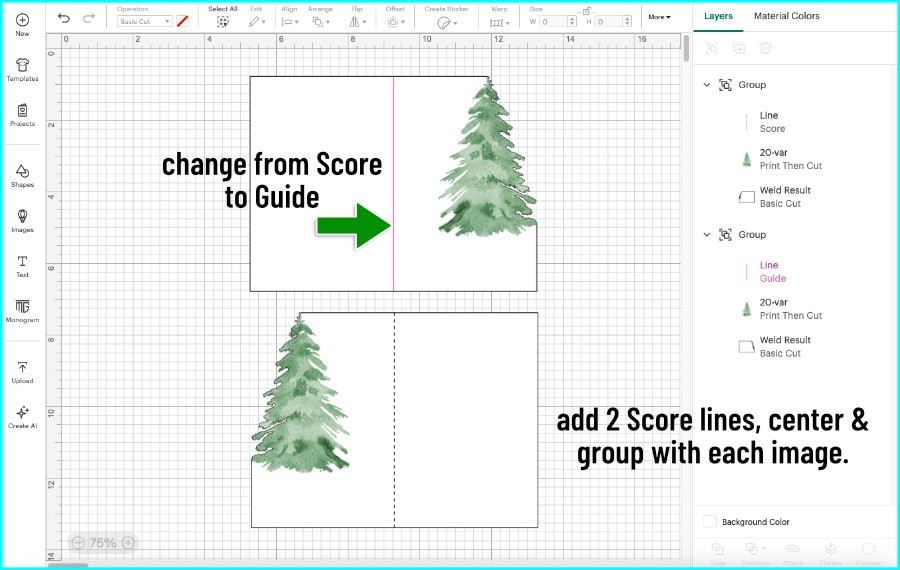
Add a score line from the Shapes menu, size it to 6″ tall, then duplicate it. Select each card base and its score line, then Align Center and move each score line them into their Group in the Layers panel.
For the front of the card, I want a center guide just for designing, not a score line, so I’ll change that line’s operation to Guide.
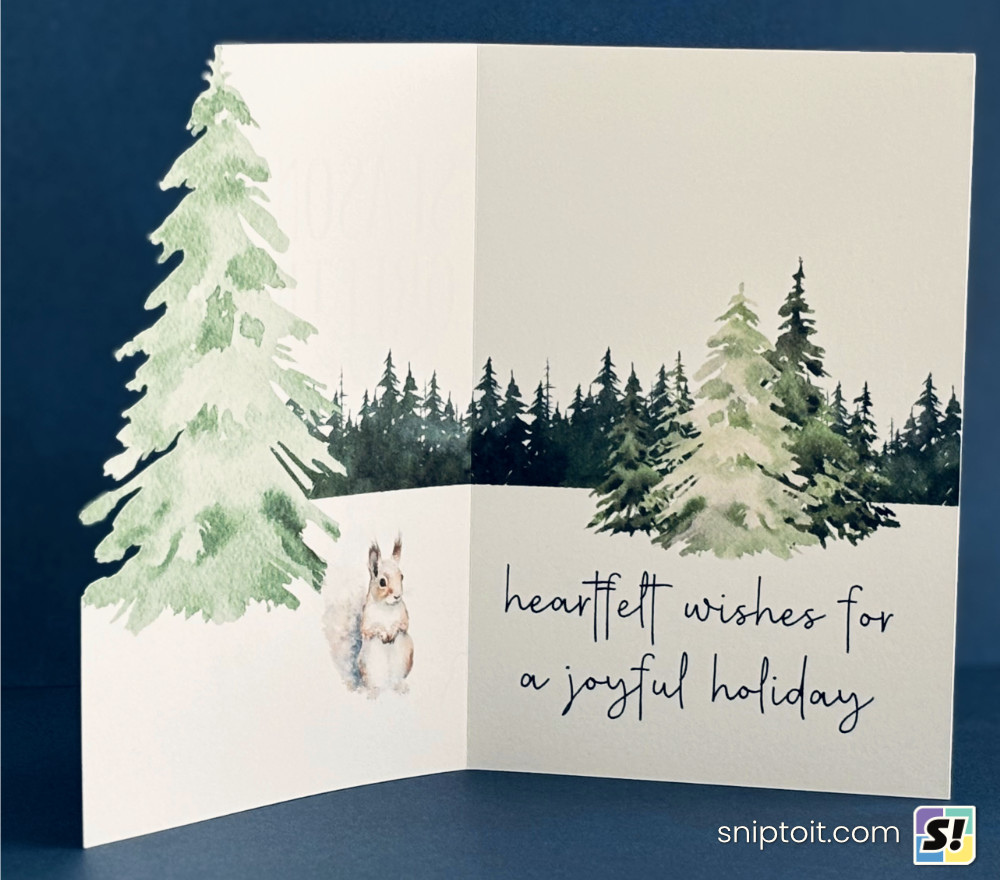
Now I’ll add the rest of the artwork to the card. I’m using watercolor clipart and fonts from Creative Fabrica, and I’m creating a simple winter scene that starts on the front panel and continues on the inside. I’m going to add text to the front that will be printed, but I want the text on the inside of the card to be written with a pen.
Season’s Greetings font: Aunofa Serif. Source images: watercolor trees. Source images: watercolor forest animals.
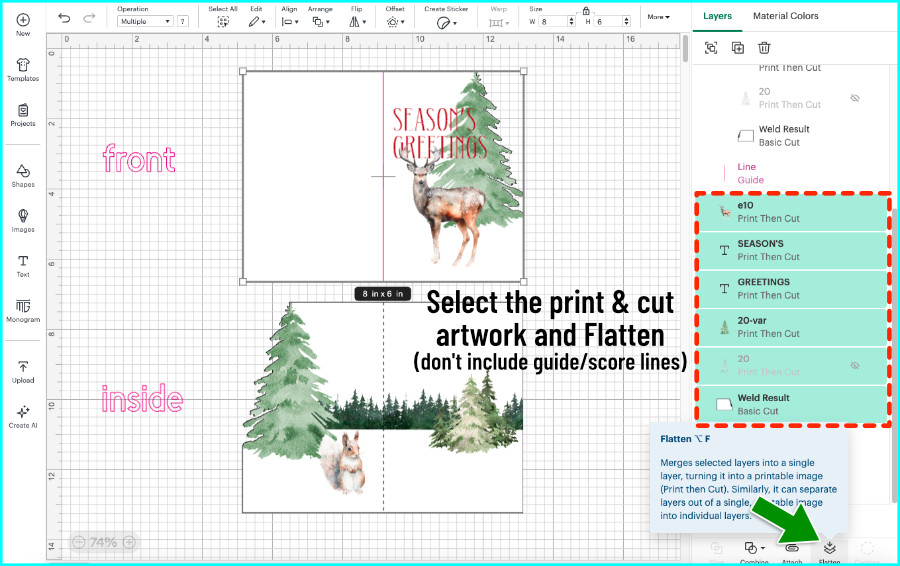
Once your designs are finished, select all the Print & Cut elements and the card base and then click the Flatten icon. Be careful NOT to include the Guide and Score lines when you Flatten.
(If you’re feeling a bit out of your depth, you might find our explainer on the Flatten tool enlightening)
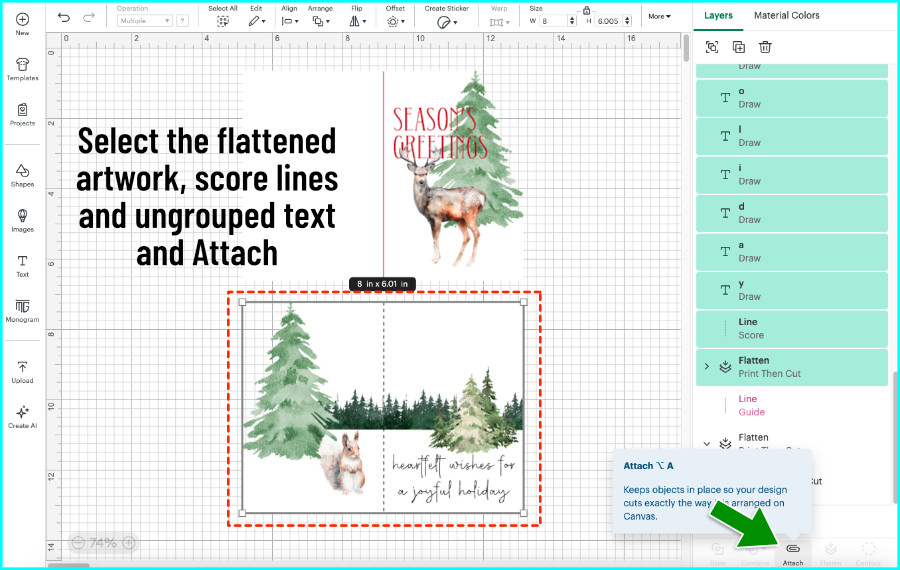
On the inside of the card, I’ll add the sentiment that I want written in pen. The font I’m using on the inside is a single line font (Feasibly Single Line), and in Design Space, this type of font needs to be completely ungrouped before Attaching to the card base.
So, ungroup all the text. Select all the text, the score line, and the flattened card base and click Attach.
The designs for the front and inside of the card are now complete!
Set up double-sided printing with a guide shape
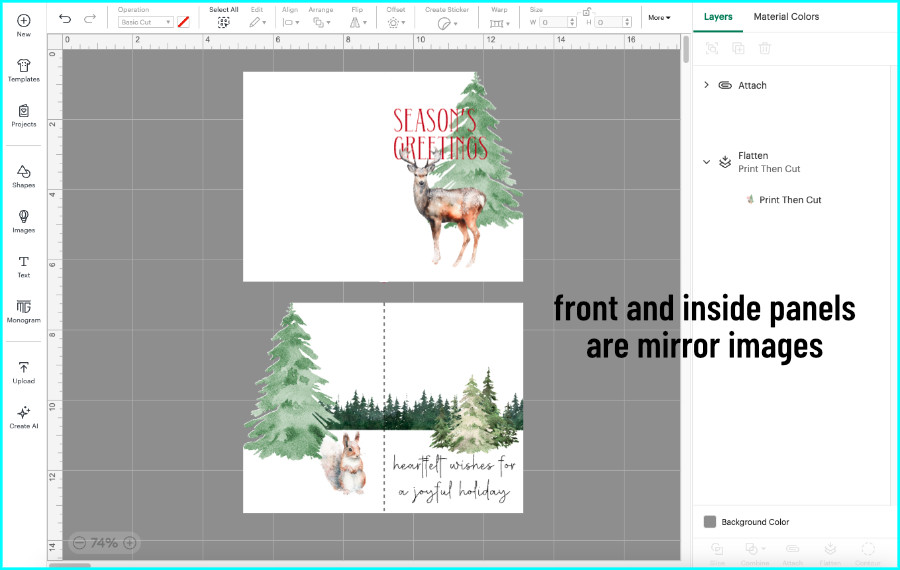
The key to double-sided printing is all about the orientation of the images and their positions on the page. You’ll print the same sheet twice: once for the front and once for the inside. The images need to be in exactly the same spot on opposite sides of the page, and mirrored so they align.

That’s why we flipped the base for the inside design horizontally, to mirror the front. The tree side edge will be on the right of the front panel, and when the card is opened, it’ll be on the left side.
But it isn’t enough to just mirror your designs on the canvas, because Design Space doesn’t retain your layout positions when you go to Make. We need to outsmart Design Space to keep our designs positioned on the mat so they will match perfectly front to back.
To do that, I’m going to attach my front and inside images to a larger guide shape. I’ll be using a guide SVG that fills the entire Print Then Cut area to lock the orientation and positions of my designs. (You can download the Letter-sized or A4 sized guide from the Resource Library)
I rotate each panel 90 degrees to fit the print and cut area. Select the guide shape and your front design, Align Center, then Attach.
Select the inside design and the guide shape, Align Center, then Attach. Now the images will match up on each side of the page.
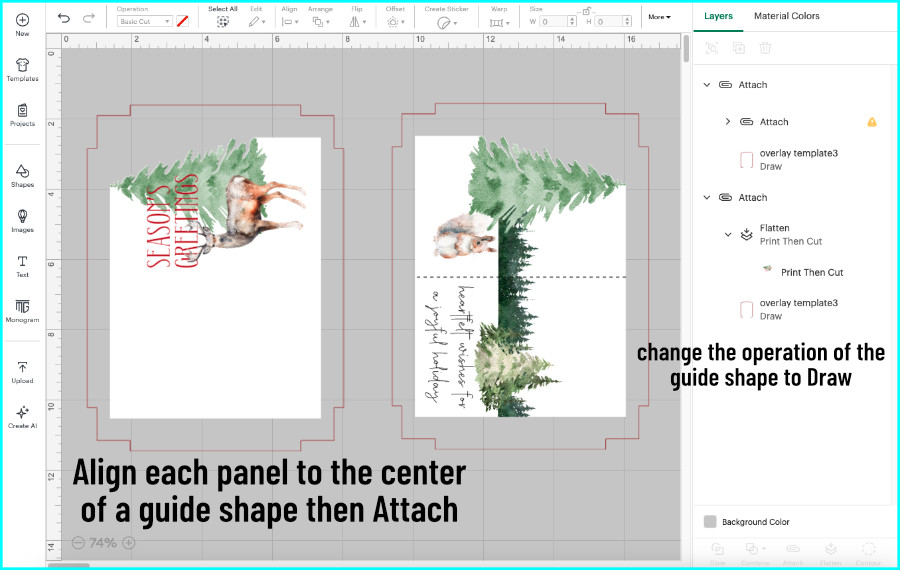
Now, change each guide shape’s operation to Draw, and pick a color that’s different from your writing color. I’ll keep it basic and just choose red, and I won’t insert that pen when prompted.
(Why don’t I choose Guide as the Operation for the max area guide shape? Because Guides can hold your image orientation, but they won’t maintain space around an image when you go to Make, so they can’t retain positioning on the mat.)
Double-sided printing
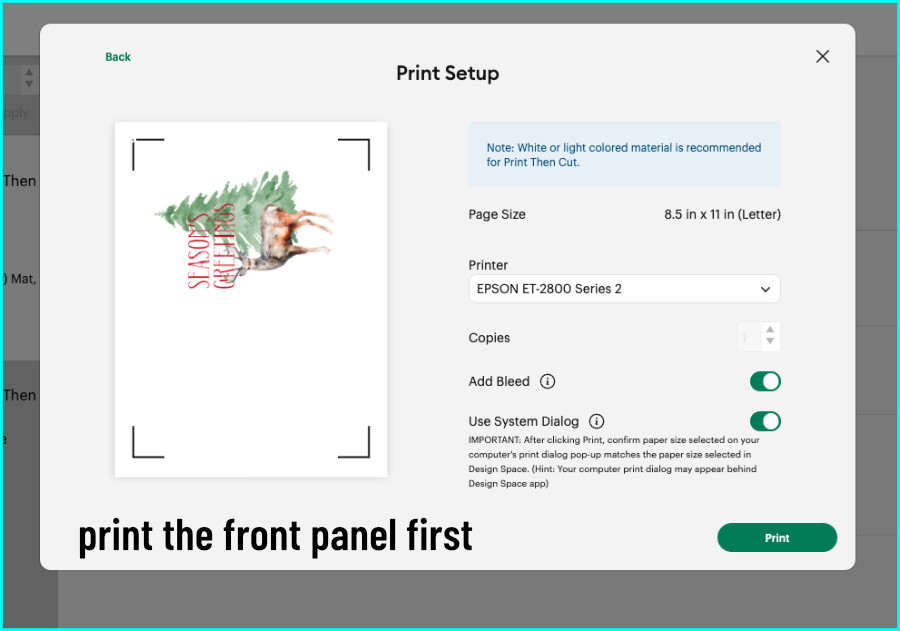
Now we’re ready to Make! The side you print last is the side you will cut, so I’m going to print the front first, then the inside. The inside of my card has the scoring and writing operations attached to it, so it needs to be the one that gets loaded facing upward on the mat.
Select the mat with the front design, click Continue, then Send to Printer. Turn on Bleed and open your system dialog. I’m using 80lb matte white cardstock, and selecting best quality.
[A note about cardstock: I’m using the heaviest cardstock my printer will handle since I’m not layering this card. My printer can manage 80lb, but not 110lb cardstock.]
Before printing, I’m going to label my sheet “Top Front” and “Top Back” with a pen to keep track (the side edge is at the top of each side).
For my rear-loading printer, I’m going to load the sheet in headfirst for the front, then flip the page side-to-side and reload it headfirst again for the inside print.
[If you have a printer that loads from a bottom tray, the top front will be loaded leading into the printer, and when it comes out it will likely be facedown and you just have to turn it to load the leading edge of the back side into the printer]
Once the front is printed, instead of choosing a cut setting for the front, I’m going to select the mat with the inside design and send that to print.

Score, write and cut
Load the printed sheet onto your cutting mat with the inside facing up, and follow the prompts as the machine scores, writes, and cuts. Don’t load the pen for the guide shape outline.
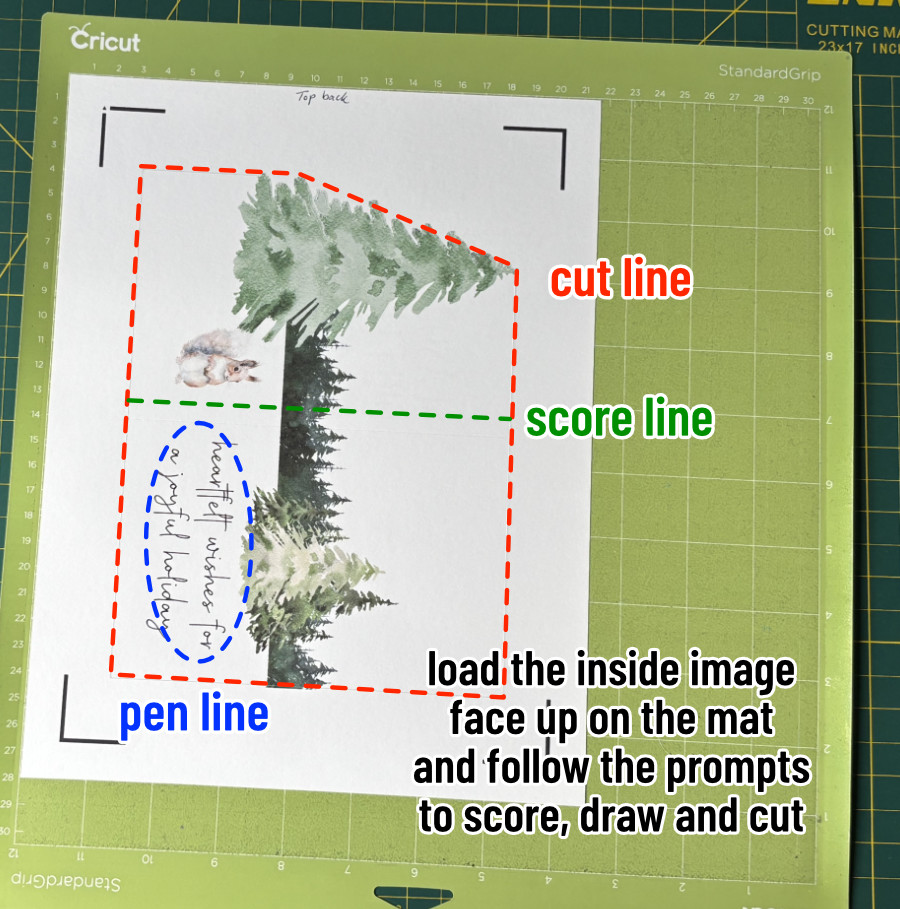
Once it’s finished, just fold along the score line — and voila! A beautiful handmade Christmas card with a double-sided print and a decorative edge. If you’re short on time this season but still want to make something personal, this is a quick and easy way to create custom cards that look amazing.

Before you go…
You might want to read our in-depth double-sided print & cut tutorial, or our latest tutorial on creating eclipse cards in Design Space. If you’re lloking for more card-making resources, check out our comprehensive guide to writing fonts: