
This article is part of our Mastering Cricut Design Space learning hub. It is part of our series on the tools and techniques of the Canvas.
The Attach tool is one of the key functions in Cricut Design Space. It is essential for card making, using pens and scoring tools, and properly aligning your designs.
It’s one of those tools that’s needed for most projects from beginner to advanced, but it’s easy to confuse it with other tools that do similar things. This tutorial is going to help you sort out what it does, when to use it and when to leave it alone.
Here’s a quick rundown of what’s in this article:
- Quick Definition: What is the Attach tool?
- Attaching Multiple Operations
- Attaching to Preserve Alignment and Spacing
- Why did my layers turn the same color?
- Attach vs Group
- Attach vs Flatten
- Attach vs Weld (or Unite)
- Next steps to Mastering Design Space…
Quick Definition: What is the Attach tool?
Attach tells Design Space to lock the relative position of selected layers in place when you move from the Canvas into the making stages. This means:
- fastening multiple Operation types together so that they will be executed on the same mat (ie. Attaching a score line and pen writing to a cut shape to make a card)
- locking the relative positions of multiple objects (ie. Attaching multiple shapes so they maintain a specific spacing)
Design Space will group layers by color and sort them onto color coded mats. It even does this with score lines and pen lines, which will get sorted onto their own mat.
Design Space also has a material-saving default. Objects on the same color mat will be rearranged to use the least amount of material.
What the Attach tool does is tell Design Space to ignore its default programming and substitute your instructions.
Attaching Multiple Operations
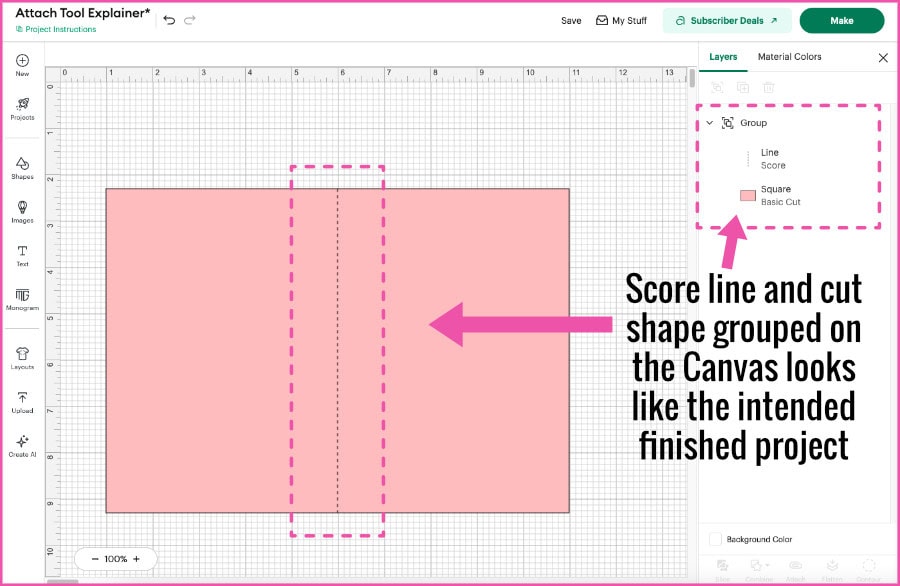
Let’s go to the first example: Adding a Score line and a rectangle to the canvas to make a card base.
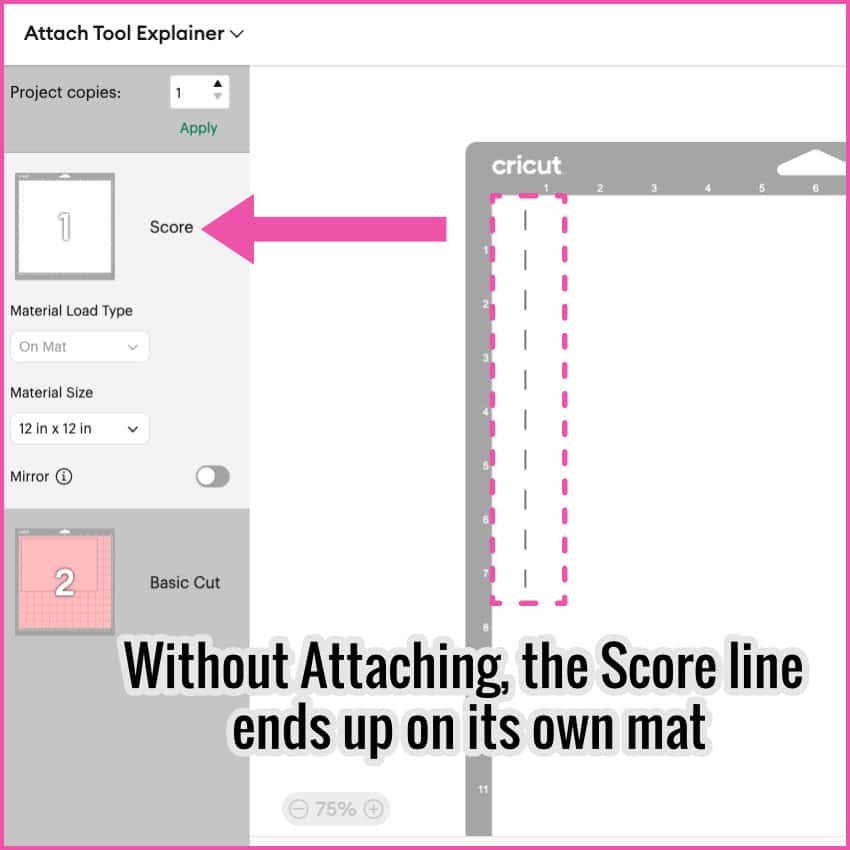
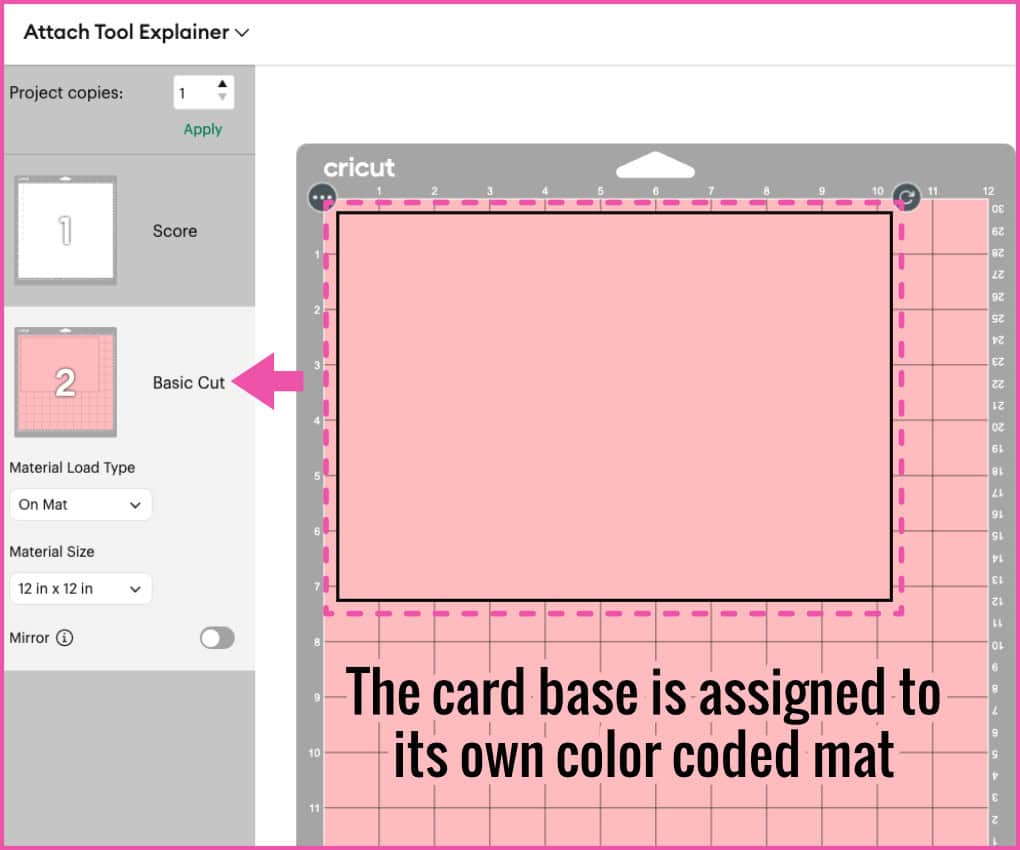
Even if you center the score line and the rectangle and Group them, you are not giving Design Space specific instructions that will keep these two objects together in the Making stage. If you click the Make button, the Score line will be sent by default to the top left corner of the first mat (white) and the rectangle will be sent to the mat corresponding to its color.
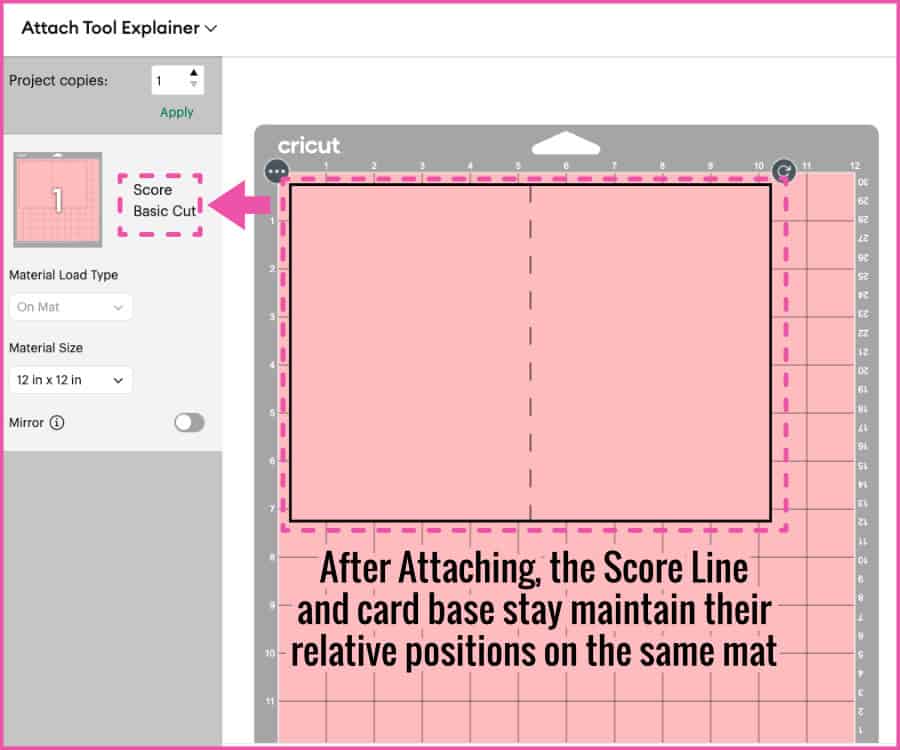
When you Attach the Score line and the cut shape, you are giving Design Space this instruction:
Ignore your default programming. Keep these objects grouped in this exact position and perform both operations on the same mat.
Attaching to Preserve Alignment and Spacing
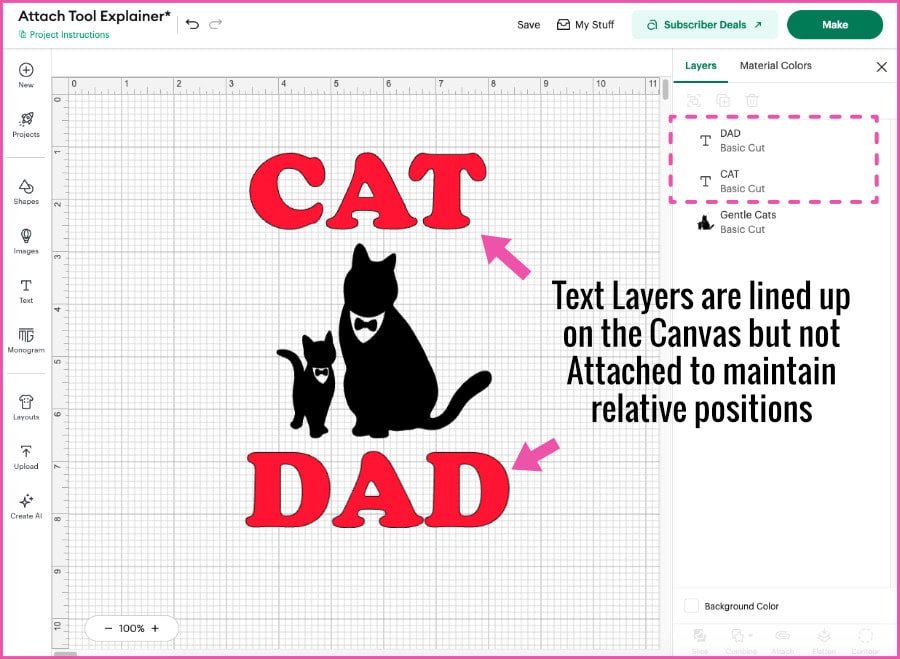
In the second example, the Attach tool is used to keep 2 objects a specific distance apart when they’re cut.
Lets say you are designing a graphic to cut out of iron-on vinyl for a t-shirt. You want two blocks of red text spaced 6 inches apart to allow space to add an image of a different color.
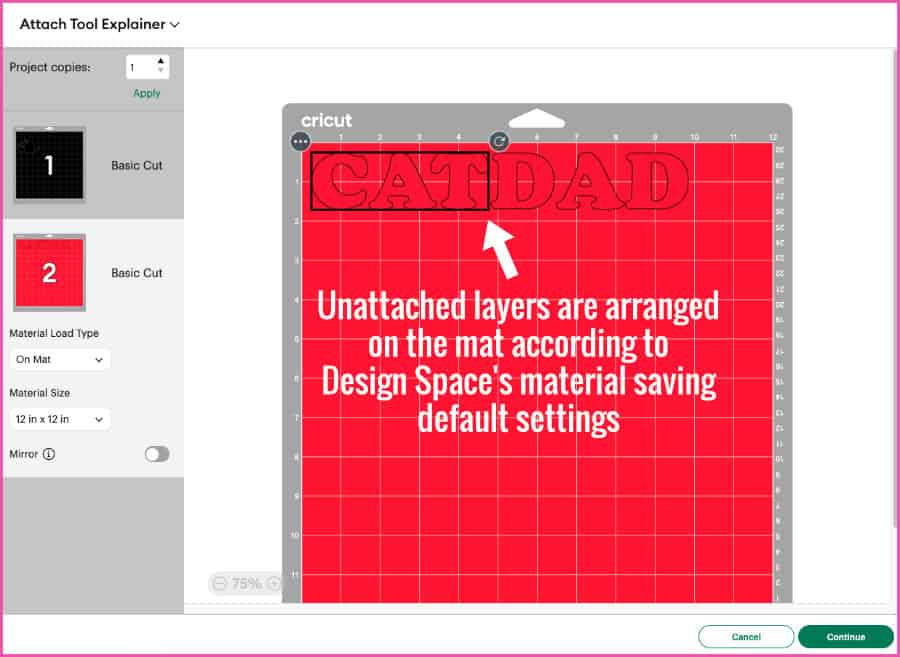
What happens if you haven’t attached the text blocks to lock their position when you hit Make and go to the Prepare screen? You will see that Design Space has rearranged the text on the mat according to its own material-saving default programming. The text blocks will appear side by side and your spacing and alignment instructions will have been discarded.
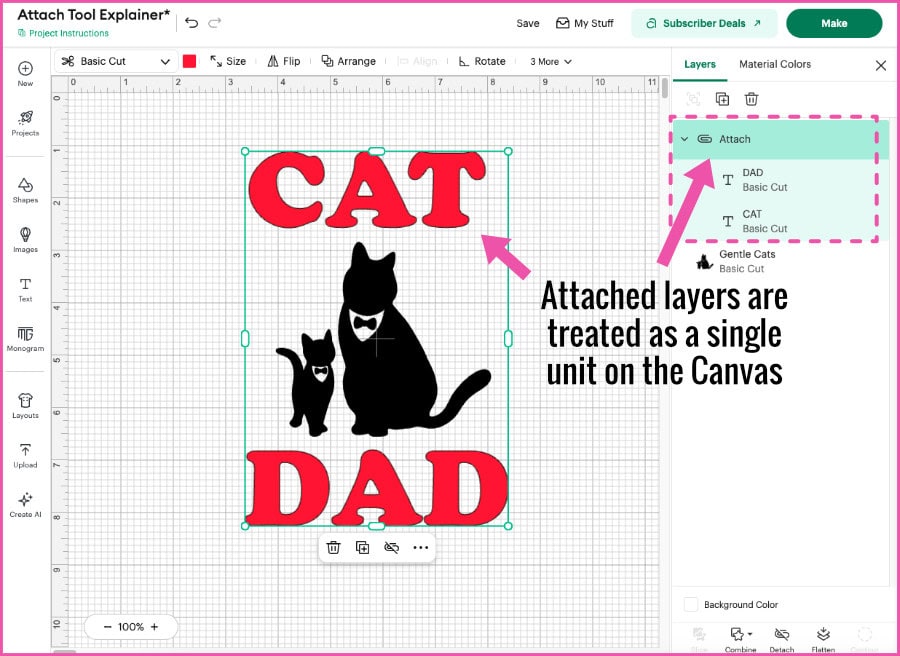
When you use the Attach tool to lock the relative positions of those two text blocks you are giving Design Space this instruction:
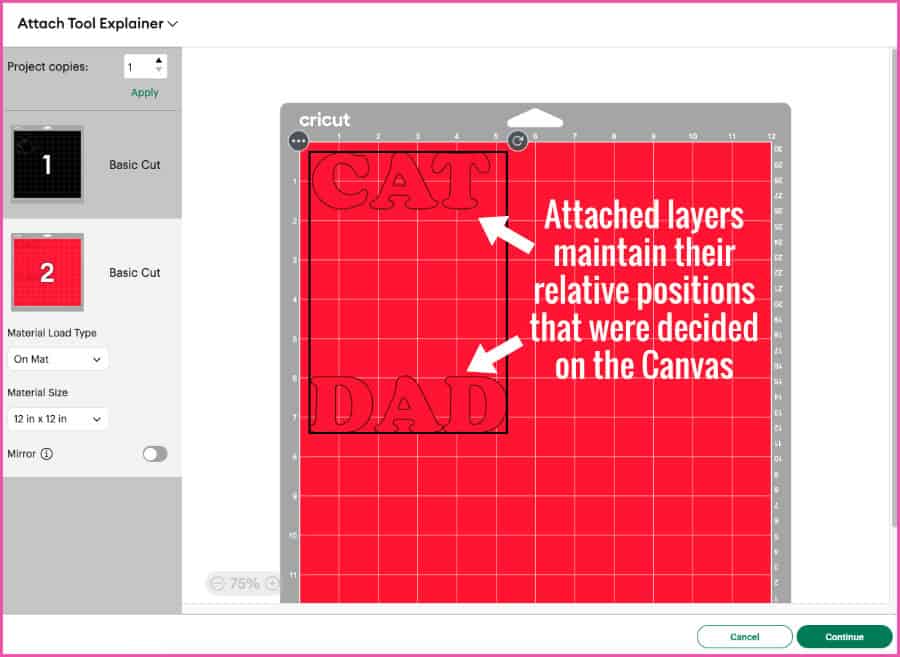
Ignore your default material-saving programming. Keep these objects arranged exactly as I have indicated.
Why did my layers turn the same color?
You may have noticed a few things when using the Attach tool that can cause confusion. Like if you want to arrange a block of white text over a black circle. You click the Attach tool to make sure the text stays in the exact position you want over the circle, and both layers turn black. You didn’t want that, so what happened?
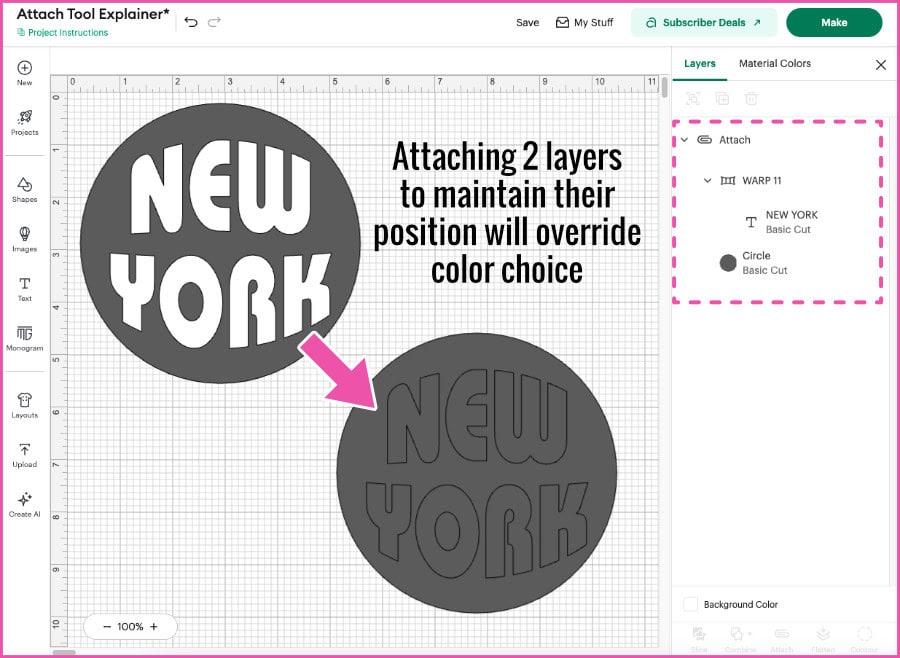
When you use the Attach tool, the instruction received by Design Space is that the Attached objects must be on the same mat, no matter what. Since Design Space uses color to organize mats, both objects are turned to the same color so they will be on the same mat.
So what do you do instead?
If you want to cut the text and shape out of different colors or materials, you can Group the text and circle instead. This will keep them together on the Canvas, but they will be sorted onto different mats for cutting.
If you want the text and circle as a Print Then Cut image, you need to select Flatten instead. This will keep your text white and the circle black, but they will be merged into a single-layer Print Then Cut image.
Attach vs Group
Grouping and Attaching perform similar functions on the Canvas but there’s a clear distinction:
Group: keeps layers of different colors and Operation types together on the Canvas to help you manage your cohesive design. Grouping only works on the Canvas. Once you hit the Make button, all of the grouped layers are treated as independent objects and separated according to color.
Attach: treats objects as a single unit on the Canvas, and can include different operation types. It maintains positioning after the Make button is selecte. Attached objects and operations will appear together in their locked positions on the same mat on the Prepare screen.
Attach vs Flatten
Design Space’s Flatten tool has a lot in common with the Attach tool. It is a planning tool that tells Design Space to override its default programming in favor of your instructions. Flatten is used to merge multiple layers into a single printable object with one outer cut line.
You can use Attach and Flatten together to make unique projects, like adding a score line or written text to a printed object. I use Flatten and Attach when I create 2 sided print and cut text designs. The flattened image image gets attached to a guide shape to lock its position. Design Space can’t move it on the Prepare screen.
Attach vs Weld (or Unite)
Weld and Unite are shape creation tools that combine multiple objects into a single new shape with a single operation. The Attach tool can combine multiple objects together and preserve their original boundaries and operations.
Using the Unite tool (or Weld) can produce some of the same results as using the Attach tool. Specifically, both tools can be used to lock down the relative position of multiple objects. Unite and Weld, however, do not do this with multiple operation types. While Unite and Attach can be undone, Weld is permanent.
For a full explanation on the role of the Unite tool, check out our in-depth post on the Combine tools, including Unite, Subtract, Intersect and Exclude.
Next steps to Mastering Design Space…
Now that you’ve gained insight and mastery of the Attach tool, here are a couple of great posts where we use the Attach tool to level up our Design Space skills:
How to make Cricut fill in letters (Updated: Cricut Foil Tested)
Cricut Hack: Easy Card Layer Alignment for Everyone!
If you’ve got a handle on the Attach tool, here’s the next skill you can build:
Stop Ignoring this Design Space Hidden Gem! 6 Smart Ways to Use the Contour Tool
Got a question or Comment? Let us know in the comments section and we’d love to help.