
Are you frustrated with the Cricut Foil Tool? Or maybe you like the foil tool but you don’t know what to do with the scraps left after foiling? I’m going to show you how to apply those unused foil scraps and sheets to create beautiful, unique projects without the hassle!
I’ll be demonstrating the technique as I make a kintsugi-inspired encouragement card. You can download the file for free from our Resource Library.
The problem with the Foil Tool
Let’s be real: the foil tool can be so frustrating. I have written about how to get the best out of the foil tool, and I’ve foiled a ton of projects that worked out beautifully. But lately it’s like I’m cursed, and I can’t get foiling to work for me, even with all my best practices. My Explore Air 2 foils better than my Maker 3, and I have no idea why.
This is an image that foiled flawlessly a couple of years ago (EA2), perfect on the first try:

This is what I got when I tried to recreate it today (M3). Can you spot the difference?

When the foil tool does work, you’re left with all these scraps that seem too good to throw away—but too small to re-use. Not to mention that even the best results are often a lot more subtle than I’d like, without the big shine I was hoping for.
The technique: foiling adhesive
So how does the technique work? It’s simple.
Similar to HTV, Cricut foil sheets are made up of a clear plastic carrier with foil applied to the back.
The Cricut foil tool uses pressure to transfer it, but there’s another way: apply the foil directly to adhesive.
You can use any pressure-sensitive adhesive:
- Smart Paper Sticker Cardstock (which I’ll be using in this tutorial)
- labels or sticker sheets
- adhesive EVA/craft foam
- double-sided adhesive sheets or tape
- even tape runner or glue dots
Anywhere there’s adhesive, the foil will stick. Like on a Cricut mat, as pretty much everyone who uses the foil tool finds out.
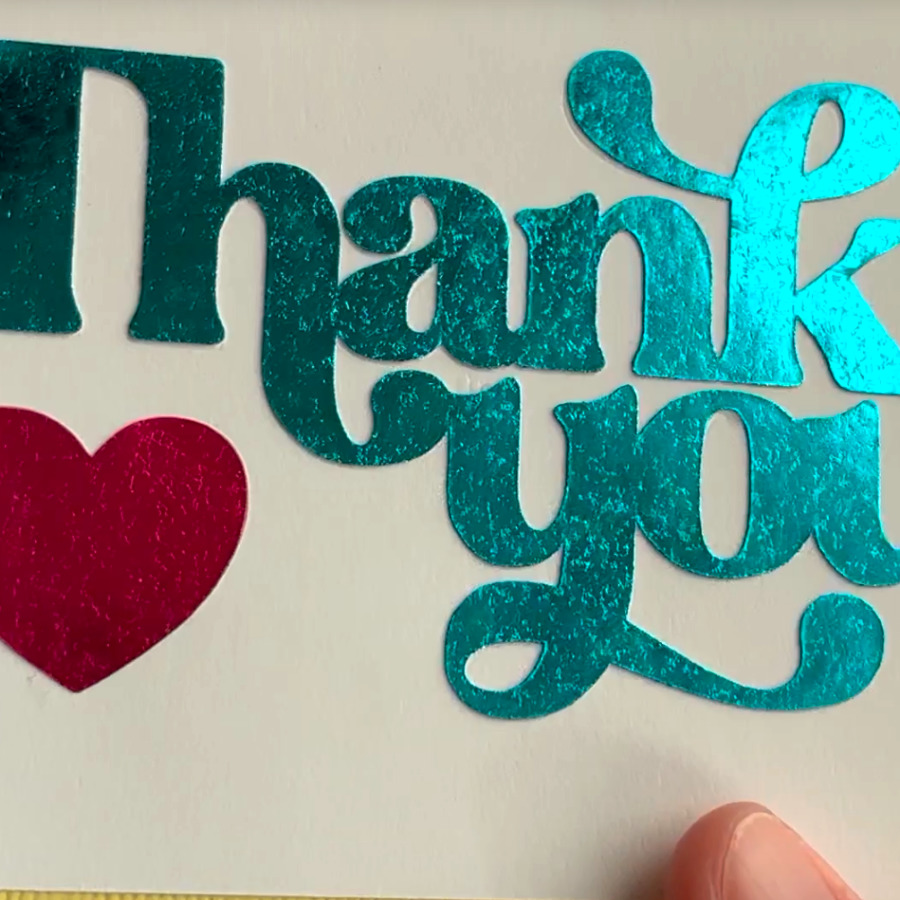
The results will be textured and organic-looking rather than a smooth mirror finish. The exact look you get will be unique, and will depend on the texture of the adhesive and the condition of the foil sheets you’re using (i.e. one application from a full sheet vs multiple applications from scraps). But I think this technique results in a bold, bright result with a cool, vintage look. Foiled cardstock is never ultra-smooth, either.
Project example: kintsugi encouragement card
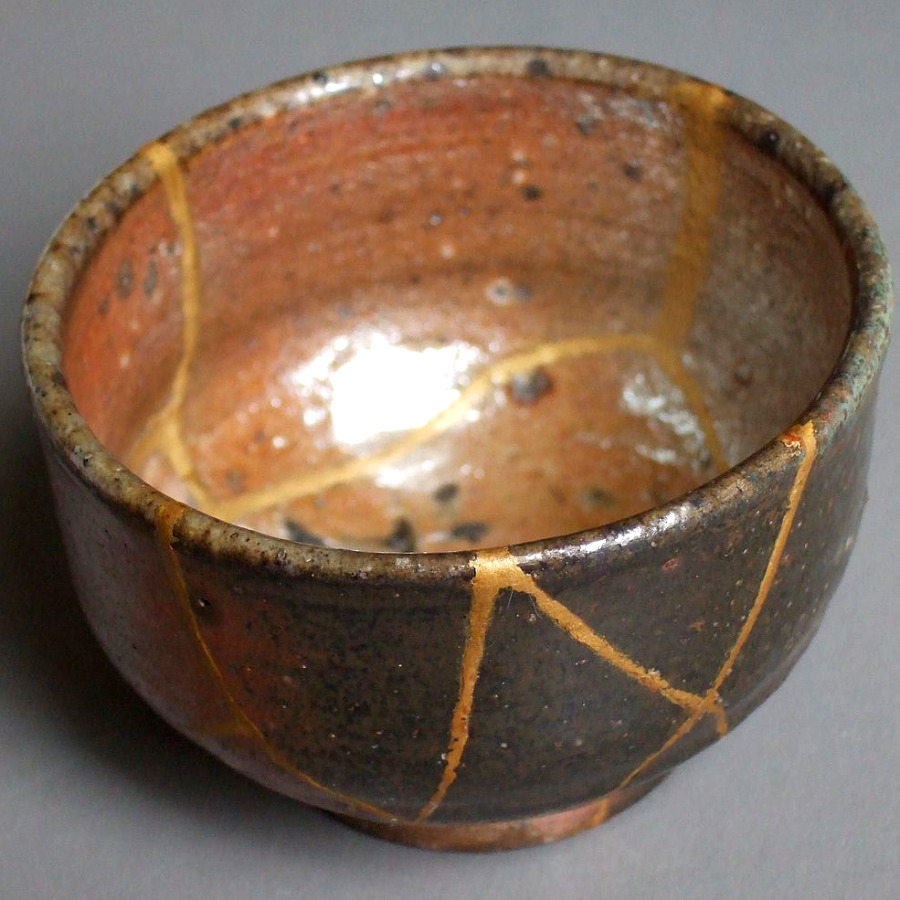
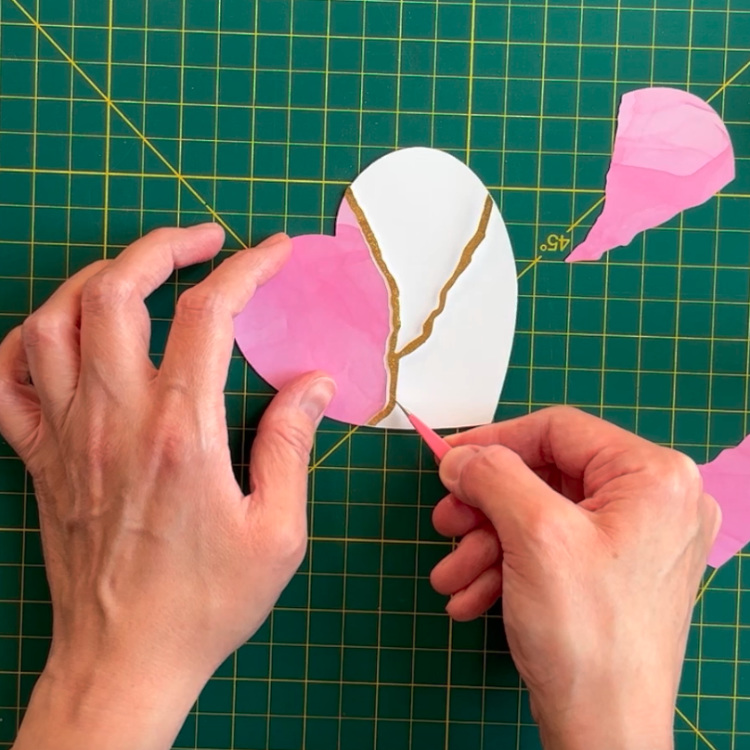
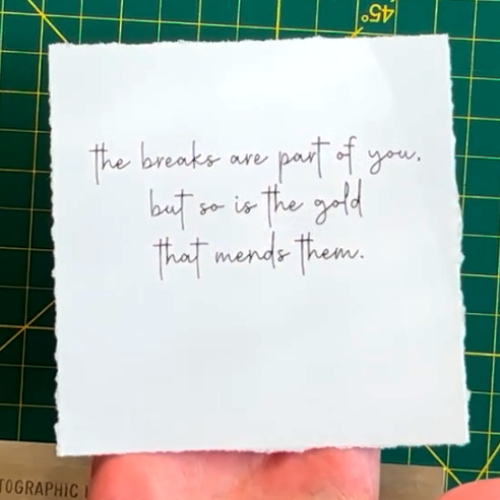
To show you how this technique works, I’m making an encouragement card inspired by kintsugi, the Japanese art of repairing pottery with lacquer and gold. The philosophy is that flaws reflect an object’s unique history and should be celebrated, not hidden.
kintsugi: “golden joinery”. The Japanese art of pottery repair where breaks are mended with lacquer dusted or mixed with gold. The technique highlights flaws, embracing an object’s history and uniqueness and increasing its beauty.
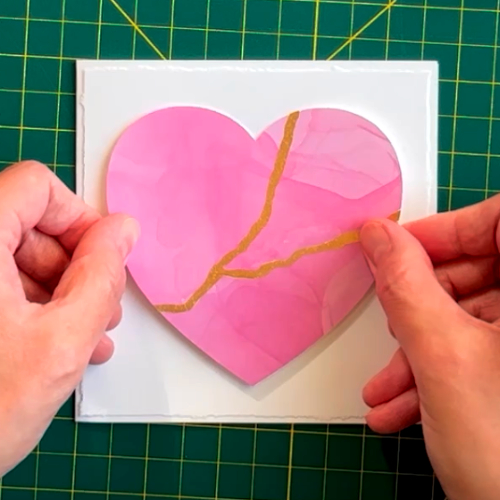
The sentiment in the card is “the breaks are part of you, but so is the gold that mends them“.
If you’d like to make this same project, you can get the cut file for free from our Resource Library (scroll down to “Image files”). If you’d like to change the sentiment in the card but like the font, it is Feasibly Single Line, from our curated list of tested, free writing fonts.
Cutting the adhesive cardstock
I’m using Cricut Smart Paper Sticker Cardstock for my gold seams.
If you’re using a single-sided adhesive sheet, make sure to MIRROR your design when cutting. You’ll cut your image or text in reverse, then flip it to use the adhesive side for foiling.
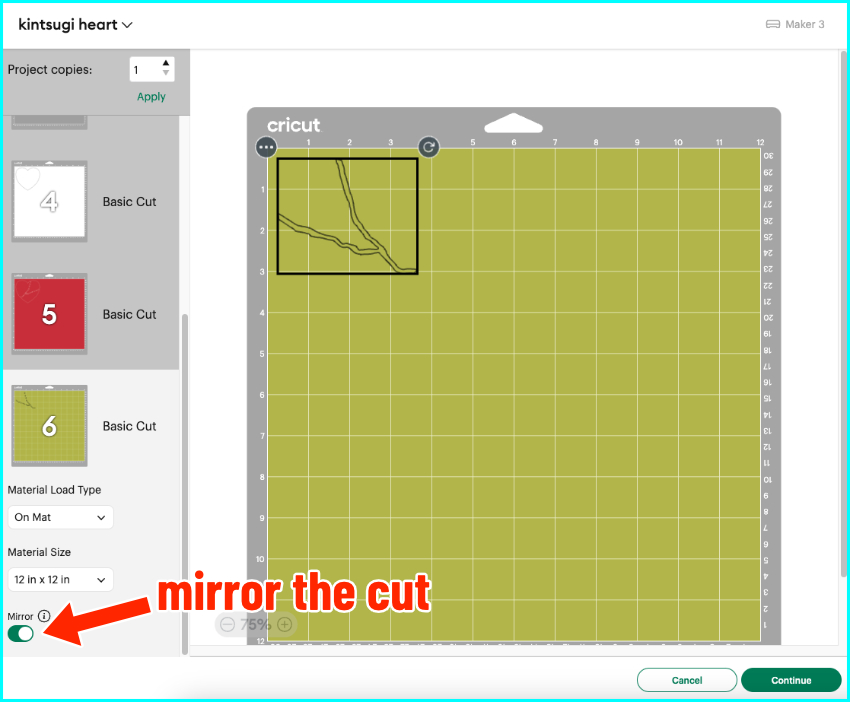
I cut my Smart Paper matlessly using the default setting for that material, but when I cut it on a mat I use the Medium Cardstock setting. Once cut, I weed the design just like vinyl.
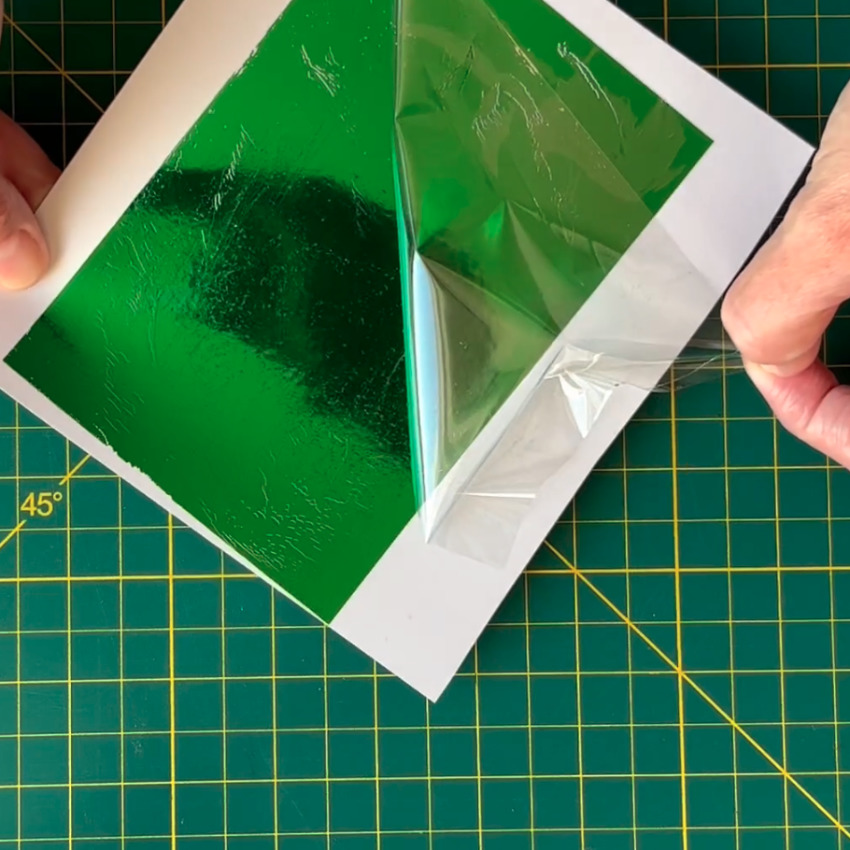
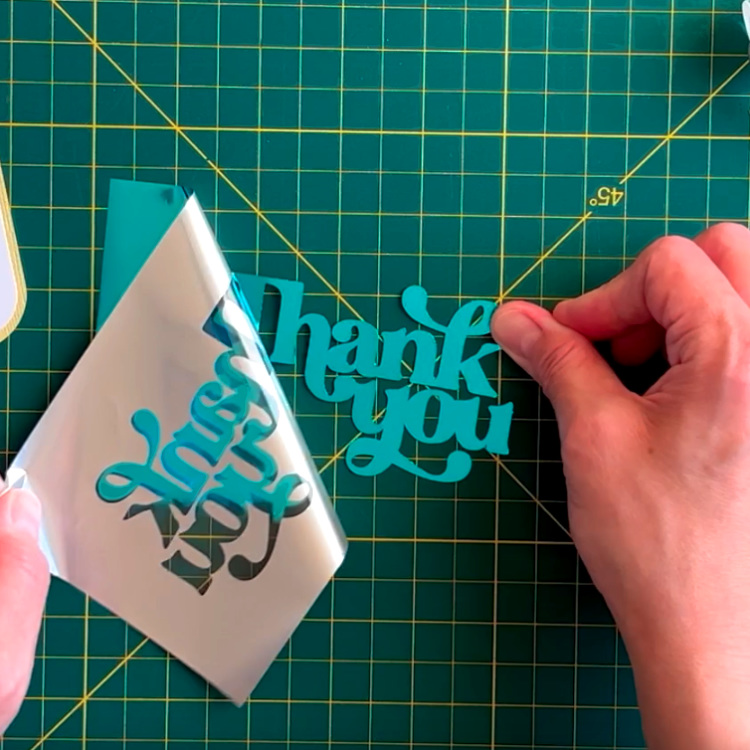
Applying the foil
I take my adhesive cardstock off of the backing sheet and then apply foil to the piece. I’ll be using scraps of gold foil from a couple of projects.
- lay the cardstock adhesive side up on your work surface
- place your foil piece shiny side up over the adhesive
- use a squeegee/scraper to burnish the foil down onto your adhesive

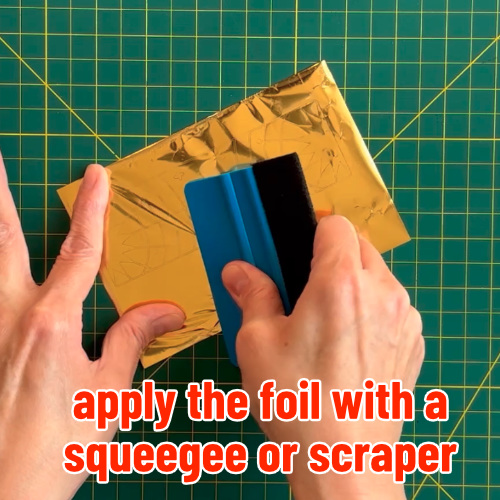
If you’re using scraps, you may have to go over areas more than once. That’s OK – it creates a unique, vintage effect.
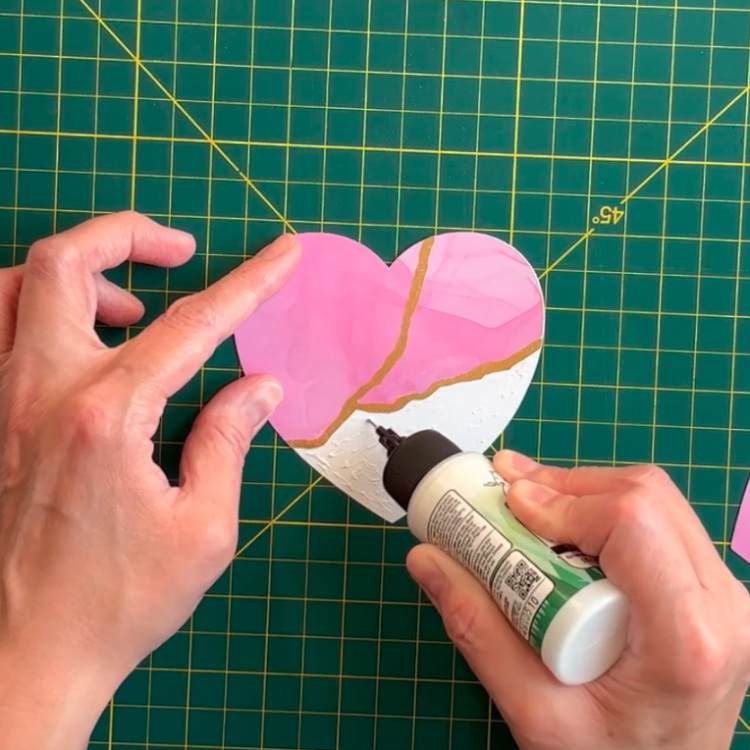
The heart on my card is a knockout design so once my gold seam piece is foiled, I just glue it into place with the rest of the pieces.
Finishing touch: faux deckle edges
To finish the card, I want a softer, imperfect look, so I’m going to give the front and inside panels a faux deckle edge. I’m using the technique demonstrated by Lacy Stoneburner from Stoneburner books, and it’s super easy to do.
deckle edge: the irregular edge on handmade paper, named for the wooden frame (“deckle”) that is used in production.

The front and interior square panels for my card are cut with an extra half inch on all sides. All I need to do is place a straightedge over the panel a half inch down and tear the cardstock along the edge. My panels are cut from 65lb AstroDesigns white cardstock.

That’s it – a unique, imperfect, and lovely final touch.
The easy way to make your foiled lettering bold
You don’t have to stick to subtlety with this technique. Instead of single line foiled text that’s barely visible, you can cut bold and chunky fonts out of your adhesive and give lettering that brighter shine. No more messy cross-hatch fills that take forever to foil!

So that’s it, a super easy way to get beautiful foil effects using the sheets and scraps I know you already have. No more waste, no more frustration—just gorgeous results with a little adhesive.
Before you go
You might enjoy checking out our recommendations for using the foil tool (it can work!), or some of our other cardmaking tutorials:


