I think we are officially in our wavy stacked text era. After Ian’s wavy text tutorial and warped Halloween shirts, we’re now making stacked wavy text in winter designs. It’s easy to create fun designs in no time, so we made a bunch of free SVGs to share: 4 In my Era-style, plus 2 other holiday designs.
You can make your own design using our wavy stacked text tutorial and template, or you can download one of the free designs from our Resource Library. Let’s get started!
Quick navigation:
- Choosing a blank and HTV
- Materials and tools
- Download, import, and resize your design
- Cut your design
- Press your shirt
Video: How to Make Warped Text Holiday Shirts with a Cricut EasyPress
Choosing a blank and HTV
Any T-shirt or sweatshirt will do! I am decorating two 100% cotton T-shirts, in kid’s (2T) and women’s (XL) sizes.
When I make shirts I generally choose thinner, flexible HTV that will feel soft and wash well. I have chosen Siser EasyWeed, EasyWeed Electric, and Sparkle for this project.
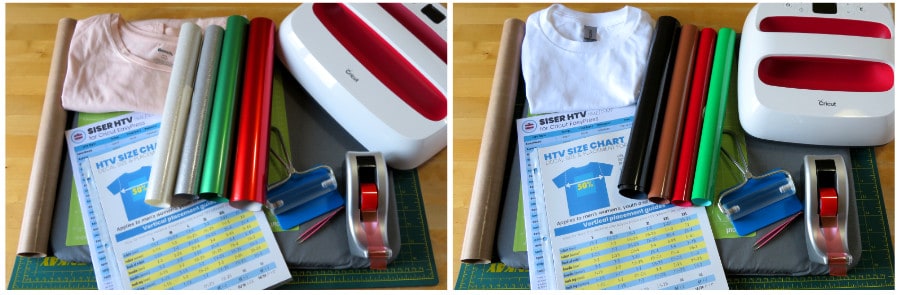
Materials and tools:
- Cutting machine – I’m using Cricut, but you can use a Silhouette or any other cutter
- Cut file – download a free SVG from the Resource Library (or design your own using PhotoPea)
- Cutting mat – I’m using a green Standard Grip mat
- Brayer or squeegee
- HTV – I’m using Siser EasyWeed (red, green, black, hazelnut) for the Olive the Other Reindeer shirt, and Siser EasyWeed Electric (red, green) and Sparkle (white, silver) for the In my Peppermint Mocha Era shirt
- Weeding tool – I mainly use Tweezerman pointed tweezers, you can use any kind of tool you prefer
- Shirts – I am using a Gildan 100% cotton kids T-shirt (Toddler 2T) and a Bench women’s 100% cotton t-shirt (XL)
- lint roller
- Heat resistant tape (optional) – to tape carrier sheets in place, if necessary
- Heat press – I will be using a 10×12″ and a 9×9″ EasyPress 2
- Pressing mat
- cover sheet – parchment paper or teflon sheet
Download, import, and resize your design
Download the SVG
If you want to use one (or more!) of our 6 ready-made designs, download the SVG or DXF file from our Resource Library.


If you want to make your own design for free, you can follow Ian’s full tutorial for making a stacked wavy text design.
And if you’re feeling inspired to make your own design, don’t limit yourself to just the same basic font. Check out our list of 20 groovy fonts that are perfect for wavy text designs to expand your creative possibilities!
Import the file into Design Space
- Open a new project in Design Space and upload the SVG file
- Add the image to the canvas and resize it to fit your shirt (see below)
- If you want to change the colors, ungroup the layers and modify the design however you like
If you ungroup the design, it will keep each word as a single unit, so if you want to change the colors of individual letters in Design Space, you will have to duplicate the word and use the contour tool to hide different letters in different layers. Otherwise, just use whatever colors of HTV you want when you go to make the actual cuts.
Size the design
You can check out our HTV size and placement chart if you need help sizing your design for your shirt. The chart also includes a guide for placement on your shirt.
I sized the designs using Ian’s 50% rule. Measure the distance between armpit seams of the shirt; the image should be a maximum of half of that width.
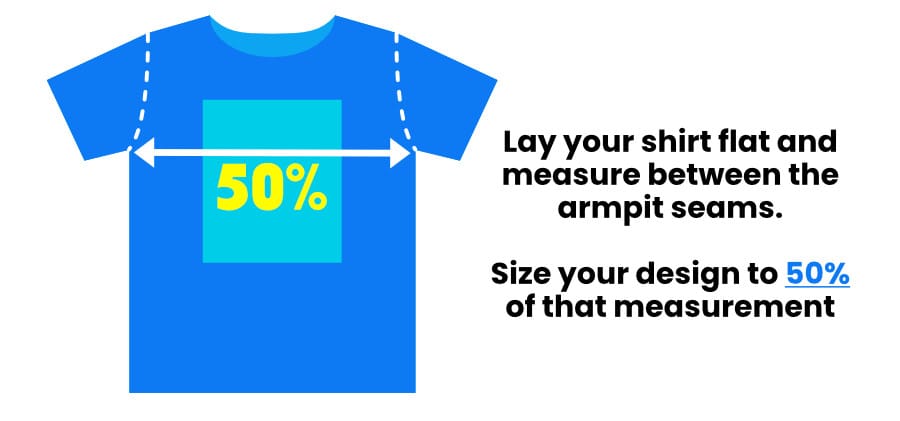
The 2T shirt measures 11″ between armpit seams, so I sized the first design to 5.5″ across. The women’s Bench shirt measures 20.5″ between armpit seams, and the design was sized to 10″ across.
Click Make and then arrange your cuts on the mats.
Mirror all of your mats when you go to the Mat Preview!
Do a test cut (if necessary), then cut your design
If you haven’t used one of your HTVs before, do a test cut to check if the recommended settings are correct.
- choose a square and a triangle from the Shapes menu
- center the triangle in the square and Attach
- resize the test cut box to 0.5″ and go to the Make screen
- cut your test cut box
- if it weeds cleanly around the triangle, your cut settings are good
- if not, change settings and re-cut

Suggested cut settings for Siser HTVs
Siser Sparkle, EasyWeed Electric, and EasyWeed:
- Cricut Explore Air 2: Vinyl+
- Cricut Maker: Heat Transfer (non-Cricut)
Cut your carrier sheets
Once you have cut and weeded your design, cut your carrier sheets closer to the vinyl, if necessary.
Depending on your design, you can cut your carrier sheets very close to line up all your text and press it all together. For example, I cut the carrier sheets on the reindeer design so that I can line up all the text and press just once, then I’ll press again to add the eyes and nose on the reindeer.

Press your shirt
I pressed the shirts on a Cricut 16×20″ pressing mat using an EasyPress 2. All HTV used had the same press time/temp.
Siser recommends adding 30ºF to their normal press temperatures if you are using an EasyPress, and I always follow that advice. You can download the time/temp chart we made for Siser HTV + EasyPress from our Resource Library.
The recommended press temperatures for each HTV (adding 30ºF to Siser):
- Siser Sparkle, EasyWeed Electric, and EasyWeed: 335ºF, 10-15s
I use firm pressure with my EasyPress. Too little pressure will result in HTV that lifts after a wash.
For a conventional heat press: medium-firm pressure and press at 305ºF, 10-15s.
I used a teflon cover sheet for all my presses.
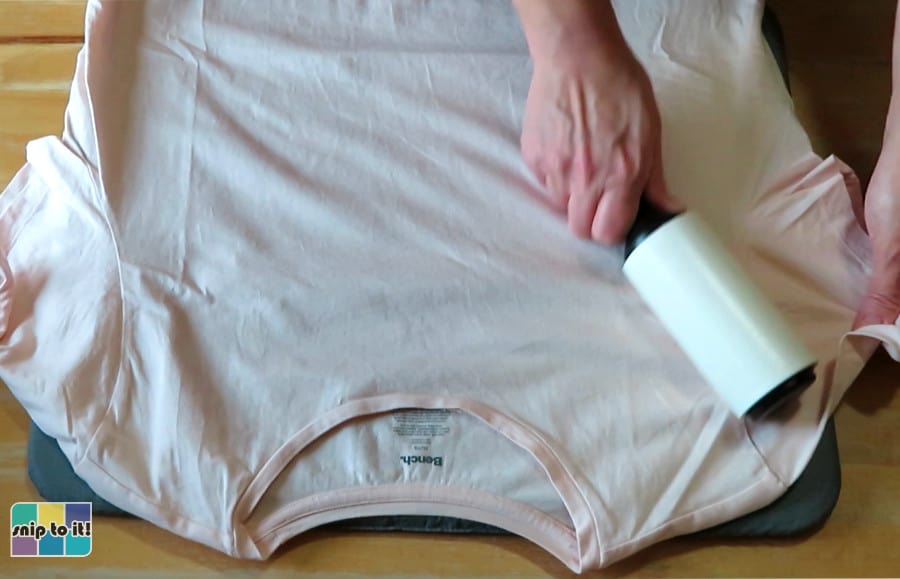
Prepare your base
Remove lint and debris with a lint roller and pre-press to remove moisture and wrinkles:

Press your layers
Siser HTV is very easy to layer. EasyWeed and EasyWeed Electric both have a “1 second tack”, which means you can press for 1-2 seconds then peel the carrier sheet, allowing you to build layers quickly without over-pressing. Both of the designs I made required a bit of layering.
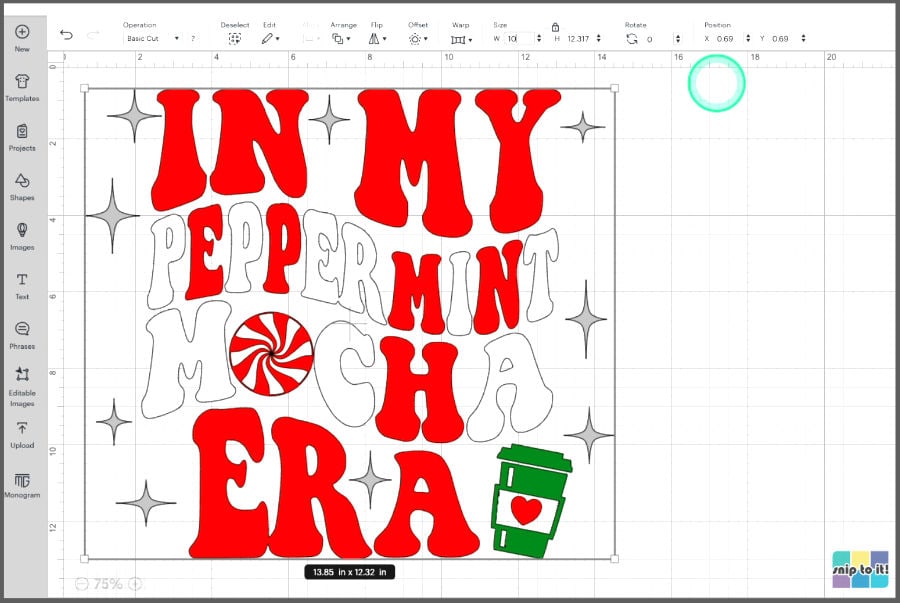
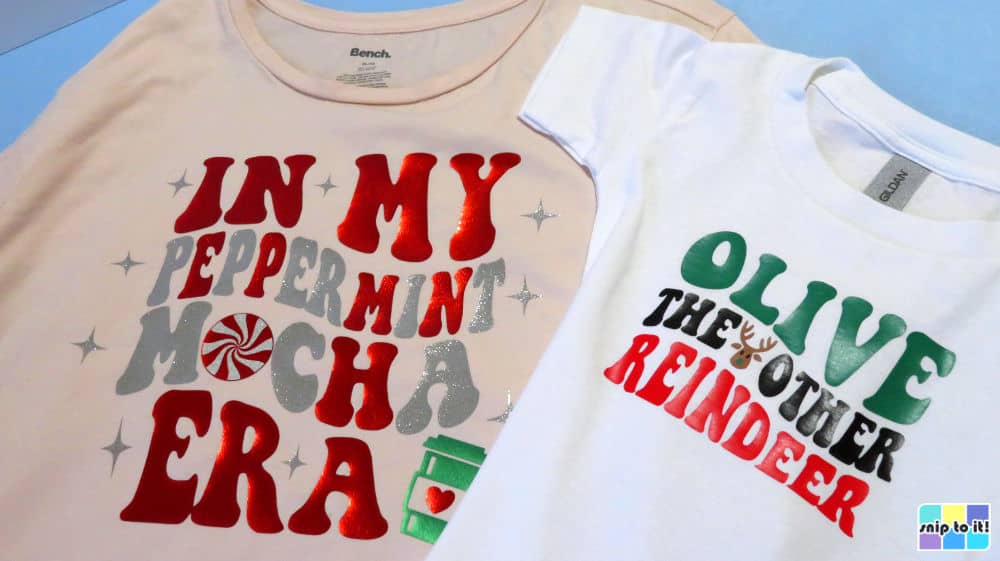
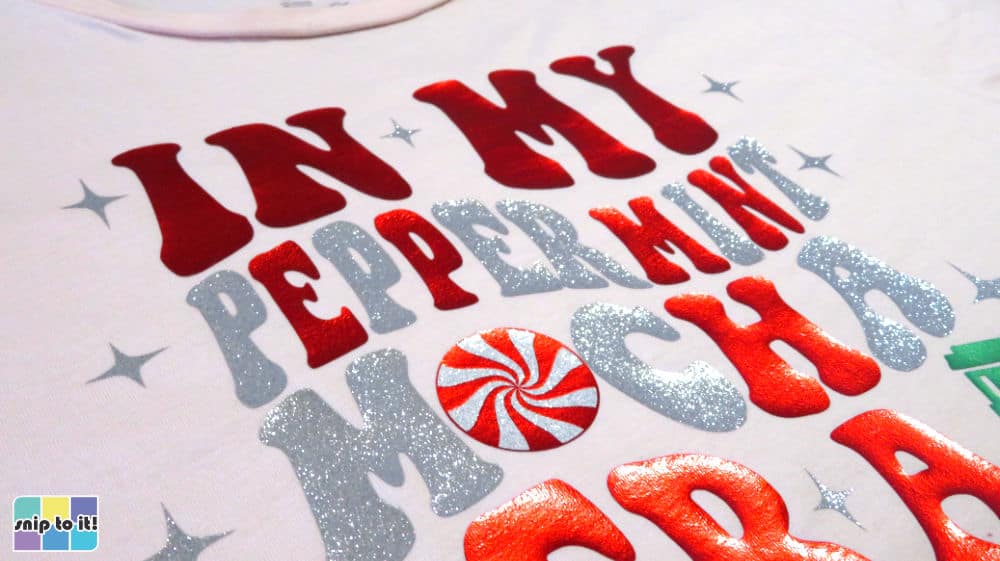
In My Peppermint Mocha Era:
Using the guidelines from our HTV size chart, I placed the top of the design 1.75″ from the neckline of my women’s XL shirt.
I pressed the EasyWeed Electric in red first, using a short tack:
- 335oF, 2s press, hot peel of the carrier sheet
- for tacking, I just count the seconds myself (ignore the time shown on the press, I didn’t use the timer)
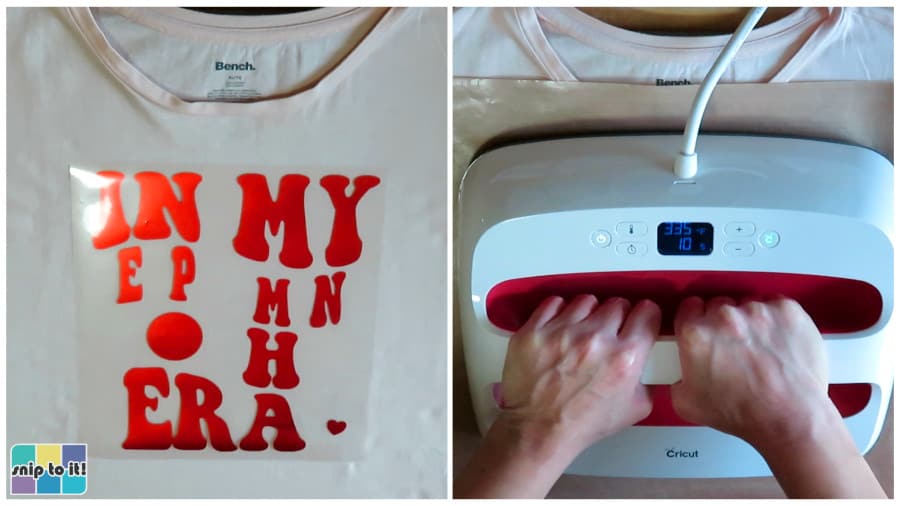
Then, I added the green Electric cup with another short tack:
- 335oF, 2s press, hot peel of the carrier sheet
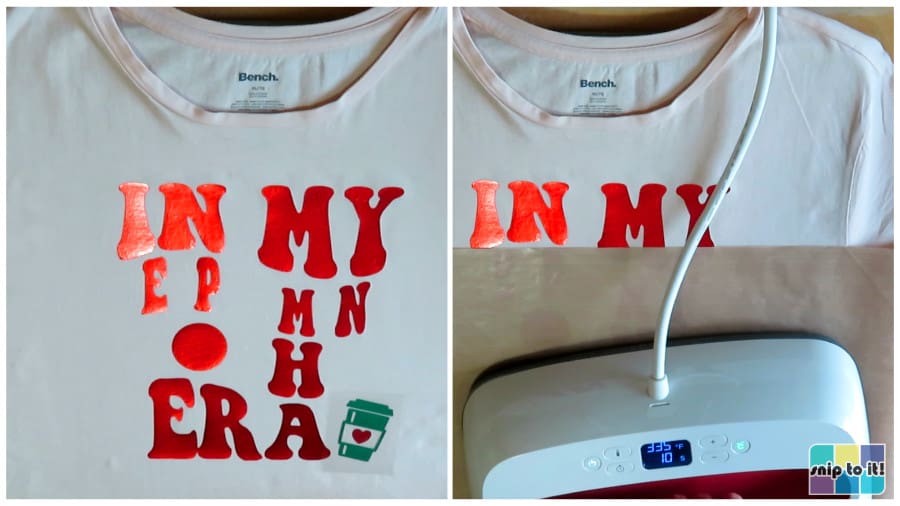
Then I pressed the white Sparkle:
- 335oF, 5s press, hot peel of the carrier sheet
- Sparkle isn’t a 1 second tack HTV, but 5s is usually sufficient for a good tack
- I ended up not liking the lettering in white Sparkle, so I covered it with silver Sparkle after I finished the shirt – see the note below

To finish the shirt, I added all the stars in silver Sparkle:
- 335oF, 12s press over the whole design to finish the shirt
- hot peel of the carrier sheets
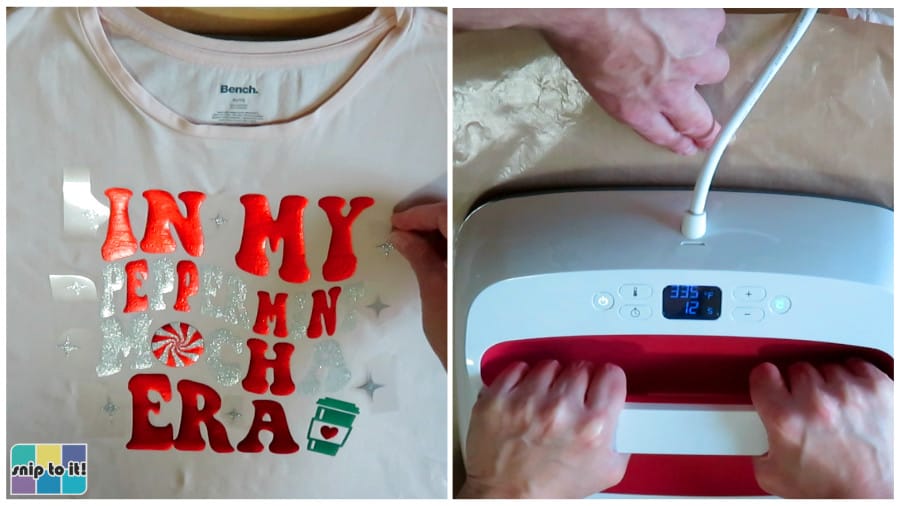
NOTE: I didn’t like how pale the white Sparkle was on the pink shirt, especially next to the vibrant red Electric. So, I re-cut the white letters out of silver Sparkle and layered them right over the white letters (335oF for another 12s). I am much more happy with the result! It is relatively easy to fix some HTV mistakes, especially when you’re using Siser.
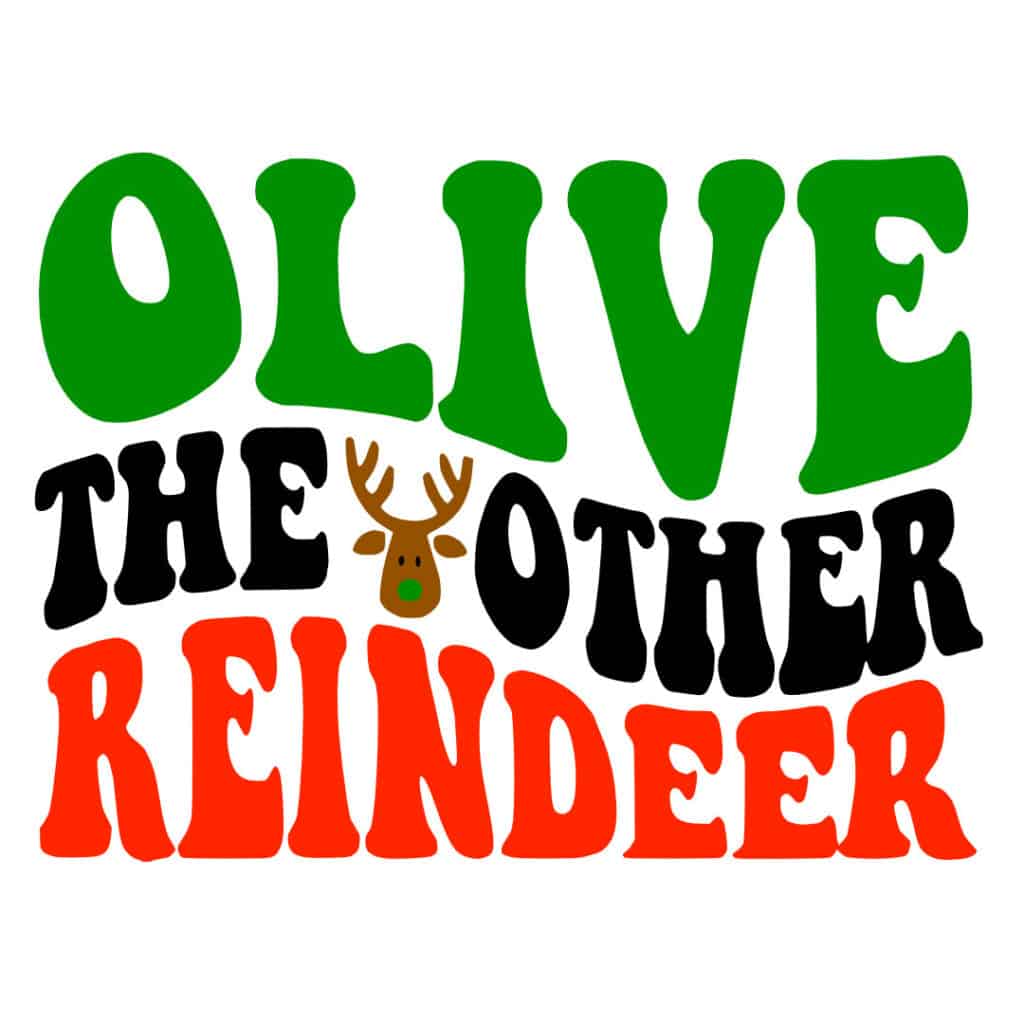
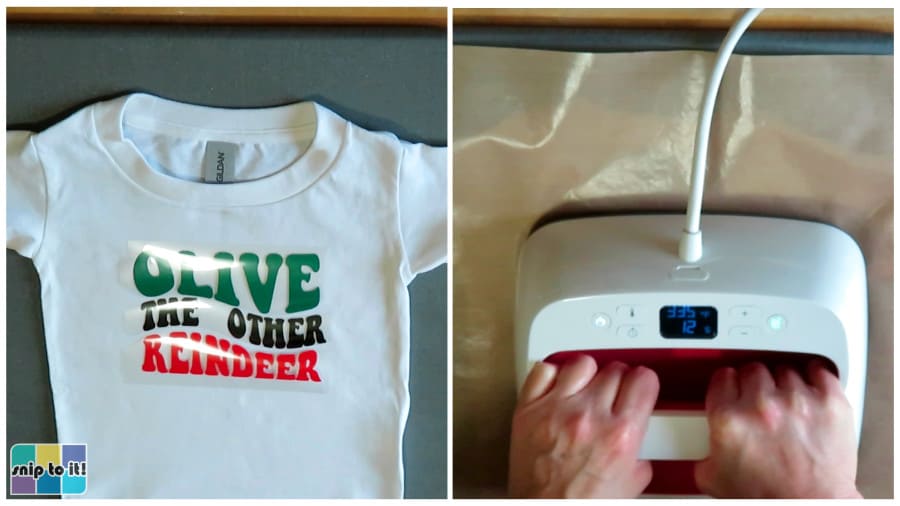
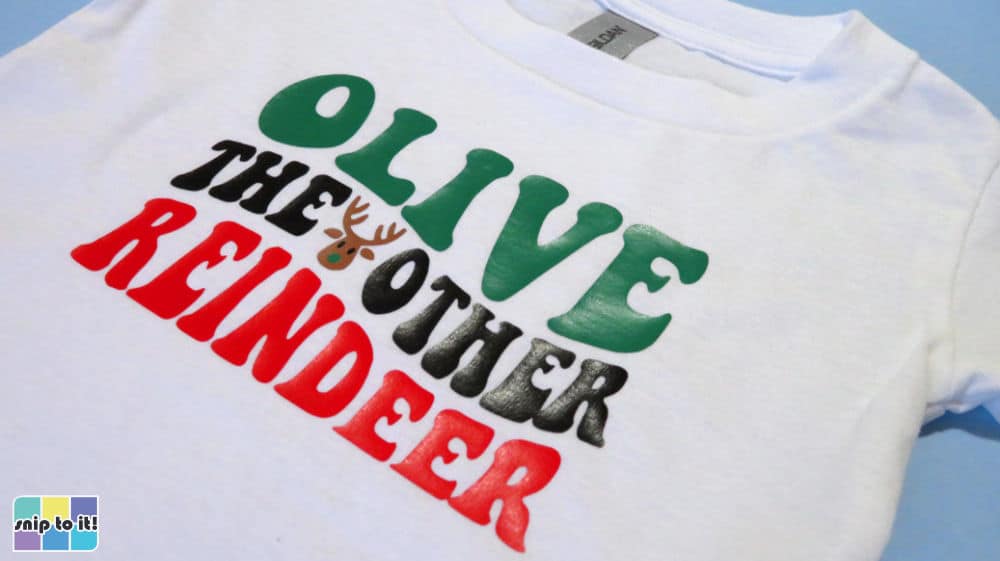
Olive the Other Reindeer:
For the toddler t-shirt, I switched to my 9×9″ press which fits perfectly between the seams of kids’ shirts. The design was placed 1.5″ from the neckline of the t-shirt.
I cut the carriers close enough to press all the text for this shirt together, starting with a short tack:
- 335oF, 2s press, hot peel of the carrier sheets
- once again, ignore the timer, I just count the seconds myself
Next, I added the reindeer face to my design; Siser EasyWeed in hazelnut:
- 335oF, 2s press, hot peel of the carrier sheet
- (yes, female reindeer have antlers, and only the females still have their antlers in December – this depiction of Olive is 100% accurate! ;P)
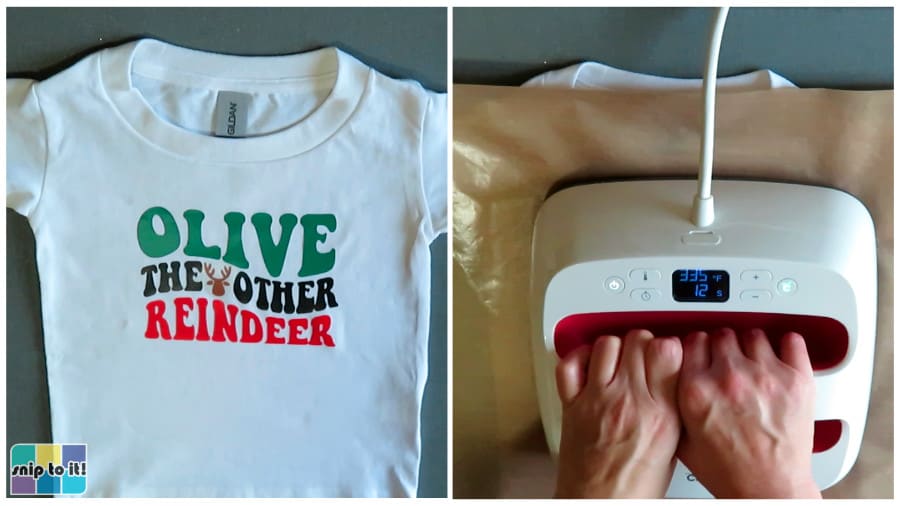
Finally, I added the eyes (black EasyWeed) and nose (green EasyWeed) for my reindeer and finished the shirt:
- 335oF, 12s press of the entire design
- hot peel of the carrier sheets
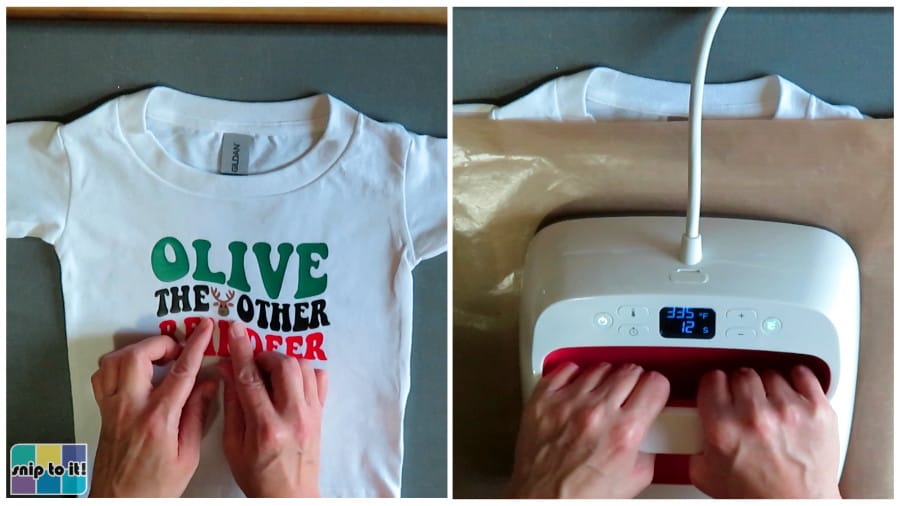
If you’re worried about marks from the last carrier sheets, you can also just give the eyes and nose a 2s tack, remove the carriers, and then give the entire design a final 12s press under teflon or parchment.
And now the shirts are complete!
Whether you make a wavy stacked text shirt for yourself or as a gift, I hope you enjoy these designs!
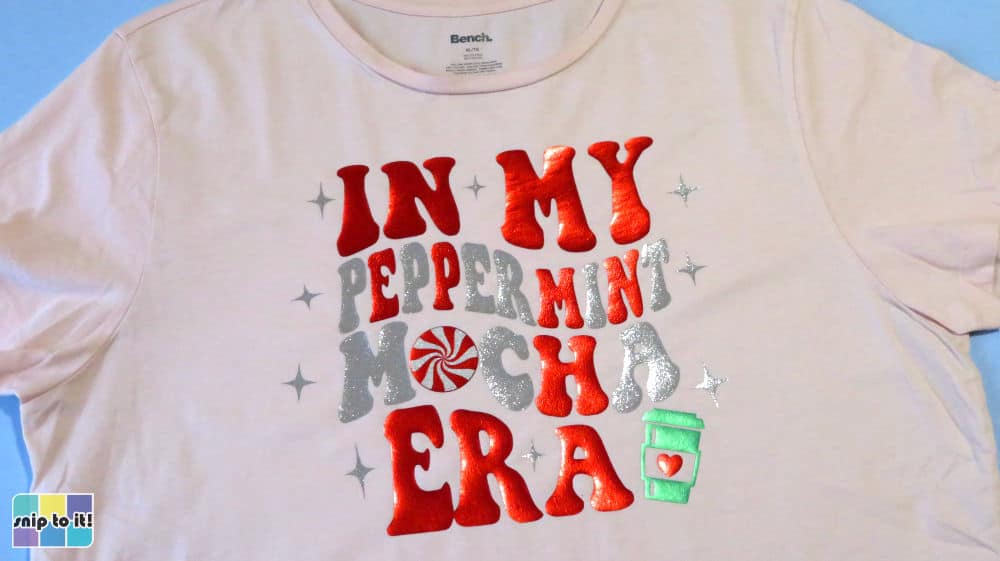
Check out how amazing the shine is on that EasyWeed Electric!
Even regular EasyWeed has a cool shine to it.
I’ll probably be making an “In my always freezing era” sweatshirt this January! I hope you like the SVGs and find it as easy as I did to make these fun shirts. Let me know what you think in the comments below!
Before you go, you might like our other holiday projects: